

 Home
Home 
Time to verify your compression tester! If it's correct I'm surprised that thing will start.
Do you have a leak down tester?
My 1952 Dodge M37 re-building process
Moderators: Cal_Gary, T. Highway, Monkey Man, robi


Re: My 1952 Dodge M37 re-building process
Haven't see it in the shop to be honest. I am returning when the radiator is arriving to test again and see.
Sebastian
(sorry, I only speak in METRIC)
(sorry, I only speak in METRIC)
Re: My 1952 Dodge M37 re-building process
Update on the engine:
We did a CO2 leak detection test and in a matter of seconds the reactive changed color
No need to also mention that it started making bubbles but, well,...the problem is there.
For sure we have pressure transmitted to the cooling system. This means A) the head gasket is bad; B) the head is nor properly aligned or C) there's a fissure in some cilindre. Hope there's no D.
I pray for option A, or B at least. I cannot imagine taking the engine out again and losing more time.
In other news I received the ETW-1 from Daytona Parts in Florida thanks to Midwest intervention. The thing looks like brand new. Astonishing.

Also made some instructions to the guys at the shop as they asked me about the support brackets for the oil bath as they didn't seem to figure out where to put them (interesting enough, it was hard to find pictures of this).

While we wait for the machine crew to come over and take a look at the engine's issue (...because guarantee), I've got a load of screws, bought 15 litres of vinegar and epoxi to start restoring this jerrycan. I even got the same year of the truck LOL.

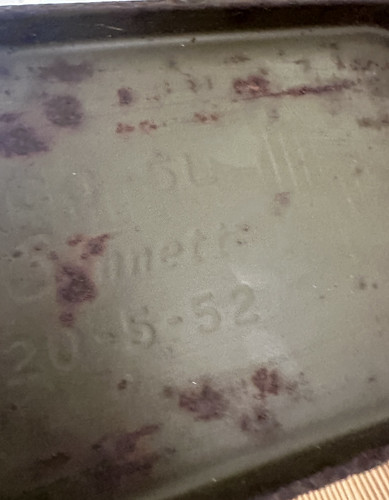
At least just to get me distracted in the meantime.
We did a CO2 leak detection test and in a matter of seconds the reactive changed color
No need to also mention that it started making bubbles but, well,...the problem is there.
For sure we have pressure transmitted to the cooling system. This means A) the head gasket is bad; B) the head is nor properly aligned or C) there's a fissure in some cilindre. Hope there's no D.
I pray for option A, or B at least. I cannot imagine taking the engine out again and losing more time.
In other news I received the ETW-1 from Daytona Parts in Florida thanks to Midwest intervention. The thing looks like brand new. Astonishing.
Also made some instructions to the guys at the shop as they asked me about the support brackets for the oil bath as they didn't seem to figure out where to put them (interesting enough, it was hard to find pictures of this).
While we wait for the machine crew to come over and take a look at the engine's issue (...because guarantee), I've got a load of screws, bought 15 litres of vinegar and epoxi to start restoring this jerrycan. I even got the same year of the truck LOL.
At least just to get me distracted in the meantime.
Sebastian
(sorry, I only speak in METRIC)
(sorry, I only speak in METRIC)

Re: My 1952 Dodge M37 re-building process
Nice updates, Sebastian!
Cal_Gary
1954 M37 W/W
MVPA Correspondent #28500
G741.org Forum member since 2004
1954 M37 W/W
MVPA Correspondent #28500
G741.org Forum member since 2004
Re: My 1952 Dodge M37 re-building process
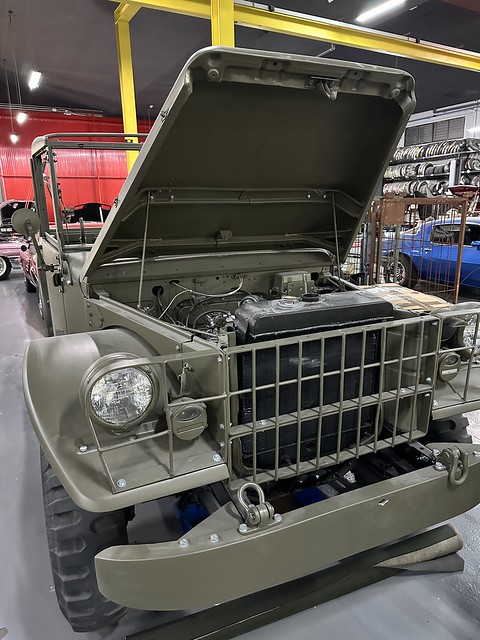
The fixing of the rad's upper chamber(*). Actually it's a new chamber.

We will need to cut the cover that acts as support for the hood.
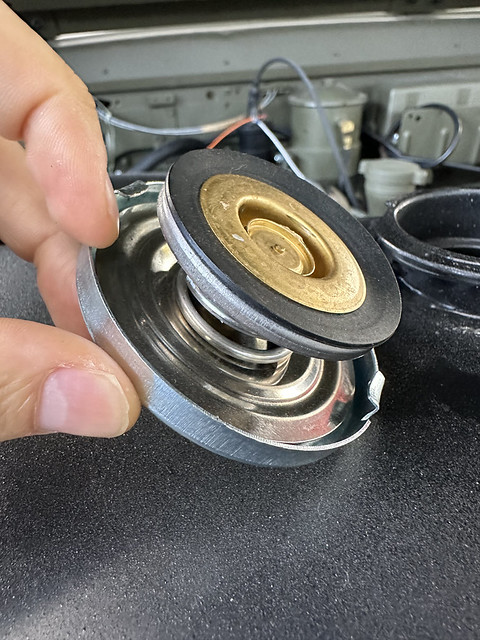
Just for information, the cap reads 10 Lbs. It was decided by the radiator shop. I currently don't have further info.
By applying a new chamber I got rid of the unusual elbow the inlet tube was holding. I mean, for some reason it wasn't original and was pointing up, making a weird curve for the water to get in. In this old picture (Oct 2021) can be noted.

Recalling this thread by Andy I took a picture of the cap to note that the upper seal rubber is not present.
On the other news, the machining crew took off the head and will work on it and see if there is a problem with the gasket they used. I will have news in about a week.
(*)I simply don't know how to call it.
We will need to cut the cover that acts as support for the hood.
Just for information, the cap reads 10 Lbs. It was decided by the radiator shop. I currently don't have further info.
By applying a new chamber I got rid of the unusual elbow the inlet tube was holding. I mean, for some reason it wasn't original and was pointing up, making a weird curve for the water to get in. In this old picture (Oct 2021) can be noted.
Recalling this thread by Andy I took a picture of the cap to note that the upper seal rubber is not present.
On the other news, the machining crew took off the head and will work on it and see if there is a problem with the gasket they used. I will have news in about a week.
(*)I simply don't know how to call it.
Sebastian
(sorry, I only speak in METRIC)
(sorry, I only speak in METRIC)

Re: My 1952 Dodge M37 re-building process
It is the upper tank.
DG
DG
Re: My 1952 Dodge M37 re-building process
Some update after months of complete hiatus.
New gaskets kit for the T-214. The important one is the head's but everything is useful.
As stated before, there is a chance there's a crack in one (or more) cylinders. But after removing the head when passing the finger on the it's surface, you can tell it is not straight. Very bad milling. You can see the traces of the ink that is used for checking during the process (sorry, no pic).
Well,...I cut all conversations with the shop. I ended up just paying for parts, not the job. The only good thing they did was the paint.

When checking the windshield for replacing the glass the inner frames cracked due to big corrosion. Note this part was not blasted and coated before. Not possible to be restored so new parts to look for.


Not the best news lately.
New gaskets kit for the T-214. The important one is the head's but everything is useful.
As stated before, there is a chance there's a crack in one (or more) cylinders. But after removing the head when passing the finger on the it's surface, you can tell it is not straight. Very bad milling. You can see the traces of the ink that is used for checking during the process (sorry, no pic).
Well,...I cut all conversations with the shop. I ended up just paying for parts, not the job. The only good thing they did was the paint.
When checking the windshield for replacing the glass the inner frames cracked due to big corrosion. Note this part was not blasted and coated before. Not possible to be restored so new parts to look for.
Not the best news lately.
Sebastian
(sorry, I only speak in METRIC)
(sorry, I only speak in METRIC)
Re: My 1952 Dodge M37 re-building process
Keep in mind your windshield frames are the same as what is on the M35 2.5 ton, M54 5-ton, and 800-series 5-ton.
Might be easier to find over there.
Just not the 900 series 5-ton.
Dennis
Might be easier to find over there.
Just not the 900 series 5-ton.
Dennis
Re: My 1952 Dodge M37 re-building process
Indeed Dennis, I have already reached out to people in the US for this. As usual, the complications raise at the time of shipping. 
Sebastian
(sorry, I only speak in METRIC)
(sorry, I only speak in METRIC)
Re: My 1952 Dodge M37 re-building process
Hi everyone.
It is been long. Well, the thing is that 2024 is kicking hard in my economy, and had to put the M37 on complete hiatus in February. This, of course, started raising issues with the shop because they wanted to move forward and had no money to drop. Nada.
So I pay the last bill (....after long), and changing the place.
New shop, new crew, new ways of dealing with this process and hoping to reduce costs. I will update in a few weeks when (re)starting.
Sebastian
(sorry, I only speak in METRIC)
(sorry, I only speak in METRIC)
Re: My 1952 Dodge M37 re-building process
Keep the faith, the time & funding will become yours in the future.
The old Dodge won't mind, it already knows you love it.
PoW
The old Dodge won't mind, it already knows you love it.
PoW
Re: My 1952 Dodge M37 re-building process
Hang in there Sebastian-we're here to support you!
Gary
Gary
Cal_Gary
1954 M37 W/W
MVPA Correspondent #28500
G741.org Forum member since 2004
1954 M37 W/W
MVPA Correspondent #28500
G741.org Forum member since 2004
Re: My 1952 Dodge M37 re-building process
Hello all. Back after long time.
After leaving the shop In June last year, I put everything on hiatus for the summer to save some money and maybe trying to give it a fresh start in October. And because the new guys were fully busy with other customers, this also helped my idea.
I will recall in this post events that happened early last year.
Since the problem with the pressure started, all efforts were focused on this issue. So everything was paused: brakes, electrical, carb...; just because of saving money for the worst-case scenario: engine swap.
The problem I suffer in Spain, at least where I live, is that everything takes time. I cannot control this. Blame vendors, shipping, mechanical work. Name it, but things move in a different rhythm.
Anyways, the head got on the mill again. Both surfaces, underside and top.
Below one can see that between cylinders #4 and #5, and #5 and #6 there is a dark trace. Same happens around the holes for the water. Of course this was now seen after the removal of the head.


After a good cleaning and applying aviation sealant the head got installed, screws adjusted following the TM and the test started.
Now, another thing happened. After running for about a minute, the radiator's inlet tube never got swollen, something that, before the milling of the head, was happening seconds after starting. This was good, but when applying the thermometer we could read 80ºC on the head and 30ºC in the outlet tube. The rad was also cold in the lower part, actually never getting any heat.
The first runs were done with no cap on the rad, so to get rid of air. I could see no turbulence when checking the filling hole so we started to think for a possible blocking. This could not be as the radiator was rebuilt and tested for pressure. So removing the water pump and inserting a water hose in the block to see the passage was the way to go; and no problem here too.
The pump had no problems. Rotated flawlessly. I don't have pictures but its inside looked good.
Now a question: what is this hole for? The pump's cover got an imprint of it and I've seen it in videos of other guys having the same marking.
Again, I don't have pictures of mine. Any idea?

The hole connects to this small orifice in the back cover of the pump. Behind where the propeller sits.
I would say it's for allowing some return to the intake current. But the hole on the block is way too big in comparison.

Anyways, one of the guys decided to drill and make the hole bigger (not too much). And it worked, the temperature got more or less in the range between hot and cold.
All this milling and testing back and forth took like a month, so when I was thinking about new steps some customers of mine decided to cut contracts. It hit me hard, the shop started getting loads of new work and the Dodge and my pace were a problem for them. We decided to stop working around April.
I'll be updating about new stuff happened since beginning of the year. See ya.
After leaving the shop In June last year, I put everything on hiatus for the summer to save some money and maybe trying to give it a fresh start in October. And because the new guys were fully busy with other customers, this also helped my idea.
I will recall in this post events that happened early last year.
Since the problem with the pressure started, all efforts were focused on this issue. So everything was paused: brakes, electrical, carb...; just because of saving money for the worst-case scenario: engine swap.
The problem I suffer in Spain, at least where I live, is that everything takes time. I cannot control this. Blame vendors, shipping, mechanical work. Name it, but things move in a different rhythm.
Anyways, the head got on the mill again. Both surfaces, underside and top.
Below one can see that between cylinders #4 and #5, and #5 and #6 there is a dark trace. Same happens around the holes for the water. Of course this was now seen after the removal of the head.
After a good cleaning and applying aviation sealant the head got installed, screws adjusted following the TM and the test started.
Now, another thing happened. After running for about a minute, the radiator's inlet tube never got swollen, something that, before the milling of the head, was happening seconds after starting. This was good, but when applying the thermometer we could read 80ºC on the head and 30ºC in the outlet tube. The rad was also cold in the lower part, actually never getting any heat.
The first runs were done with no cap on the rad, so to get rid of air. I could see no turbulence when checking the filling hole so we started to think for a possible blocking. This could not be as the radiator was rebuilt and tested for pressure. So removing the water pump and inserting a water hose in the block to see the passage was the way to go; and no problem here too.
The pump had no problems. Rotated flawlessly. I don't have pictures but its inside looked good.
Now a question: what is this hole for? The pump's cover got an imprint of it and I've seen it in videos of other guys having the same marking.
Again, I don't have pictures of mine. Any idea?
The hole connects to this small orifice in the back cover of the pump. Behind where the propeller sits.
I would say it's for allowing some return to the intake current. But the hole on the block is way too big in comparison.
Anyways, one of the guys decided to drill and make the hole bigger (not too much). And it worked, the temperature got more or less in the range between hot and cold.
All this milling and testing back and forth took like a month, so when I was thinking about new steps some customers of mine decided to cut contracts. It hit me hard, the shop started getting loads of new work and the Dodge and my pace were a problem for them. We decided to stop working around April.
I'll be updating about new stuff happened since beginning of the year. See ya.
Sebastian
(sorry, I only speak in METRIC)
(sorry, I only speak in METRIC)
Re: My 1952 Dodge M37 re-building process
Back in December 2024 I started checking for missing stuff and/or pieces that should be replaced.
For example the windshield inner frames were unable to be restored due to corrosion (see post from Jan 27th, 2024). I checked with VPW and Midwest mainly because they have a metal shop. I left this pending for long due to budget.
The ones below come from Midwest.


One of the problems when you dismantle a machine is that you end up with so many pieces all over the place is hard to control their destiny. In the previous shop I was unfortunate enough to lose sight of:

MIA....
While having some spare time decided to rescue stuff from the scrapping, like the Douglas connectors...


After organising and drawing a plan, work resumed in January this year.
But before that, some assorted pics from 2024:

April's situation.

I admit the seats got a superb refurbishment.

Parts ready for pickup in June. Some never made it, it was pure scrap.

More parts.

Waiting.
For example the windshield inner frames were unable to be restored due to corrosion (see post from Jan 27th, 2024). I checked with VPW and Midwest mainly because they have a metal shop. I left this pending for long due to budget.
The ones below come from Midwest.
One of the problems when you dismantle a machine is that you end up with so many pieces all over the place is hard to control their destiny. In the previous shop I was unfortunate enough to lose sight of:
- air-filter/cleaner arm + cleaner adaptor
- fording shut-off valve
- hoses of different caliber/shape still usable
- original nuts of all sizes and shapes
- bellcrank pivot stud + throttle joint + hand throttle bellcrank
MIA....
While having some spare time decided to rescue stuff from the scrapping, like the Douglas connectors...
After organising and drawing a plan, work resumed in January this year.
But before that, some assorted pics from 2024:
April's situation.
I admit the seats got a superb refurbishment.
Parts ready for pickup in June. Some never made it, it was pure scrap.
More parts.
Waiting.
Sebastian
(sorry, I only speak in METRIC)
(sorry, I only speak in METRIC)