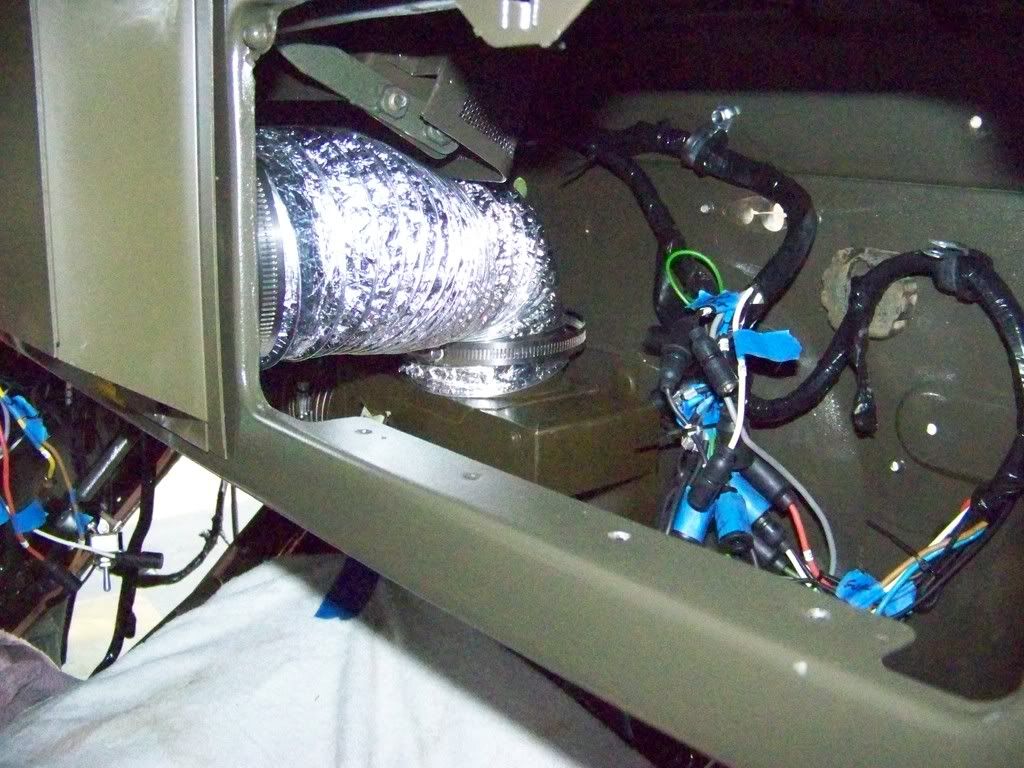
Started installing the MWM heater and wiring into the cab. Decided to use new rubber coated strap hangers up underneath to hold the harness. We kept out blue tape labels on to make it easier to keep track - all wires are also numbered.
We cheated on the heater ducting, the NOS tube from the divertor to the defroster was way too rigid to make the bend and clear the pop up vent and wires (sorry JB).
Cal_Gary wrote:Lookin' good! I'm still getting the Painless wiring harness installed in mine, and will post some pix once completed.
Gary
I thought the standard military wiring harness was painless... 23 to 23, 16 to 16...It's the original plug and play....lol.
Actually all kidding aside...why did you choose to use a commercial wiring harness over the original military? I'm interested in why you decided to go that way. Was it price? Availability? Accessories? I'm just wondering.
We actually purchased from Sid all the pieces and here's the rundown:
1. Forward harness left side - stock except we added a wire to the light switch to activate turn signals. We unwrapped the left spilt to add in a ground wire to the left front lights and re-routed the brake switch wiring to run along the dimmer switch run versus having the brake switch wire run across the cab, connect to the rear harness and then run across the rear cross member. This eliminated a few connections and kept the harness routing within that harness versus jumping across. We changed from douglas to packards to accept a new horn, temp, oil, and all new gauges in the dash. While we had the harness split open, we added in the extra wires for the ign key, heater(nos), elect wipers, rear cargo lamp, and rear b/u lamps.
2. Turn Signal - we added the H1 lever and relay box mounted to glove box with a spec harness from Vintage. We added a dedicated ground wire up the column.
3. Forward harness right side-we pulled 2 of the spilt connections running to the rear back into the cab and added a dedicated ground wire. This eliminated 2 splits out in the weather and under the dash.
4. Front lights - we kept the douglas connections on the splash panels and connected the dedicated ground to a common post so the lamp pigtails are all stock and visible. We actually have new b/o with packards but they are hidden under the closeouts/fenders. Headlamps/b/o drive are stock.
5. Rear harness - we wanted to use the larger 4 wire H1 stoplamps for visibility and rear b/u lamps. We also had a packard fuel gauge and had eliminated the brake switch run. Instead of chopping up a perfectly good harness, we made our own with 450ft 14g wire and shrink wrap. Instead of all the rear splits we pulled dedicated wires for left right and put all the connections under the dash. We eliminated several spilts and kept all the connections under the dash and the shrink wrap is one long tube with no joints.
We were careful in our use of female packards because you can slip them off and reinstall them to douglas - the male packards don't. This way we could always convert back to NOS lamps with no problems. This is going to be Zac's driver so we error towards reliability.
Hi K8,
Several factors influenced my decision. One, my old (ugh) harness is nothing but a butchered pile of spaghetti, two, I priced the complete authentic complete new M37 harnesses from several vendors which were very high priced, so I decided to go with the Painless kit because (three) it cost about half of the authentic price, has every wire marked exactly where it needs to go, and has enough runs for every accessory should I ever decide to add any do-dads. Having said all of that, I DID get a new, authentic headlight switch harness because I wanted to retain the military look of my dashboard with the three-lever light switch. I'll graph the two harnesses together (yep I have my multimeter) and will also document the process because I've received inquires form a couple of forum members on how to do this install. I'm not doing a frame-off resto (apartment living, you know) so I have no concerns about using the modern wiring. Finally, I've already installed the fuse block and was pleased to find two existing holes on the firewall that matched perfectly-just needed to resize one hole.
Oh, and off-topic-I'm a life-long Browns fan, and I see you're from Cleveland!
Gary
Cal_Gary
1954 M37 W/W
MVPA Correspondent #28500
G741.org Forum member since 2004
Same here life long Browns fan...but then again I've lived in Cleveland for 46 years...
Thank you for your explination. I have wondered if a M35 wiring harness with the ignition circuts added in would work on the M37. They seem to go on epay from 20-50 bucks depending.
Monkeymissle, I'm staying with 12V-might need a jump from a civilian some time-not easy to find another 24v system in the General Public. The Painless kit I ordered is the GM non-keyed harness #10104. Since I don't plan on submerging I stayed away from the waterproof harness 10140 (and it's more expensive).
Knattrass, since my wife is from Mount Clemens, I know your dilema too. I'm happy to say I did attend a Tigers/Indians game in Tiger Stadium years ago since I see it is now being razed on the evening news-sad....
K8-I don't know about the M35 harness working for an M37. The wiring harness project is a first for me, so I'm following instructions and installing it one strand at a time.
Gary
Cal_Gary
1954 M37 W/W
MVPA Correspondent #28500
G741.org Forum member since 2004
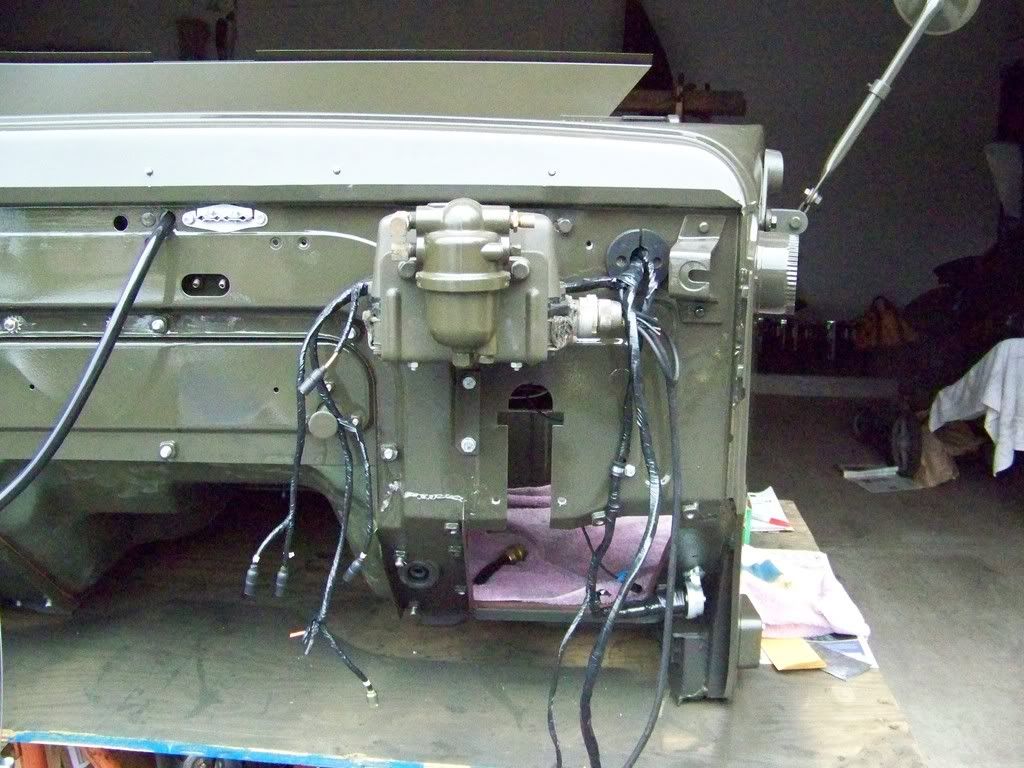
The official heater defroster is in - this thing is very dangerous if you ever bump into it... sharp corners everywhere. That's the price for being original.
Peter - this project is about my son not the truck. We got this to engage him in the "work to appreciate" lesson of life. He has done 80% of the work with the "coach" and you guys doing the rest. He has apprenticed with a sandblasting guy, learned body work/painting from a guy who has a spray booth in his backyard (true), overhauled and documented the wiring for a school assignment, stayed home from the movies, hanging out, etc......yes, this was going to be his daily driver, but I think he won't want to take it to school everyday. The second part of the project is to return to the community - driving the Vets in parades, visiting and demonstrating the truck to Vets at various "active" retirement homes, etc. You guys have been a big contributor to his project, and I am forever grateful for having jumped into this with him. All the best - Keith
Makes Good sense, Kieth. Thank you for sharing this . As a parent, I too have made efforts to direct my childs attention towards constructiveness. Now that she is 22, that effort has paid off. Regards, Peter
1952 M37 W/W
Veteran of 82 ABN. Division Motor Pool 1969


 Home
Home


