

 Home
Home 
Great progress and looking good Sturm! I continue to weigh discs versus John Bizal's new drums....
Gary
SC M37
Moderators: Cal_Gary, T. Highway, Monkey Man, robi
Re: SC M37
Cal_Gary
1954 M37 W/W
MVPA Correspondent #28500
1954 M37 W/W
MVPA Correspondent #28500
-
sturmtyger380

- SFC

- Posts: 573
- Joined: Sun Oct 21, 2007 5:13 pm
- Location: Up State SC
Re: SC M37
To John's question,
So I looked at the ARB Air locker. Without air pressure it's just like an open differential. Okay, I have to run the air lines from the kits to the front a rear axles and get a source of air pressure. I haven't decided if I will buy a 24 volt onboard air unit from ARB yet or just run a CO2 bottle. But the idea is when off road or in a poor traction situation you hit the ARB switches on the dash. Then the differentials lock up and turn both wheels together. So, I will have a front and rear switch. If I get to a hill where I know I need traction, line up for the hill and hit one or both switches and climb the hill. Once on top hit the switches and back to open diffs.
I thought about doing just the rear. And if the old front Diff was okay would have done that but the front was as rusty as the rear.
Since my differentials were in bad shape I looked at the options. I looked at the locker option which can cause resistance while turning on pavement. Normally not an issue as your tires might lose a little more rubber with a locker type. But our old axles don't need any more stress.IF I'm not causing too much drift from your build thread, I'm curious about what your experience has been with locking differentials. Rear only vs front & rear, brand, etc. I will be considering adding that when it comes time to do differential work on my truck. I don't do rock crawling or anything like that, but I do use it in my hilly woods.
So I looked at the ARB Air locker. Without air pressure it's just like an open differential. Okay, I have to run the air lines from the kits to the front a rear axles and get a source of air pressure. I haven't decided if I will buy a 24 volt onboard air unit from ARB yet or just run a CO2 bottle. But the idea is when off road or in a poor traction situation you hit the ARB switches on the dash. Then the differentials lock up and turn both wheels together. So, I will have a front and rear switch. If I get to a hill where I know I need traction, line up for the hill and hit one or both switches and climb the hill. Once on top hit the switches and back to open diffs.
I thought about doing just the rear. And if the old front Diff was okay would have done that but the front was as rusty as the rear.
47 CJ2A
53 M38A1
52 M37
51 M38
67 M416
?? M101A1
53 M38A1
52 M37
51 M38
67 M416
?? M101A1
Re: SC M37
Sturm, I thought about air lockers too, and while I've not committed to getting them you might consider doubling your pleasure and getting an air horn kit! That way you can also plumb your air lockers off that compressor. That's how I intend to do mine when the time comes, for what it might be worth to you.
Gary
Gary
Cal_Gary
1954 M37 W/W
MVPA Correspondent #28500
1954 M37 W/W
MVPA Correspondent #28500
-
sturmtyger380
- SFC
- Posts: 573
- Joined: Sun Oct 21, 2007 5:13 pm
- Location: Up State SC
Re: SC M37
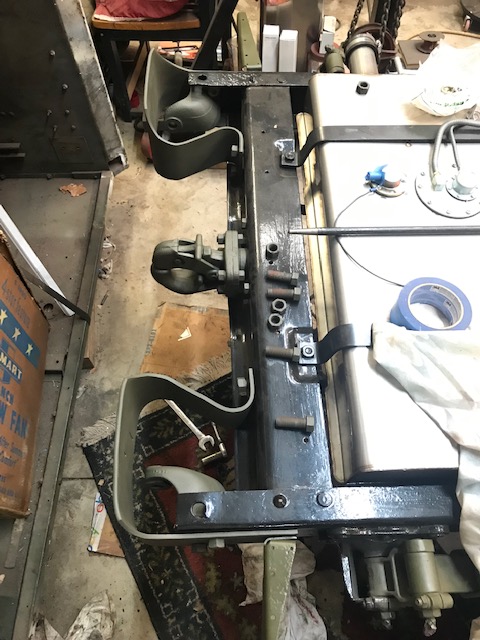
It’s been a long road since my last post. Years ago, I had picked up a nice M37 fuel tank that had been used by the Army slung under a generator trailer. I cleaned that tank and it had pin holes in the low hump part of the tank. Why they didn’t put some sort of drain there I don’t know. Where the drain is, is not the low part of the tank.
I bought the KBS fuel tank sealing kit and used that. The tank is sealed but I just don’t want to be at a show someplace and have the bugger start leaking again. I sprang for the VPW stainless tank.
The VPW tank is not just a plug and play item.
I had to re-bend my lower tank straps to fit the contour of the VPW tank. This meant the stock bolts were about 5 -6 inches from the frame mounting holes. I had to buy much longer mounting bolts.
It was a pain the rear to try and force the lower strap up to get the bolt to bite on the upper strap weld nuts. So, I gave up and cut the bolts and welded them together to make something that looks like a threaded rod with a shoulder in the middle. Then I put the straps on and measured the gap between the lower strap and the frame. I cut pieces of small pipe and slipped them over the threaded rod bolts and then welded those on the bolts.
With a spacer made from a small pipe I was able to tighten the lower straps up to hold the fuel tank securely in place.
Fuel Tank

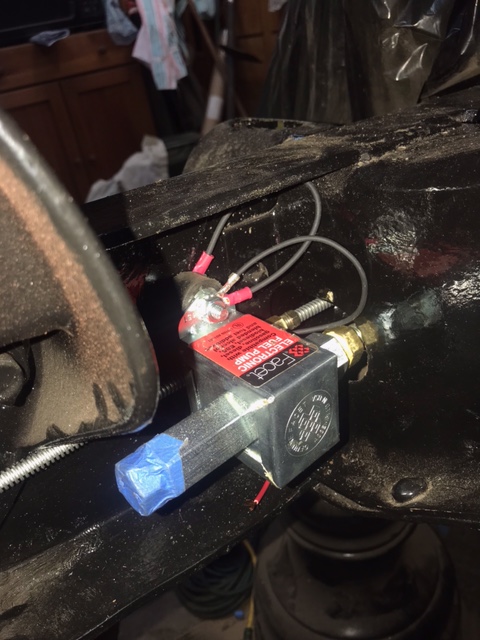
Next was installing the fuel lines and an electric pump. This was the first time I have ever received a part and was able to directly install it and be done on the same day. There is always some sort of fiddling that has to go on, but this pump went on nice.
Fuel Pump
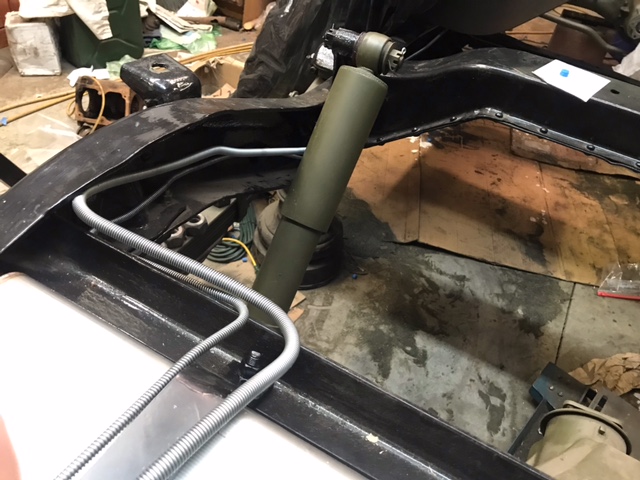
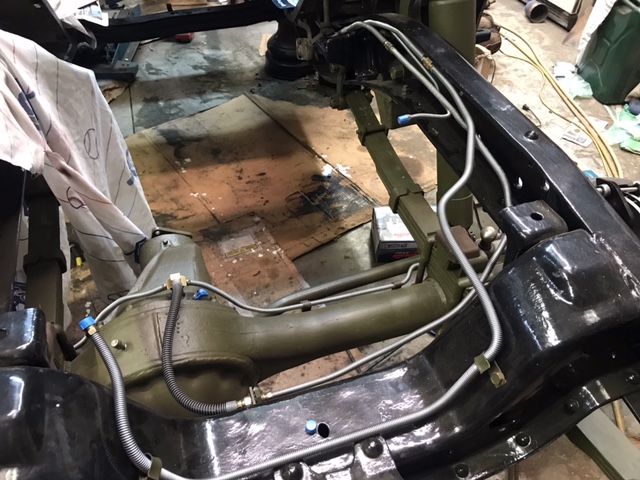
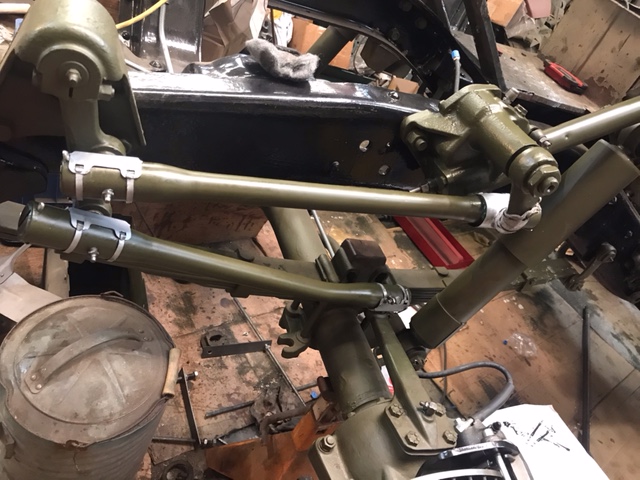
Next was to run all the lines. The vent and fuel lines are done. Since I am doing the dual Chevy master cylinder the break lines are in place but not connected under the cab. I have to figure a solution by measuring, bending, cutting and flaring some tubing to get that done.
Rear Lines
Font Lines
I bought the KBS fuel tank sealing kit and used that. The tank is sealed but I just don’t want to be at a show someplace and have the bugger start leaking again. I sprang for the VPW stainless tank.
The VPW tank is not just a plug and play item.
I had to re-bend my lower tank straps to fit the contour of the VPW tank. This meant the stock bolts were about 5 -6 inches from the frame mounting holes. I had to buy much longer mounting bolts.
It was a pain the rear to try and force the lower strap up to get the bolt to bite on the upper strap weld nuts. So, I gave up and cut the bolts and welded them together to make something that looks like a threaded rod with a shoulder in the middle. Then I put the straps on and measured the gap between the lower strap and the frame. I cut pieces of small pipe and slipped them over the threaded rod bolts and then welded those on the bolts.
With a spacer made from a small pipe I was able to tighten the lower straps up to hold the fuel tank securely in place.
Fuel Tank
Next was installing the fuel lines and an electric pump. This was the first time I have ever received a part and was able to directly install it and be done on the same day. There is always some sort of fiddling that has to go on, but this pump went on nice.
Fuel Pump
Next was to run all the lines. The vent and fuel lines are done. Since I am doing the dual Chevy master cylinder the break lines are in place but not connected under the cab. I have to figure a solution by measuring, bending, cutting and flaring some tubing to get that done.
Rear Lines
Font Lines
47 CJ2A
53 M38A1
52 M37
51 M38
67 M416
?? M101A1
53 M38A1
52 M37
51 M38
67 M416
?? M101A1


Re: SC M37
What Bob said, very clean install! Like the way you did the extension.
Bruce,
1953 M-37 w/ow
Retired Again
Keep Em Rollin'
VMVA
1953 M-37 w/ow
Retired Again
Keep Em Rollin'
VMVA

Re: SC M37
Don’t feel bad, installing a stock tank with new straps is a dog gone bugger.
M37
YEAR: 1954
YEAR: 1954
-
sturmtyger380
- SFC
- Posts: 573
- Joined: Sun Oct 21, 2007 5:13 pm
- Location: Up State SC
Re: SC M37
That's a good question. I looked on the VPW site and don't see a mention of the size. The stock one is 25 gallons.06boblee wrote:Looks great. How many gallons in the tank?
But I am thinking that this tank is a little more square than the stock one. It might hold a little more.
47 CJ2A
53 M38A1
52 M37
51 M38
67 M416
?? M101A1
53 M38A1
52 M37
51 M38
67 M416
?? M101A1
Re: SC M37
A big tank is reassuring when one is on the back roads, and when asking some gas station guy where non-ethanol gas is, and he replies, 8 miles in some other direction.
Hal
Hal
-
sturmtyger380
- SFC
- Posts: 573
- Joined: Sun Oct 21, 2007 5:13 pm
- Location: Up State SC
Re: SC M37
Now that the Steering Box rebuild is done for my truck back to other work.
Steering Box Rebuild: viewtopic.php?f=3&t=9432
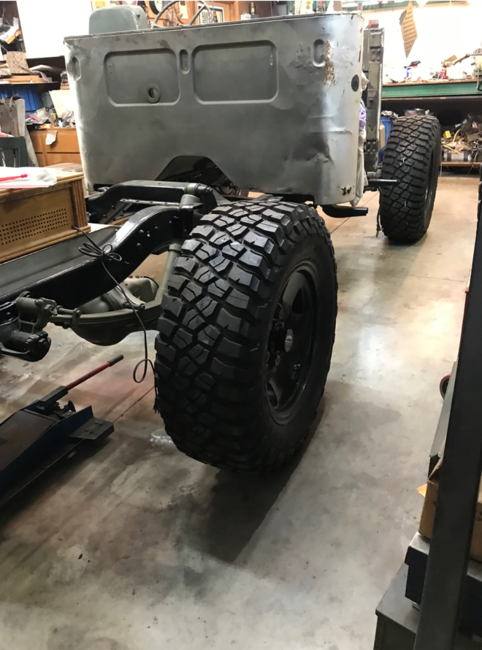
I just couldn't resist putting the rear bumpers on:
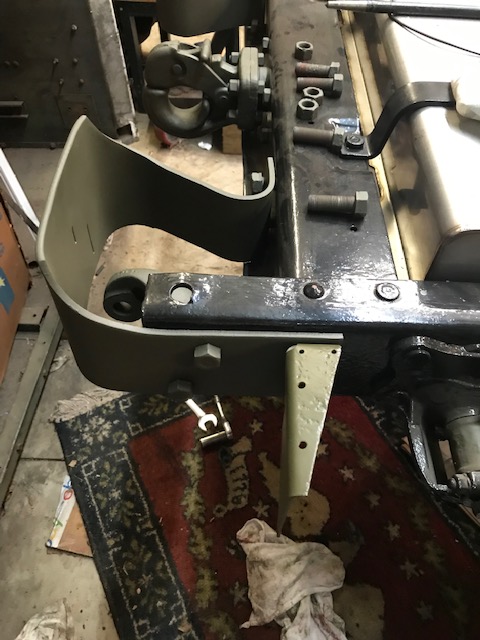
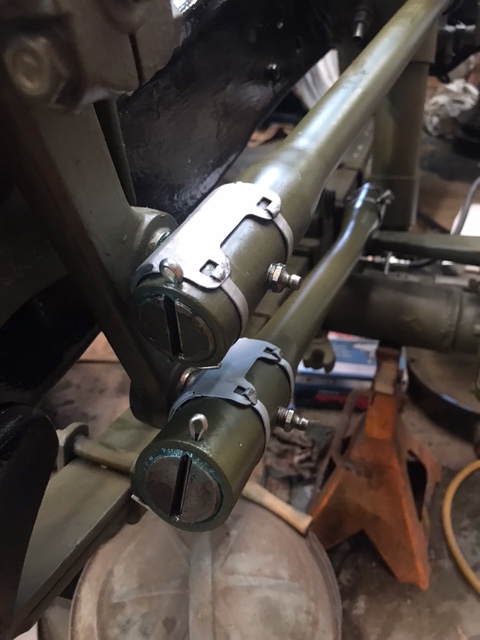
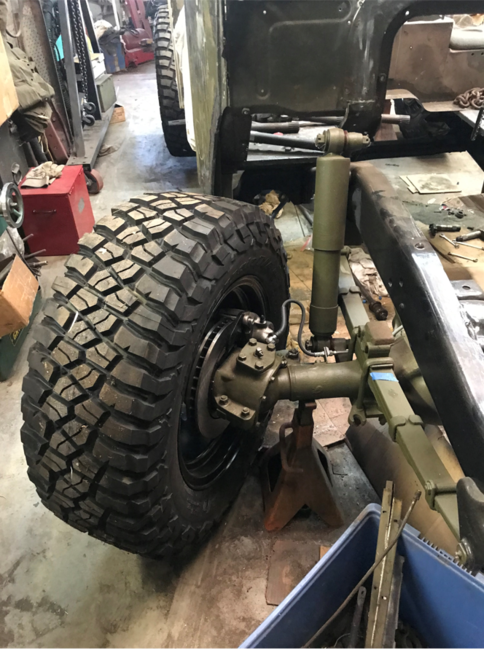
Now is the time to get the steering all hooked up so I can eventually get the wheels back on. Working on the steering linkage – don’t put the grease gun on and grease them until the dust covers are all the way on.

Steering linkage done:

Steering Box Rebuild: viewtopic.php?f=3&t=9432
I just couldn't resist putting the rear bumpers on:
Now is the time to get the steering all hooked up so I can eventually get the wheels back on. Working on the steering linkage – don’t put the grease gun on and grease them until the dust covers are all the way on.
Steering linkage done:
47 CJ2A
53 M38A1
52 M37
51 M38
67 M416
?? M101A1
53 M38A1
52 M37
51 M38
67 M416
?? M101A1
Re: SC M37
very nice. always fun installing NOS parts
-
sturmtyger380
- SFC
- Posts: 573
- Joined: Sun Oct 21, 2007 5:13 pm
- Location: Up State SC
Re: SC M37
Been busy as always. I also took a trip up to the Hagerstown Flea Market – (Used to be the Aberdeen show.) Then a side trip to southern Michigan to pick up a vintage valve seat tool. One of the valve compressors in the set had the date of 1913 on it. Wow!
When I went to get ready to bleed the master cylinder and brakes there were a series of things that had to be done. First the floor needed to be added to the drivers side as that is the stop for the brake and clutch pedals.
With the floor in place there was a problem that had to be fixed. The brake and clutch pedals were so sloppy that they would bang into the sides of the floor slots. This meant that the bushings / bearings that were in the assembly were shot, just like most other things on this truck.
So, I got to work taking the brake and clutch assembly off the truck. With that off I can clean and paint where the bracket was:
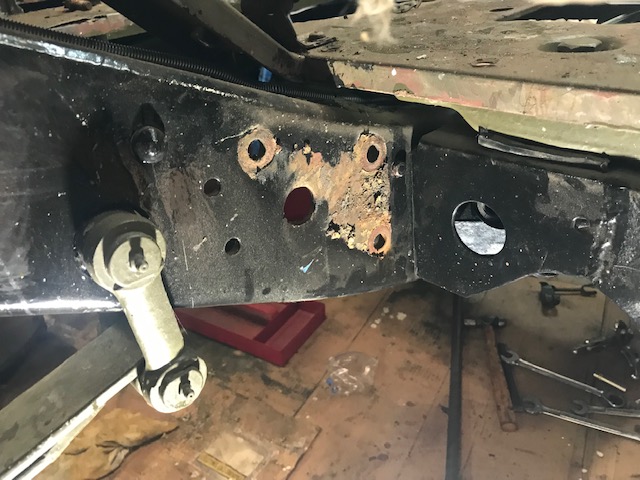
Now that the pedal assembly was off it was time to break it down into pieces.
Once apart, what the heck!! There was no bearing/bushing on the outside of the assembly! The metal pedal shaft was just loose in that hole. No wonder the pedals were flopping around.
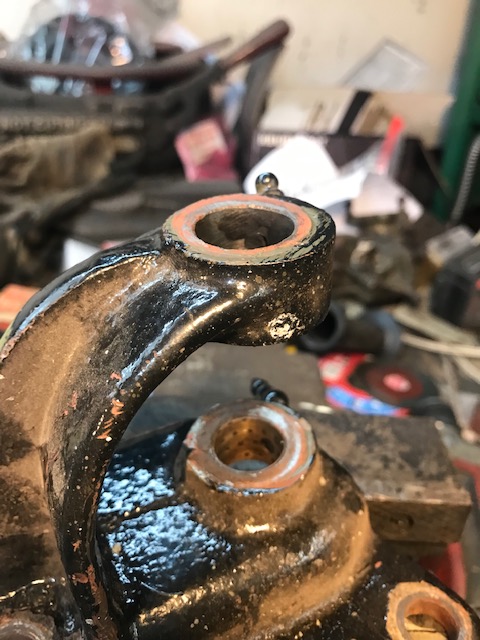
Now I had to find the old set of bearing bushings I had. I also ended up ordering a bushing/bearing that goes into the brake pedal too, so that would be fresh.
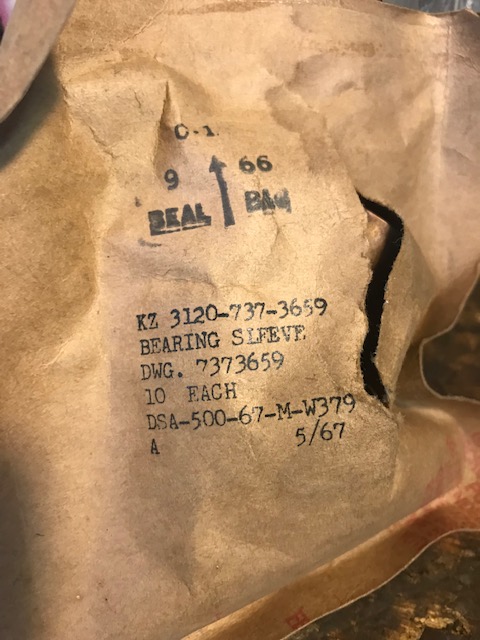
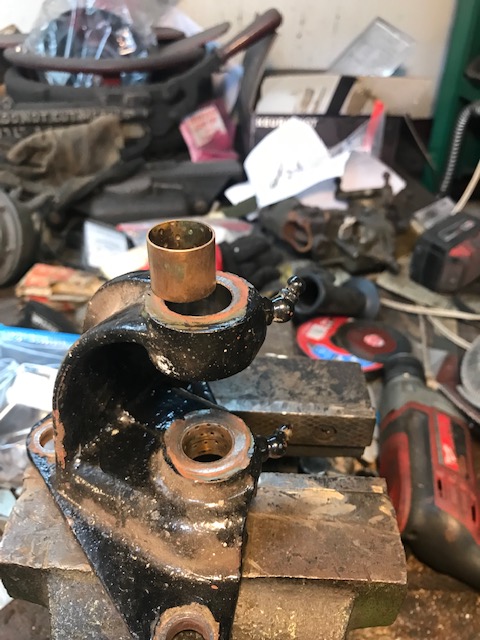
Here is one of the new bearing/bushing ready to push into the bracket.
Now the assembly is back on the truck and I can place the floor and go back to the brake work I wanted to finish. It’s always something on this truck.
When I went to get ready to bleed the master cylinder and brakes there were a series of things that had to be done. First the floor needed to be added to the drivers side as that is the stop for the brake and clutch pedals.
With the floor in place there was a problem that had to be fixed. The brake and clutch pedals were so sloppy that they would bang into the sides of the floor slots. This meant that the bushings / bearings that were in the assembly were shot, just like most other things on this truck.
So, I got to work taking the brake and clutch assembly off the truck. With that off I can clean and paint where the bracket was:
Now that the pedal assembly was off it was time to break it down into pieces.
Once apart, what the heck!! There was no bearing/bushing on the outside of the assembly! The metal pedal shaft was just loose in that hole. No wonder the pedals were flopping around.
Now I had to find the old set of bearing bushings I had. I also ended up ordering a bushing/bearing that goes into the brake pedal too, so that would be fresh.
Here is one of the new bearing/bushing ready to push into the bracket.
Now the assembly is back on the truck and I can place the floor and go back to the brake work I wanted to finish. It’s always something on this truck.
47 CJ2A
53 M38A1
52 M37
51 M38
67 M416
?? M101A1
53 M38A1
52 M37
51 M38
67 M416
?? M101A1
-
sturmtyger380
- SFC
- Posts: 573
- Joined: Sun Oct 21, 2007 5:13 pm
- Location: Up State SC
Re: SC M37
With the steering box done and the clutch bracket with new bushings the brakes now are working. It’s time to lower the truck off of the jack stands it has been on for two years.
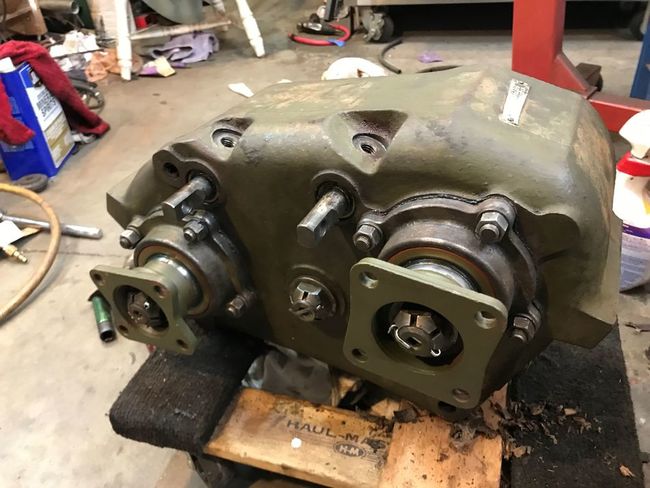
I opened the Transfer Case to inspect, and the insides look good. So, the input and front wheel drive seals have been replaced.
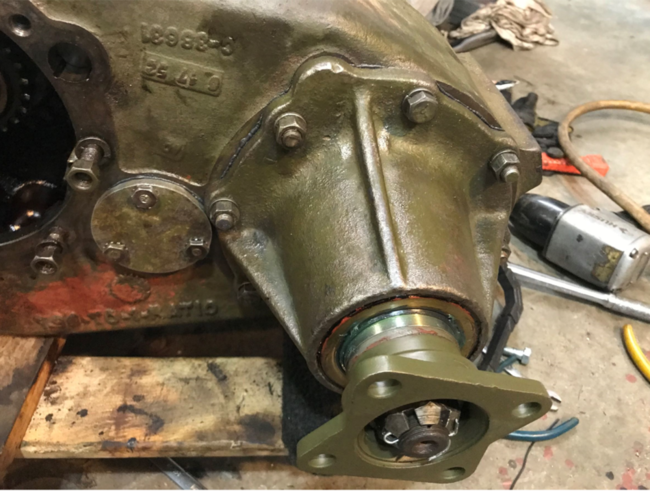
I had some issues getting the preload done on the rear output assembly, but it’s done now.
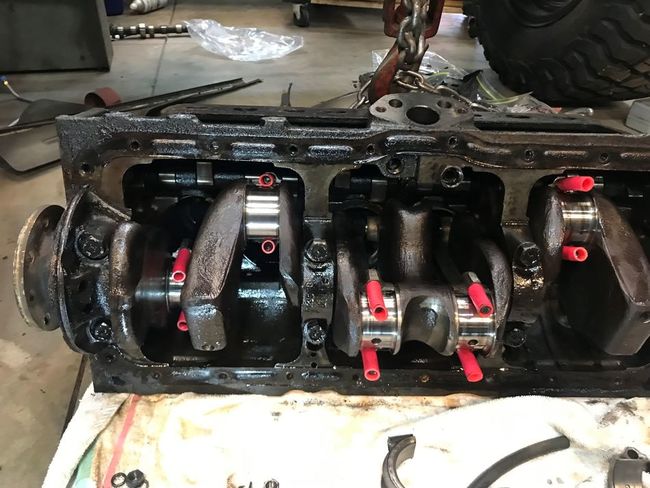
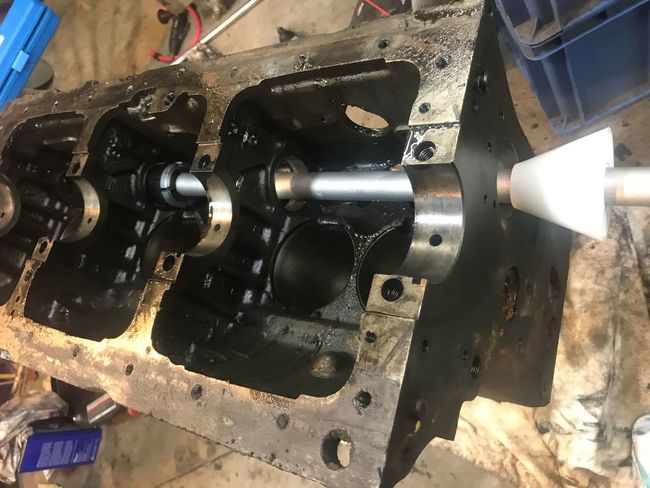
I started disassembling the engine to send to the machine shop. Here I am taking the pistons out.
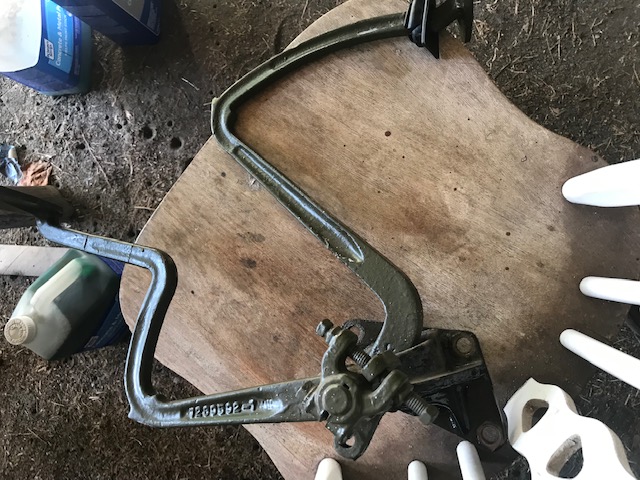
Removing the springs to get and the valve guides.

Valve guide removal tool.

Next was to drive the cam bearings out.
The engine is off to the machine shop and the T Case is almost done. Once that is mounted back in then I will start working on the drive shafts. It nice making progress.
I opened the Transfer Case to inspect, and the insides look good. So, the input and front wheel drive seals have been replaced.
I had some issues getting the preload done on the rear output assembly, but it’s done now.
I started disassembling the engine to send to the machine shop. Here I am taking the pistons out.
Removing the springs to get and the valve guides.
Valve guide removal tool.
Next was to drive the cam bearings out.
The engine is off to the machine shop and the T Case is almost done. Once that is mounted back in then I will start working on the drive shafts. It nice making progress.
47 CJ2A
53 M38A1
52 M37
51 M38
67 M416
?? M101A1
53 M38A1
52 M37
51 M38
67 M416
?? M101A1
Re: SC M37
rebuilding the pedal assembly is always worth it. they dont get greased enough usually. makes the truck feel new. the whole thing will be when your done!
