Home
Home Rebuild progress all in one thread
Moderators: Cal_Gary, T. Highway, Monkey Man, robi
Well, after more thinking, I've decided to scrap the blower... Well, not literally, just, on the Power Wagon. Reason being is, is that I would have to cook up a drive system for it, as the 400 is not serpentine belt, which is not going to be easy or cheap, and, that blower is used, very hard to find, and expensive (A new one from Mercury is 4K bucks!!!!). I would hate to put a ton of $$ into getting it on there, only to find I have a problem with it the first time it runs. So, I'll hang onto it for the mean time... Might use it on a future project where geting it on there is less labor intensive. Besides, the twin turbos will make more than enough power for what I plan on doing.
Got more work done... Sorry Lifer, as you can see, it's not going to be green...
My new toy...

Comp Cams timing set. Very nice peice for the $50

Finally, paint!


Mopar Performance fuel pump block off plate. Wont be needing the mechanical one... it doesnt move enough fuel for my goals...

The new covers:

Stainless, allen head bolts and washers:


Alternator cleaned up well... lets just hope it still works after its soapy water bath... lol

Got more work done... Sorry Lifer, as you can see, it's not going to be green...
My new toy...
Comp Cams timing set. Very nice peice for the $50
Finally, paint!
Mopar Performance fuel pump block off plate. Wont be needing the mechanical one... it doesnt move enough fuel for my goals...
The new covers:
Stainless, allen head bolts and washers:
Alternator cleaned up well... lets just hope it still works after its soapy water bath... lol


-
W_A_Watson_II

- SFC

- Posts: 627
- Joined: Sat Oct 20, 2007 7:02 am
- Location: MO
- Contact:
Will,
I like Unigraphics NX3, or 4, but, I have a copy of Solidworks 2004, so, thats what I use... It's kind fo quirky, especially when doing an assembly, but, the newer versions are much more pwoerful and run smoother.
Finally got the transmission and T case cleaned and painted. Need a new rear seal for the transfer case output, the one in there is toast. On a side note, this is the color I have in mind for the body... Dark, graphite grey metalic with black fenders. I'm going to go a bit darker then this is...
haven't had time to work on the truck, let alone an update until tonight. Work has me pretty busy... seems the demands keep piling up, but the pay ain't budging. I'm happy to have a job though.
The engine is officially resting in the frame tonight! I havent gotten my clutch yet, or run the turbo oil lines, so it will have to come back out, but, I am in the process of getting the mounts and such all set up so that I can begin disassembling the frame and cleaning and painting it.
drivetrain back together... I know, my garage is a mess...

getting it in the rough position:


the 1977 engine mount fits like a glove... I had to cut it in 1/2 to get it in the frame.


Brakes will definitely need some attentiion...

Initial position... Looks OK... measurements say very close to the same position as the 360, but, I think I can do better...


here is the biggest issue...

chains are slack!


notice how far back I had to move the mount to prevent the radiator from hitting the pulley...

everything will be at frame level, or above...

WAAAY too much space between the radiator and pulleys. I leave it like that it will hit the firewall...

Soooo, I lopped the bottom spout off...

and cut a few inches out of it. Notice now, that the end of the spout is in line with the water pump pulley. I can move the engine forward at least 2" now... giving me the firewall clearance I need.


The engine is officially resting in the frame tonight! I havent gotten my clutch yet, or run the turbo oil lines, so it will have to come back out, but, I am in the process of getting the mounts and such all set up so that I can begin disassembling the frame and cleaning and painting it.
drivetrain back together... I know, my garage is a mess...
getting it in the rough position:
the 1977 engine mount fits like a glove... I had to cut it in 1/2 to get it in the frame.
Brakes will definitely need some attentiion...
Initial position... Looks OK... measurements say very close to the same position as the 360, but, I think I can do better...
here is the biggest issue...
chains are slack!
notice how far back I had to move the mount to prevent the radiator from hitting the pulley...
everything will be at frame level, or above...
WAAAY too much space between the radiator and pulleys. I leave it like that it will hit the firewall...
Soooo, I lopped the bottom spout off...
and cut a few inches out of it. Notice now, that the end of the spout is in line with the water pump pulley. I can move the engine forward at least 2" now... giving me the firewall clearance I need.
more work done this morning. Things are looking relatively good... A few small issues, but no biggies, and I've gotten lucky with a few things as well:
Got the engine mount all welded up. Fish plated it on both sides where I cut it to give it some more strength, as well as welding it on both sides... I dont think its goin anywhere!

Line across the top is not the joint, its where the weld didnt grind down completely flat... I fixed it since this pic:

Not bad for a 110V machine on 1/4" steel:

My current issue:


My plan is to get some steel tube about 1" bigger in diameter then the filter, cut a slot in the cross member the size I need for the fiter to clear, and then weld in a section of the tube to fill in the hole, so the cross-member will be "scalloped" where the filter goes, giving me the clearance to put the filter on and take it off from the crossmember.
Got the fit with the radiator a littler better....


Some VERY good news... the stock 77 front prop shaft will bolt right in!!


Got the engine mount all welded up. Fish plated it on both sides where I cut it to give it some more strength, as well as welding it on both sides... I dont think its goin anywhere!
Line across the top is not the joint, its where the weld didnt grind down completely flat... I fixed it since this pic:
Not bad for a 110V machine on 1/4" steel:
My current issue:
My plan is to get some steel tube about 1" bigger in diameter then the filter, cut a slot in the cross member the size I need for the fiter to clear, and then weld in a section of the tube to fill in the hole, so the cross-member will be "scalloped" where the filter goes, giving me the clearance to put the filter on and take it off from the crossmember.
Got the fit with the radiator a littler better....
Some VERY good news... the stock 77 front prop shaft will bolt right in!!


Josh, I'm sure you are aware of the possible problems with a custom mix paint color. The problem can come about if a touch up is needed down the road. When I had my jag painted we added 1 gram of pearl per Qt. to the stock met. color. Came out great but even with the same 1 gram mix I didn't get a good match when the rear end got tapped. I now tend to go with a stock color as below. Your thought of dark Met gray and Black sounds good and on my 64 Ford I used 2002 Ford truck gray. JMHO

Wayne,
A VERY good point. I used to work at a body shop, so I know all about what a bear matching paint can be. The 2002 ford truck gray is actually one of the colors I had in mind, only a few years newer. My boss has an 05 3/4 ton diesel in gray that looks fantastic in the sun. It has the metal flake and perl in it like I like, so I was planning on getting the paint code off the door and seeing how much it runs a gallon.
A VERY good point. I used to work at a body shop, so I know all about what a bear matching paint can be. The 2002 ford truck gray is actually one of the colors I had in mind, only a few years newer. My boss has an 05 3/4 ton diesel in gray that looks fantastic in the sun. It has the metal flake and perl in it like I like, so I was planning on getting the paint code off the door and seeing how much it runs a gallon.

Josh,
I'm enjoying the heck out of your pics. You seem to be putting your education to good use. I sure do miss having cable internet, though. My daughter has DSL access, which is better than dial-up, but not up to what I'm used to!
Anyway, regarding the problem with your oil filter: can you get an adapter that will let you run a remote filter? If so, I'd think that would be preferable to altering the frame. (Just an idea, for whatever it''s worth.)
I'm enjoying the heck out of your pics. You seem to be putting your education to good use.
Anyway, regarding the problem with your oil filter: can you get an adapter that will let you run a remote filter? If so, I'd think that would be preferable to altering the frame. (Just an idea, for whatever it''s worth.)
"PER ARDUA AD ITER"
Lifer, thanks for the idea... It's a good one. Sadly,. there isnt even enough room to get a relo kit on there... I already looked into it! There is literally about 1/2" of clearance.
I got the cab down here from my parent's place, and, I was on the road all week, so, no progress untill this weekend...


I put the cab on yesterday and promptly ran into some issues:

Damn T case is hitting the floor in front of the seat box where the profile is less pronounced on the floorpan...
only way to fix that without cutting anything was to drop the tailshaft...

that, however is unacceptable for two reasons. For one, it violates my self issued rule that there cna be nothing hanging down from below the bottom of the frame, and, as you can see from the pic, there is about 4" of T case hanging down. The second problem is that the intake manifold was milled on on angle by Dodge so that the carb sits flat when teh engine is installed properly. With the T case down at that angle, there is about 5* of downward pitch according to my angle finder... not good for the carb.

So, I cringed, and pulled out the sawzall... Thank god I have the original rust filled cab to practice on before I bring the new rust free one down!


And, the results are it fits magnificently into the frame! only about 1/2" of hang down below the frame!


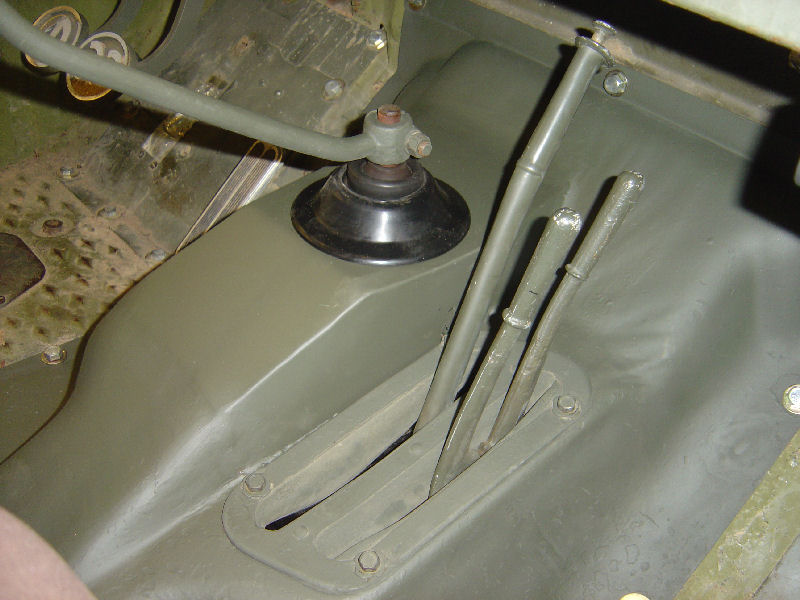
I decided the best way to fix the mess I have now created is to start at teh firewall and work my way backwards...


Hole isnt quite centered... need to dome some more work on it, but, its close...


And, the side profile, showing how when its done, it will look almost factory:


Now, I dont like cutting metal, but... I didnt see any way to get around it, and, I think it will turn out pretty good...
I got the cab down here from my parent's place, and, I was on the road all week, so, no progress untill this weekend...
I put the cab on yesterday and promptly ran into some issues:
Damn T case is hitting the floor in front of the seat box where the profile is less pronounced on the floorpan...
only way to fix that without cutting anything was to drop the tailshaft...
that, however is unacceptable for two reasons. For one, it violates my self issued rule that there cna be nothing hanging down from below the bottom of the frame, and, as you can see from the pic, there is about 4" of T case hanging down. The second problem is that the intake manifold was milled on on angle by Dodge so that the carb sits flat when teh engine is installed properly. With the T case down at that angle, there is about 5* of downward pitch according to my angle finder... not good for the carb.
So, I cringed, and pulled out the sawzall... Thank god I have the original rust filled cab to practice on before I bring the new rust free one down!
And, the results are it fits magnificently into the frame! only about 1/2" of hang down below the frame!
I decided the best way to fix the mess I have now created is to start at teh firewall and work my way backwards...
Hole isnt quite centered... need to dome some more work on it, but, its close...
And, the side profile, showing how when its done, it will look almost factory:
Now, I dont like cutting metal, but... I didnt see any way to get around it, and, I think it will turn out pretty good...
-
W_A_Watson_II
- SFC
- Posts: 627
- Joined: Sat Oct 20, 2007 7:02 am
- Location: MO
- Contact: