

 Home
Home 
I have had my truck for several years and since my son drove it to school a good bit this last year..... I am thinking it may be about time to at least check the valves to see what the clearance is. I have a completely stock engine and the only thing I know is that the valve covers are below the intake and exhaust manifolds but how in the crap are you supposed to get under there to do anything? I have the splash shield below and can remove it but still wondered if you can get into and see much from below? I don't want to reinvent the wheel and hope experience can save me some time and headache. I do remember someone saying the tolerances in the book are not necessarily correct for cold adjustment. Thanks for any guidance. Also should I go back with a cork gasket or do the liquid/tube type gasket?
Mark
First Attempt at adjusting the Valves
Moderators: Cal_Gary, T. Highway, Monkey Man, robi
First Attempt at adjusting the Valves
Mark Ellis
1953 M37 WOW
1967 M101A1
NRA Life Member
USMC Retired
1953 M37 WOW
1967 M101A1
NRA Life Member
USMC Retired

According to TM9-8030, the right-front tire, splash shield, etc. must be removed in order to gain access to the two panels. It also states the valve adjustment should be made with the vehicle running .010 Intake, .014 Exhaust.
Let me know how it goes-I need to do this as well, but am concerned about oil going everywhere using the prescribed guidance from the manual.
Gary
Let me know how it goes-I need to do this as well, but am concerned about oil going everywhere using the prescribed guidance from the manual.
Gary
Cal_Gary
1954 M37 W/W
MVPA Correspondent #28500
G741.org Forum member since 2004
1954 M37 W/W
MVPA Correspondent #28500
G741.org Forum member since 2004
Do it cold
Check the archives for Charles' cold valve specs. Jack her up remove the wheel the fender and the inner splash shield...also have to take of some PVC plumbing then it it is not to painful.
Paul f
-
MSeriesRebuild
- 1SG

- Posts: 2832
- Joined: Sat Oct 20, 2007 4:35 am
- Location: Norwood, NC
- Contact:
If you can't find cold set specs in the archives, let me know. There are several factors involved in getting a good set up. The book settings are too loose, they will rattle set that way unless you are setting a fully new component set up.
Charles Talbert
www.mseriesrebuild.com
www.mseriesrebuild.com
I think I found it
Is this it?
Charles Talbert’s Valve Adjustment Proceedure
If everything has been renewed & properly lapped into their seats with the tappet screws faced flat, .010" intake & .013" exhaust is a good COLD set up. The actual hot setting you need is .009" intake - .011" exhaust, the cold settings will tighten to the proper hot setting as the engine warms to normal temp due to heat expansion. These cold settings are also good for use in engines that have been run many miles & simply need a valve clearance adjustment when performing normal maintenance. If the tappet screws have not been faced flat, you will need to set up COLD at least .001" tighter on both intake & exhaust. The reason for this is it is normal for the face of the tappet screws to indent slightly, this is normal wear. When this happens a ridge around the outer edge of the screw face where the valve stem never hits becomes very evident. When adjustments are measured with a feeler gauge, it is on top of that ridge instead of where the valve stem actually contacts the screw face, thus the adjustment will be wider than the feeler gauge says because of the indent. In engines with a LOT of wear or indent in the screw surface, it may be necessary to bring the COLD adjustment as tight as .008" intake - 011" exhaust, but in most cases only .001" tighter will take care of it & produce a good running non-ticking set up. Remember these guidelines are for engines that are in good condition as far as the valve train is concerned. Ticking can also come from worn tappet bores in the block which allow the tappets to be pushed side ways slightly instead of straight up by the cam lobes. This condition will also produce a ticking noise that can be mistaken for loose valve clearance adjustment. If an engine has excessive wear in the tappet bores, the ticking noise will continue no matter what the adjustment. Also remember that a too tight adjustment can cause leaking valves & eventually burned valves. When your engine is started after adjustments are completed, it should be warmed up to normal operating temp. If all looks & sounds OK you should be set, go ahead with closing everything up. If you feel further fine adjustment is needed, let the engine COOL DOWN THOROUGHLY before readjusting, always remember you are working with COLD settings. If you feel you need further information, feel free to call the shop or e-mail us via the contact us link on our website. I will be glad to help you out.
Mark Ellis
1953 M37 WOW
1967 M101A1
NRA Life Member
USMC Retired
1953 M37 WOW
1967 M101A1
NRA Life Member
USMC Retired
Don't try it when the engine is running and hot!
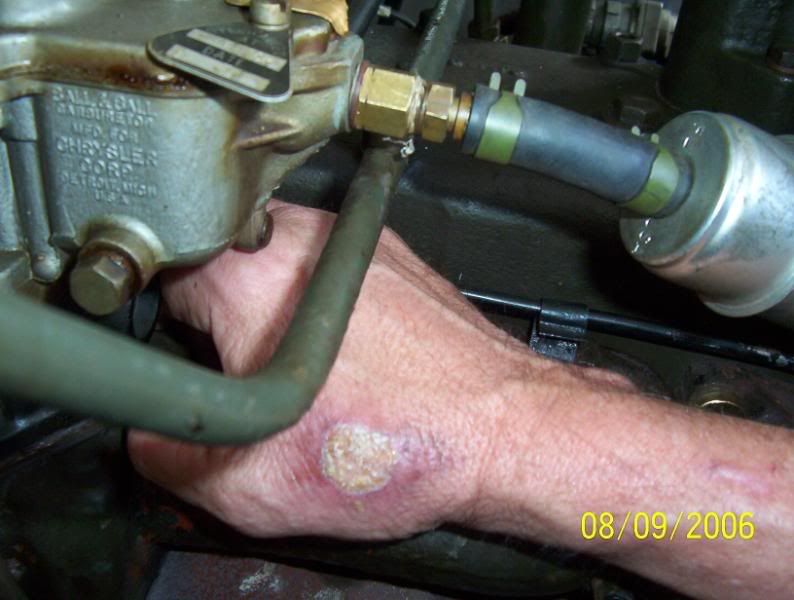
OUCH!
Carter
Life Member:
Delta, Peach Bottom Fish & Game Assn.
Life Member:
Delta, Peach Bottom Fish & Game Assn.
-
MSeriesRebuild
- 1SG
- Posts: 2832
- Joined: Sat Oct 20, 2007 4:35 am
- Location: Norwood, NC
- Contact:
Re: I think I found it
That's the one although it doesn't mention removing the right front tire & rim and the inner fender splash shield to gain much better access. Removing the PCV valve & metal vent tube makes it easier also. Good luck.topellis wrote:Is this it?
Charles Talbert’s Valve Adjustment Proceedure
If everything has been renewed & properly lapped into their seats with the tappet screws faced flat, .010" intake & .013" exhaust is a good COLD set up. The actual hot setting you need is .009" intake - .011" exhaust, the cold settings will tighten to the proper hot setting as the engine warms to normal temp due to heat expansion. These cold settings are also good for use in engines that have been run many miles & simply need a valve clearance adjustment when performing normal maintenance. If the tappet screws have not been faced flat, you will need to set up COLD at least .001" tighter on both intake & exhaust. The reason for this is it is normal for the face of the tappet screws to indent slightly, this is normal wear. When this happens a ridge around the outer edge of the screw face where the valve stem never hits becomes very evident. When adjustments are measured with a feeler gauge, it is on top of that ridge instead of where the valve stem actually contacts the screw face, thus the adjustment will be wider than the feeler gauge says because of the indent. In engines with a LOT of wear or indent in the screw surface, it may be necessary to bring the COLD adjustment as tight as .008" intake - 011" exhaust, but in most cases only .001" tighter will take care of it & produce a good running non-ticking set up. Remember these guidelines are for engines that are in good condition as far as the valve train is concerned. Ticking can also come from worn tappet bores in the block which allow the tappets to be pushed side ways slightly instead of straight up by the cam lobes. This condition will also produce a ticking noise that can be mistaken for loose valve clearance adjustment. If an engine has excessive wear in the tappet bores, the ticking noise will continue no matter what the adjustment. Also remember that a too tight adjustment can cause leaking valves & eventually burned valves. When your engine is started after adjustments are completed, it should be warmed up to normal operating temp. If all looks & sounds OK you should be set, go ahead with closing everything up. If you feel further fine adjustment is needed, let the engine COOL DOWN THOROUGHLY before readjusting, always remember you are working with COLD settings. If you feel you need further information, feel free to call the shop or e-mail us via the contact us link on our website. I will be glad to help you out.
Charles Talbert
www.mseriesrebuild.com
www.mseriesrebuild.com