

 Home
Home 
I usually have really good luck with RAPCO paints. The best 24087 enamel on the market.
Doing a set of 5-ton wheels in that 383 green looked good at first, but 6 months down the road they faded to powder. Reducer used was Xylene (recommended).
PoW
M37B3 Project
Moderators: Cal_Gary, T. Highway, Monkey Man, robi

Re: M37B3 Project
Finally getting back into the garage so I hope to post some pics soon. Nothing major just finishing up the front axle rebuild before moving onto the next thing on the very very long list. Stay toon
M37s are HMMWV in my world!
Re: M37B3 Project
Okay folks here's the latest.
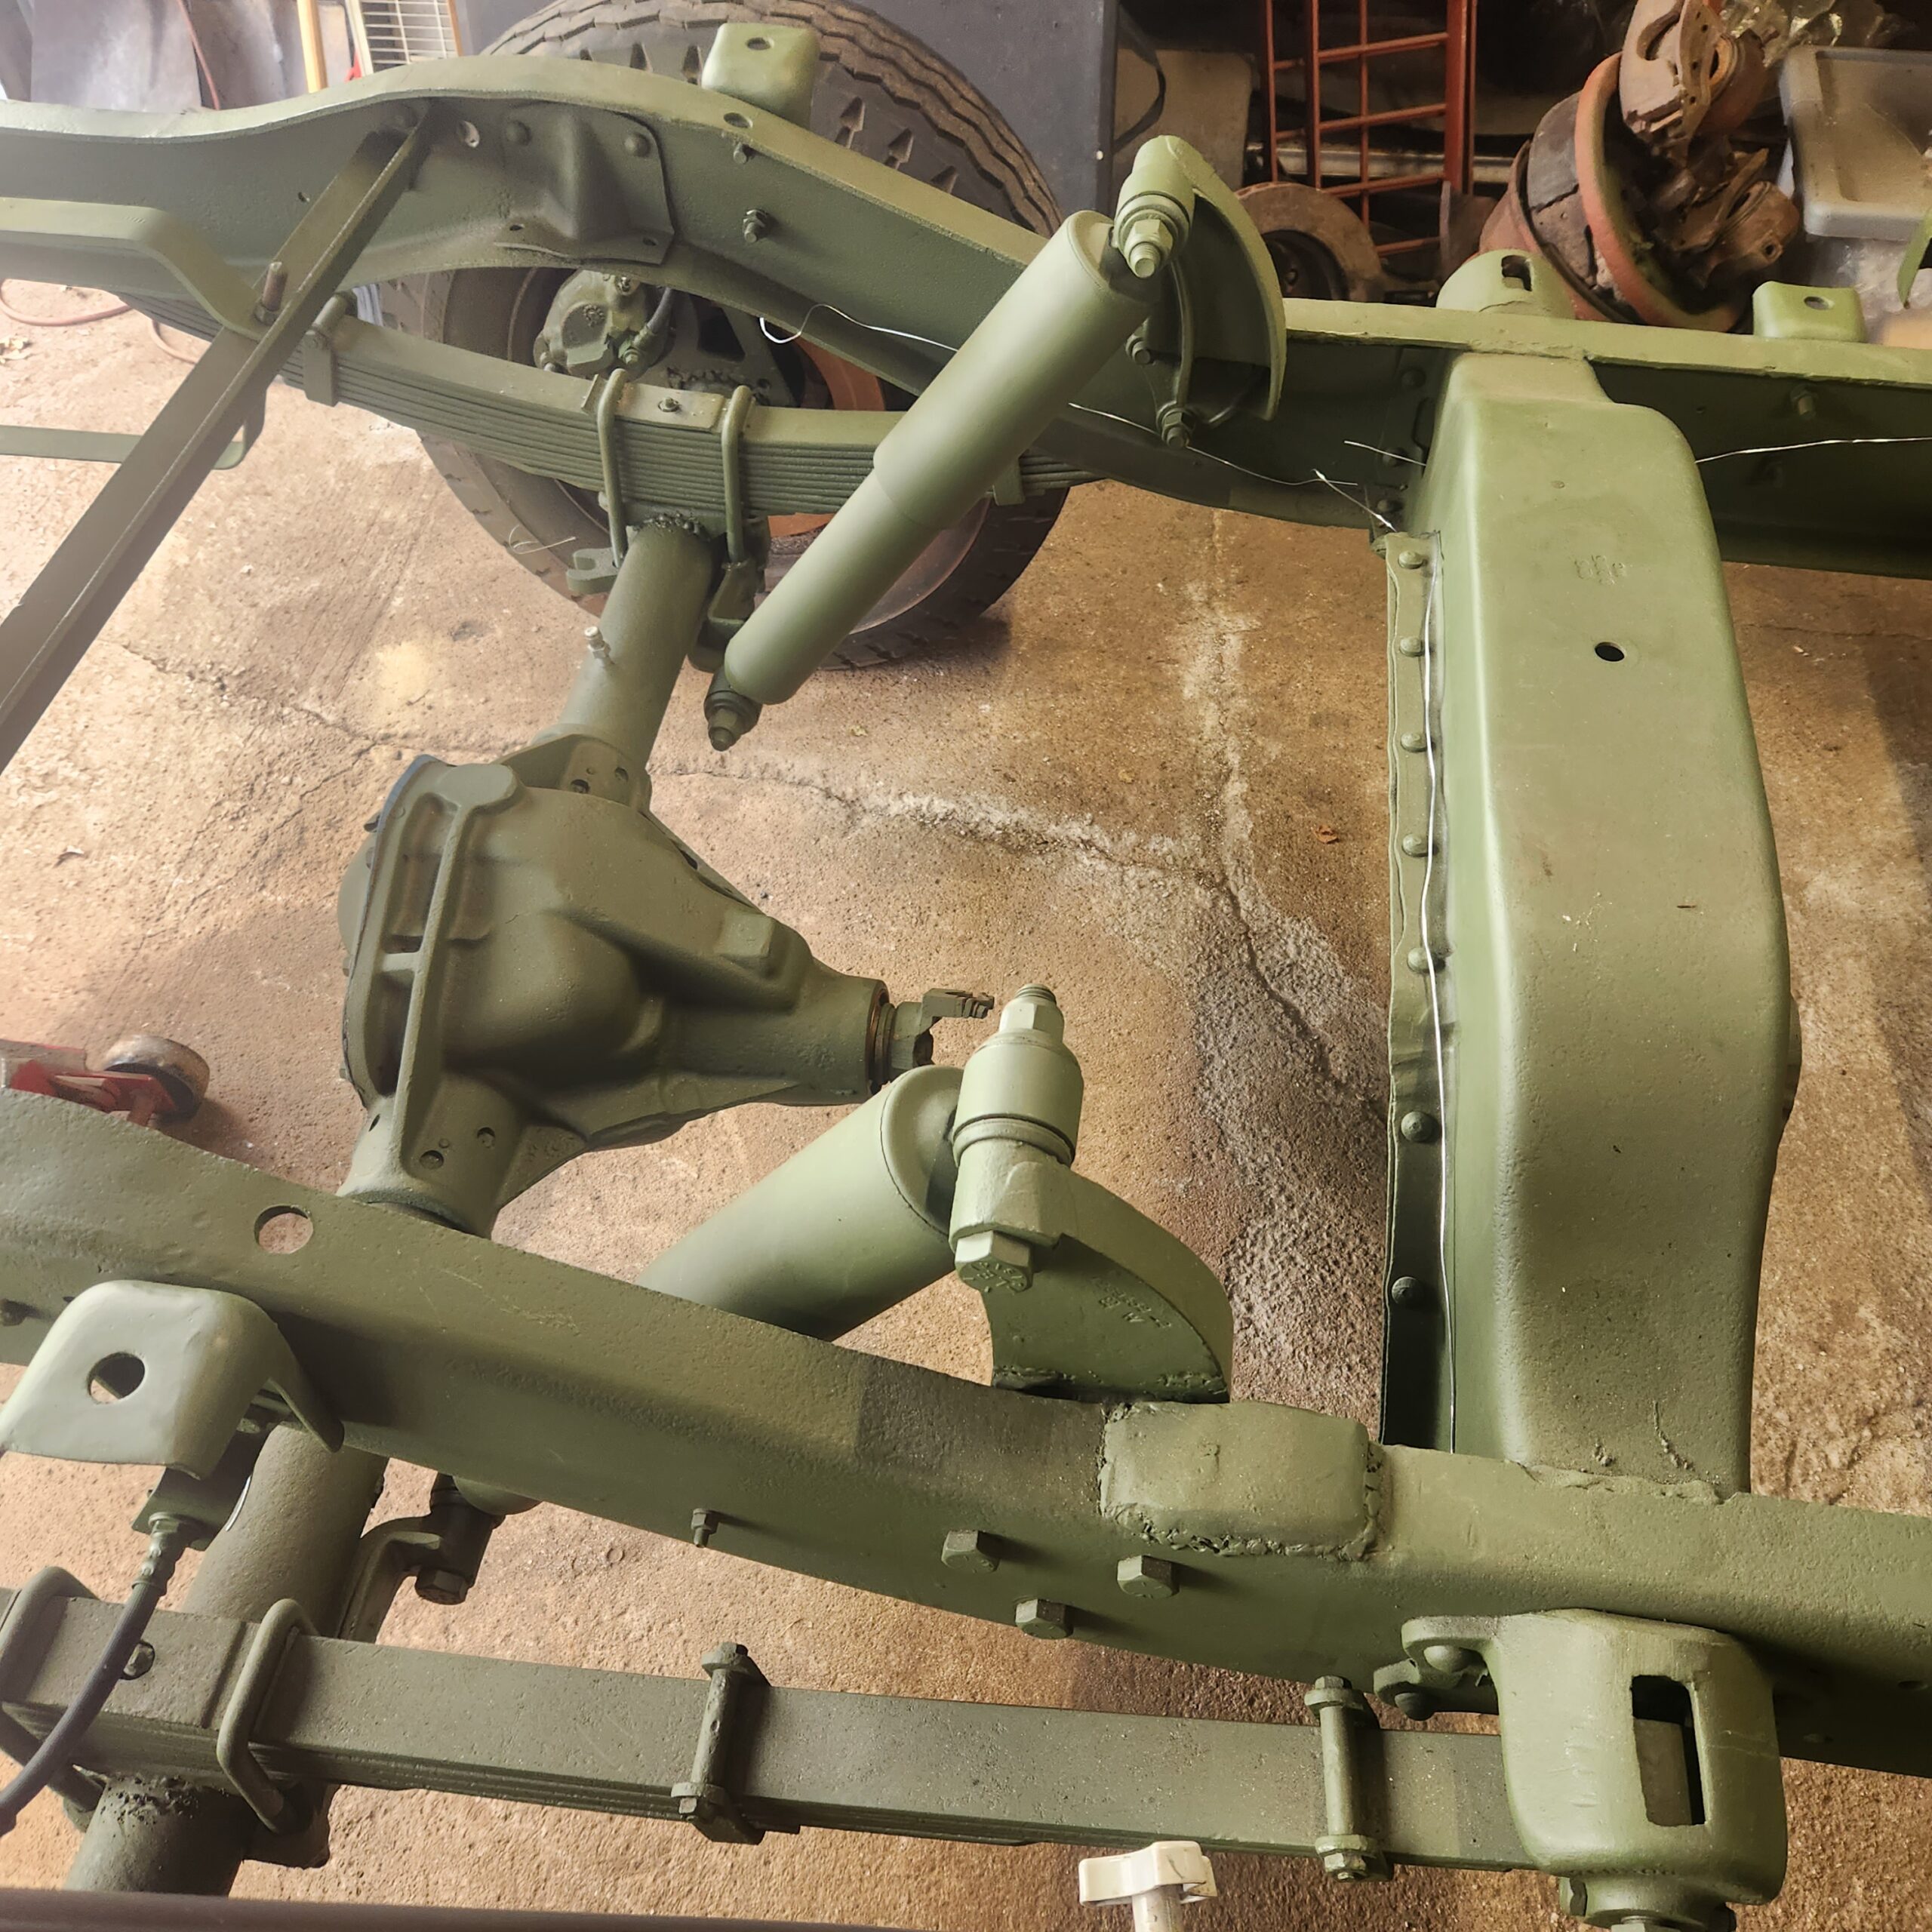
Finally have gotten some time to spend in the garage again. I wanted to get back to it sooner, but just one thing after another has kept me busy doing other things. So, last fall I had rebuilt the rear axle with new inner and outer bearings, new seals and did a rear disk break conversion as was mentioned previous. I had also started on the front axle and had gotten the drivers side done with new inner and outer bearings, new u-joint, new upper and lower ball joints, new rotor, new caliper and new pads. I also installed the new drag link. Winter hit and it sat till just this past two weeks where I rebuilt the passengers side again with new bearings, u-joint, seals, ball joints and brake components. I also got new seals and gaskets on the differential as well as rebuilt the tie rod with new ends. I've even set the toe-in to a rough mark. Once truck is completely built and driving I will have it aligned properly, but per the TM for an M880 which the axles are out of the toe-in is +- 1/8 inch. Here are some pics for you.
Passenger side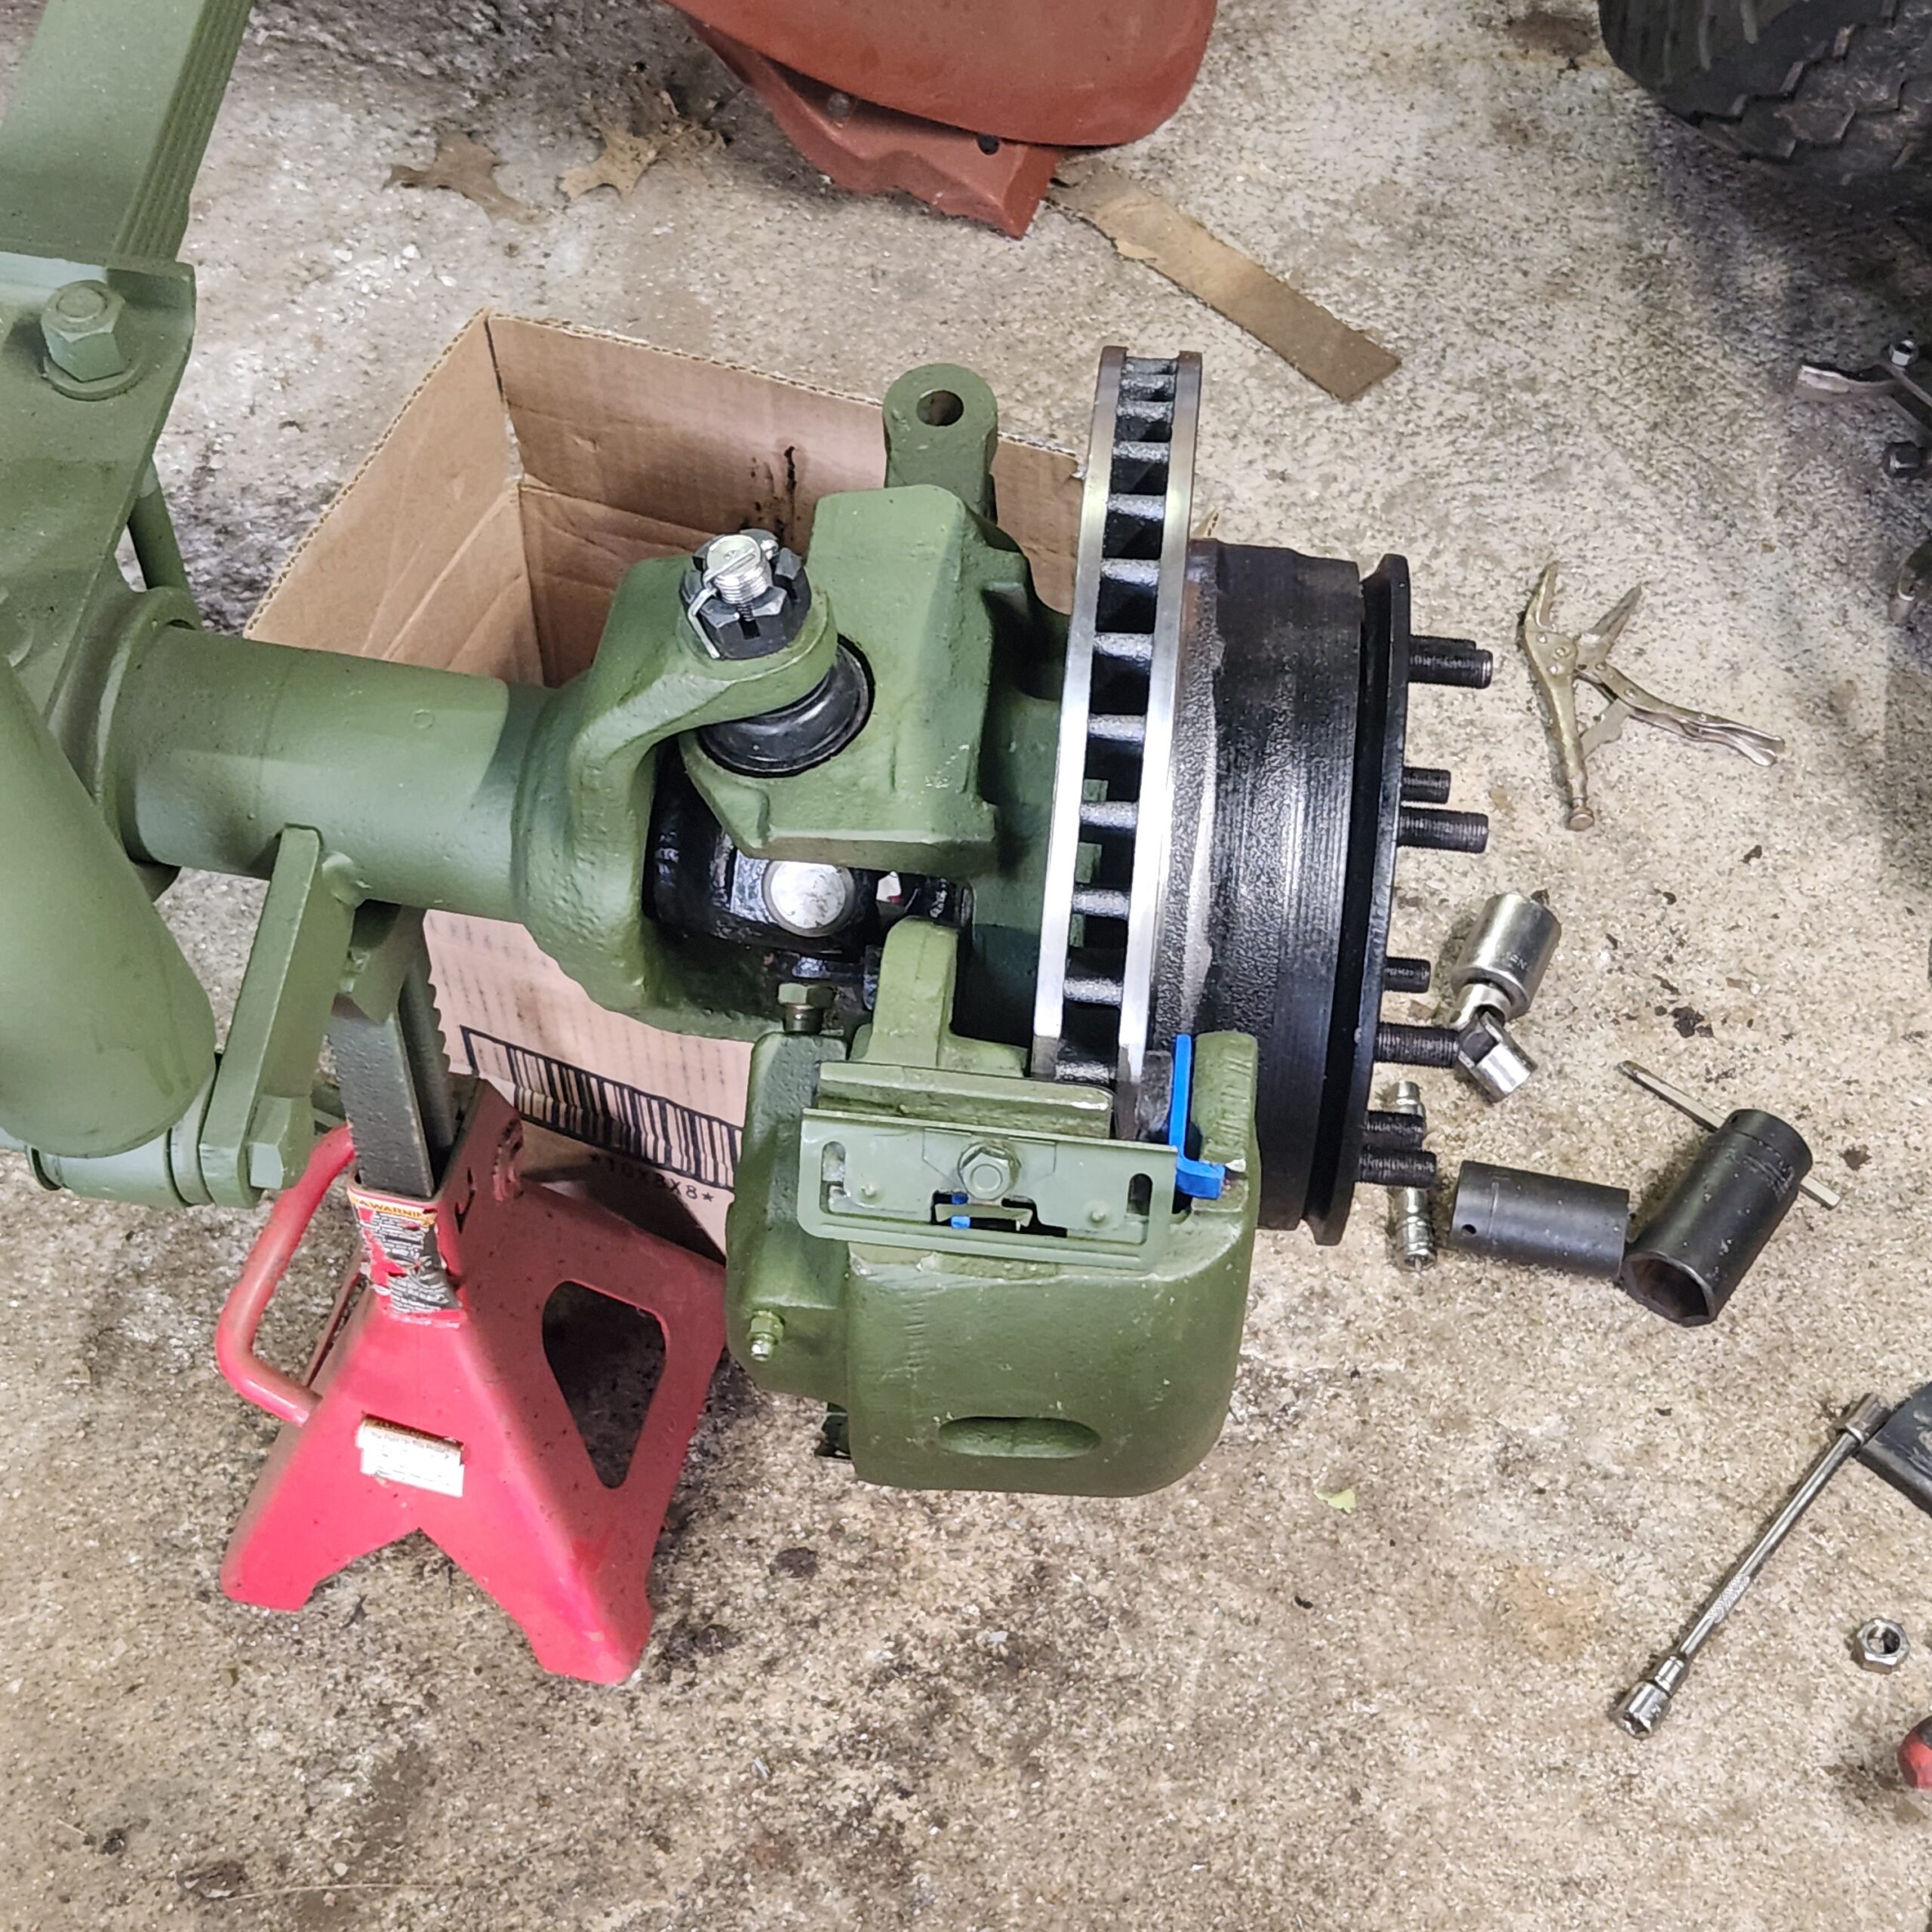
Drivers side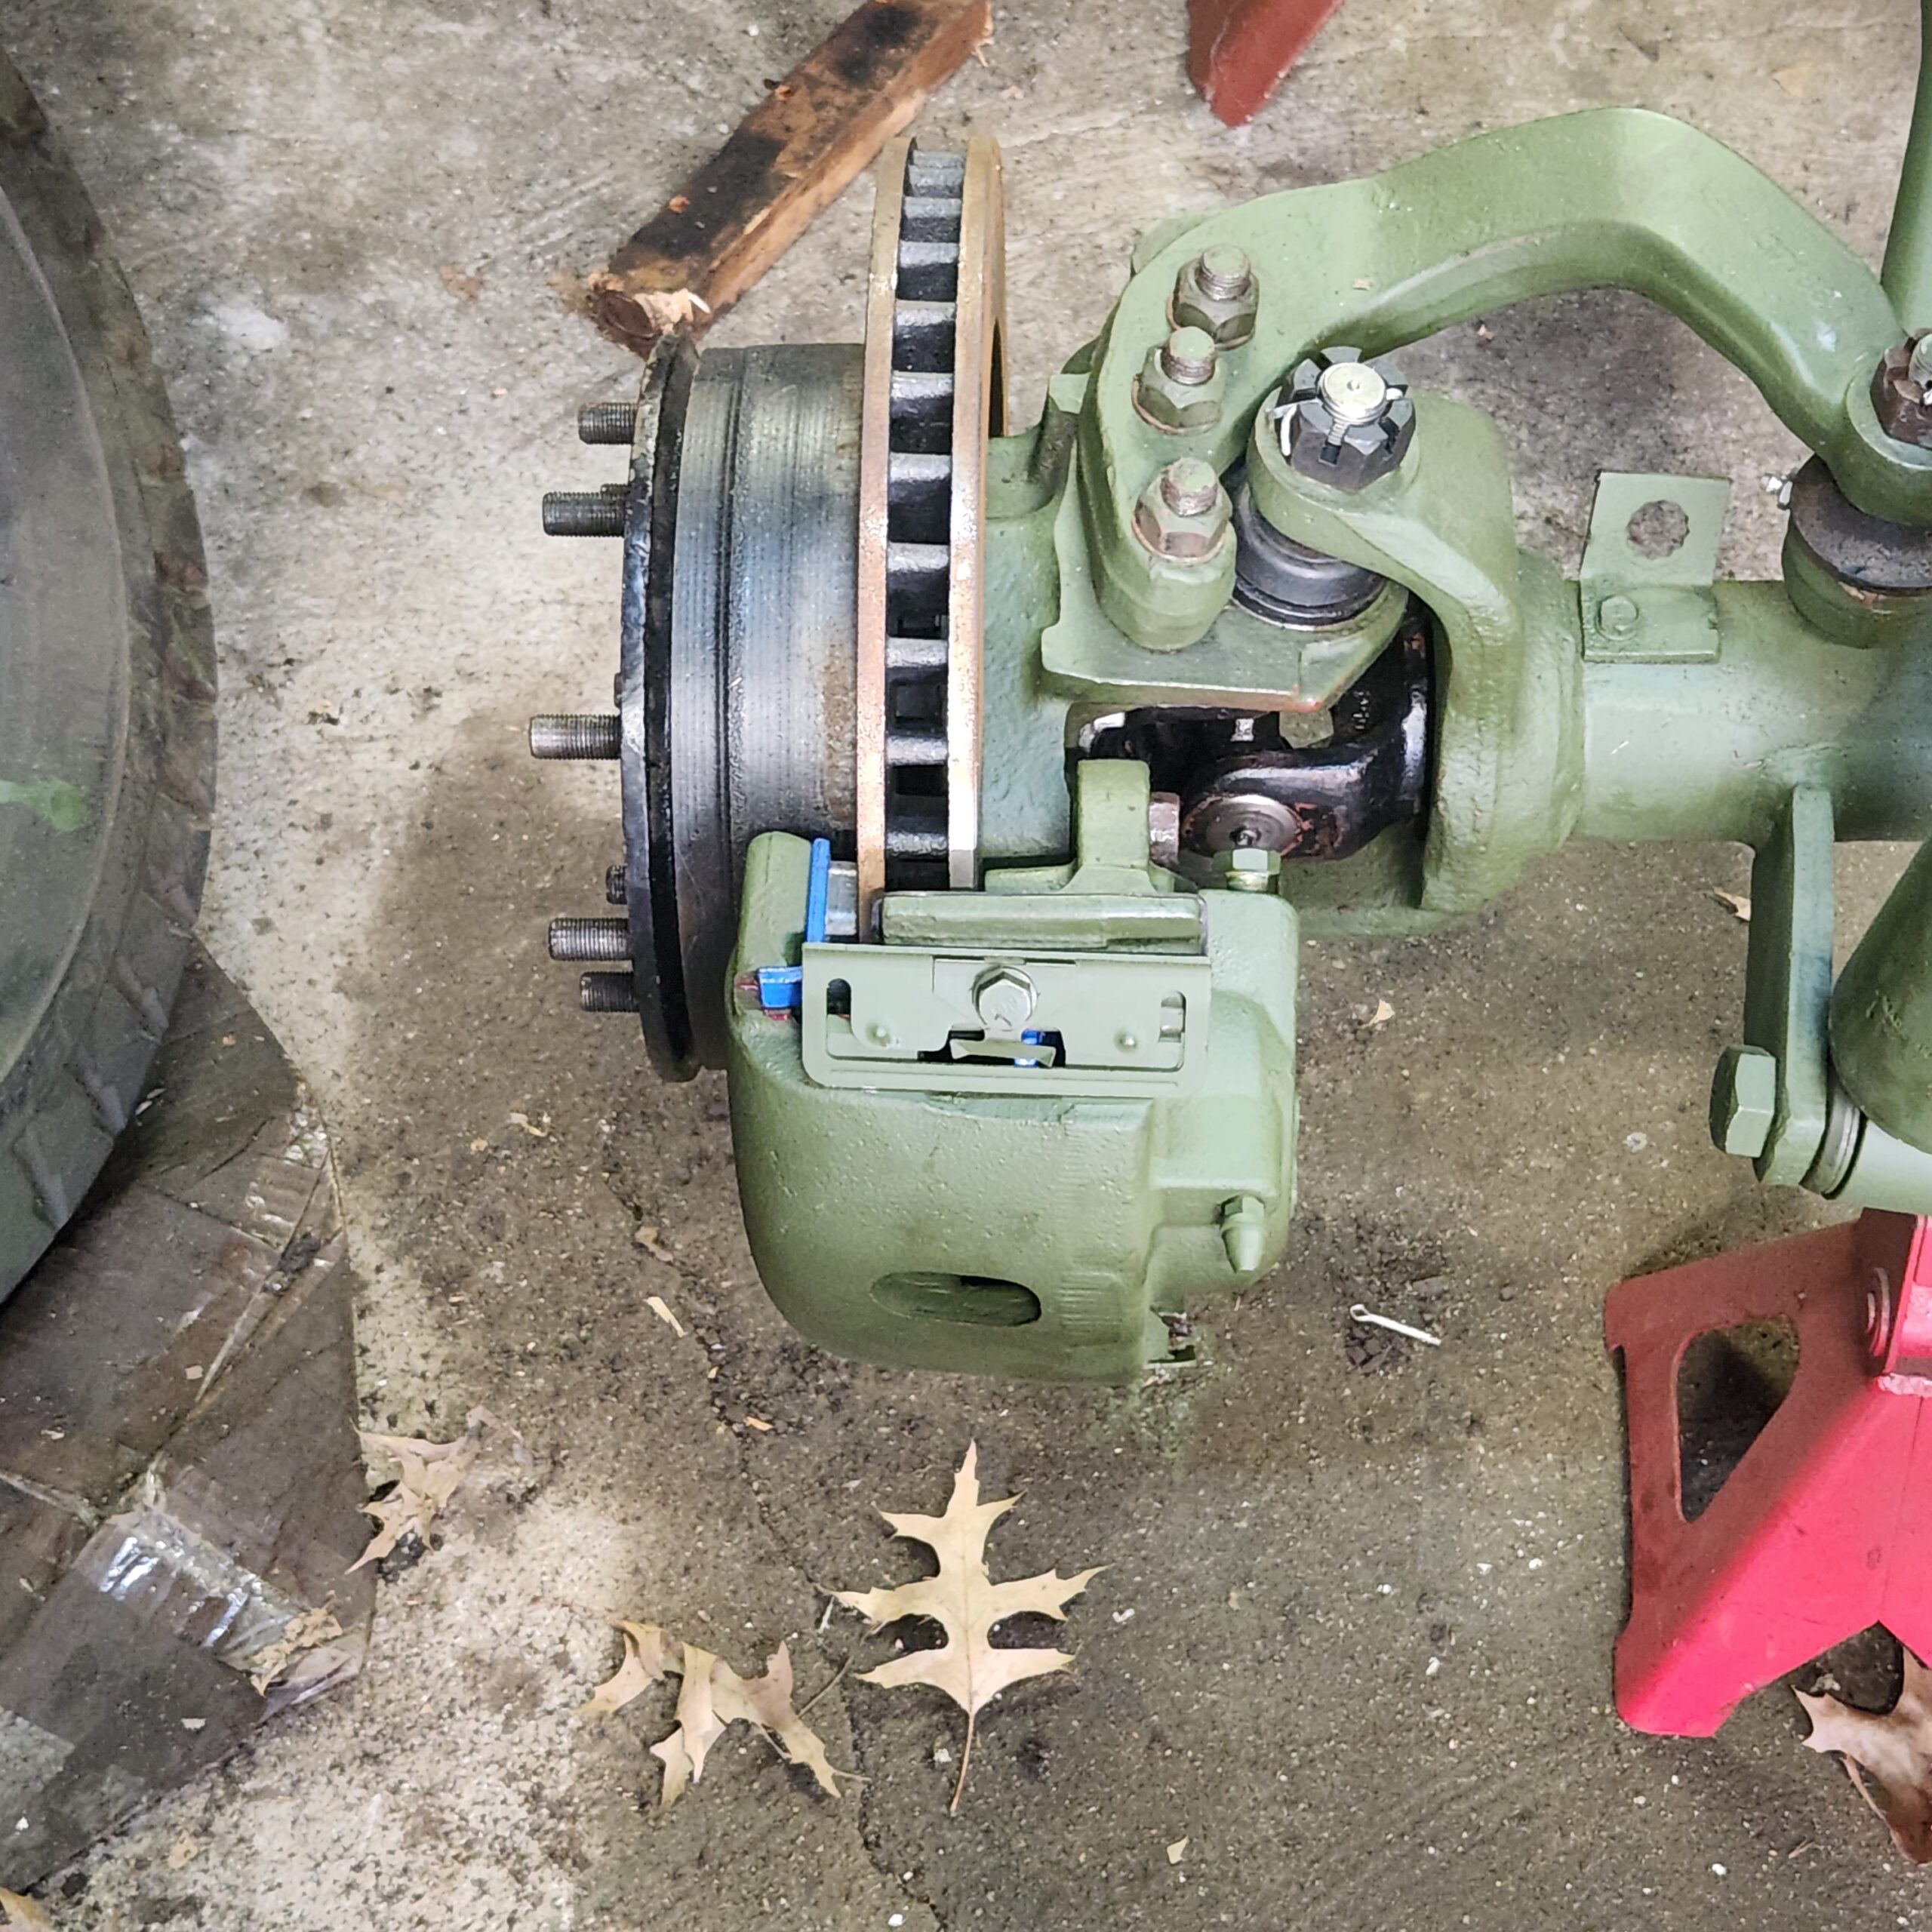
Completed front end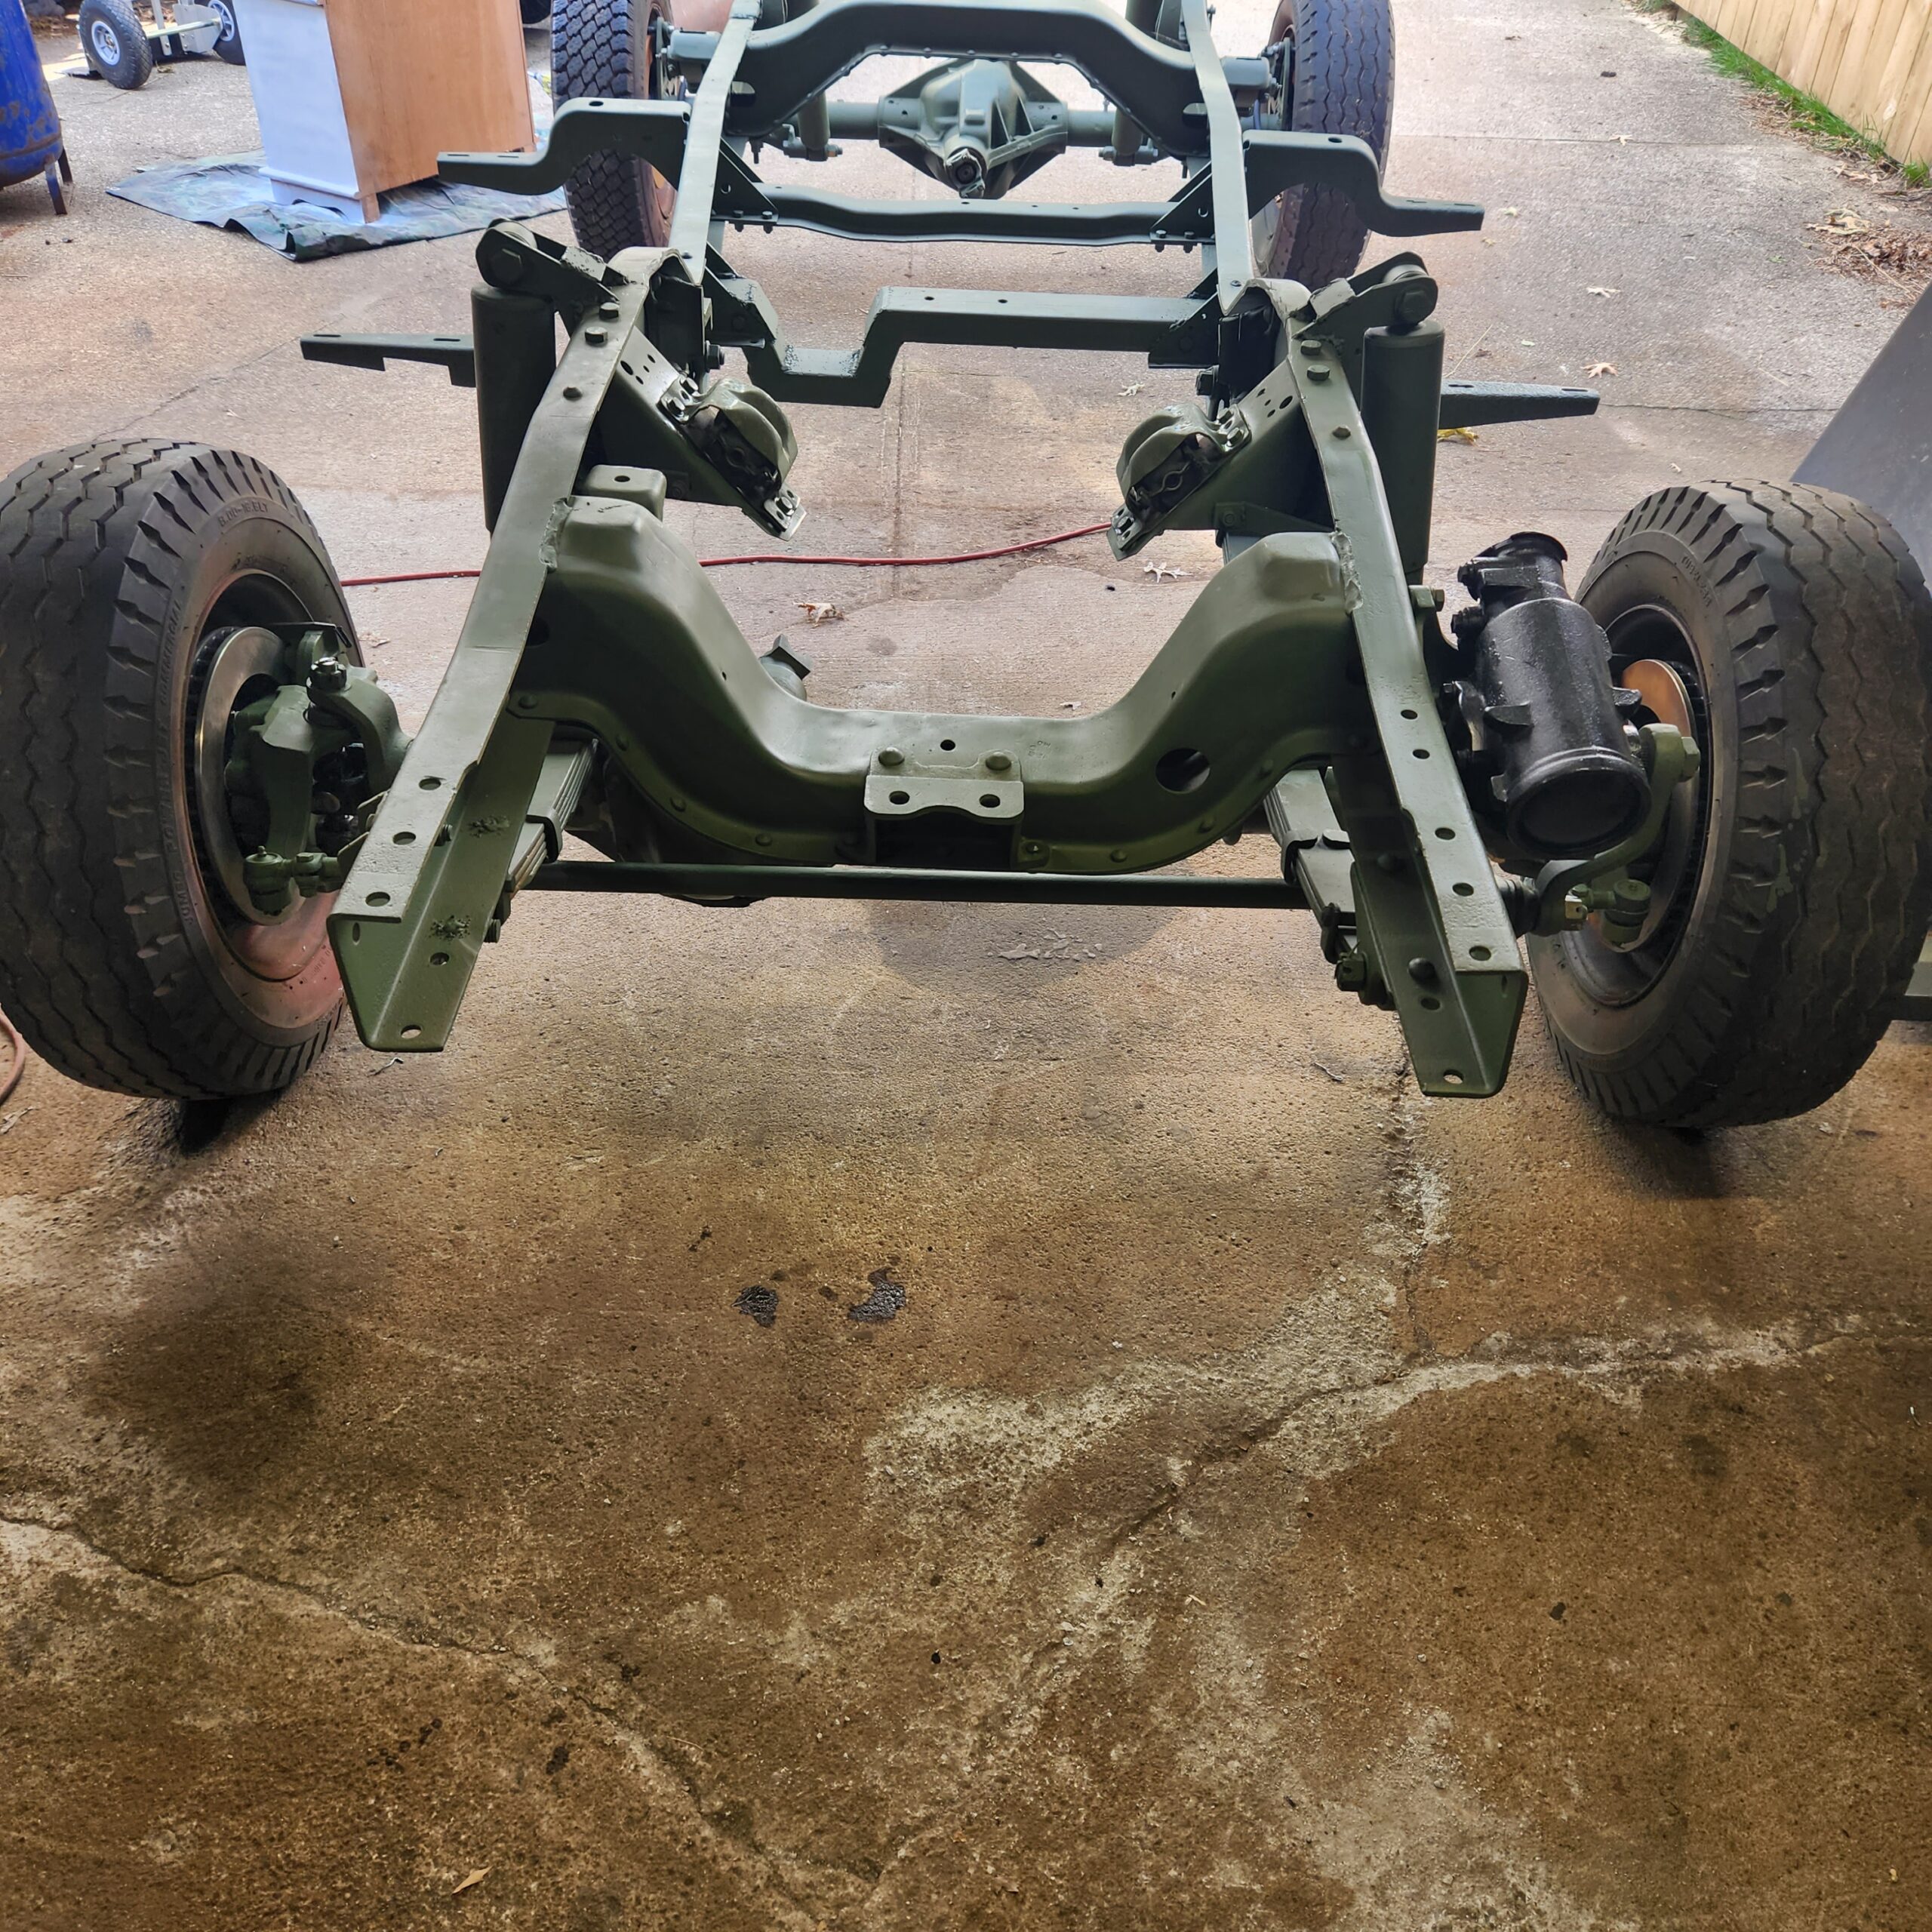
P-side complete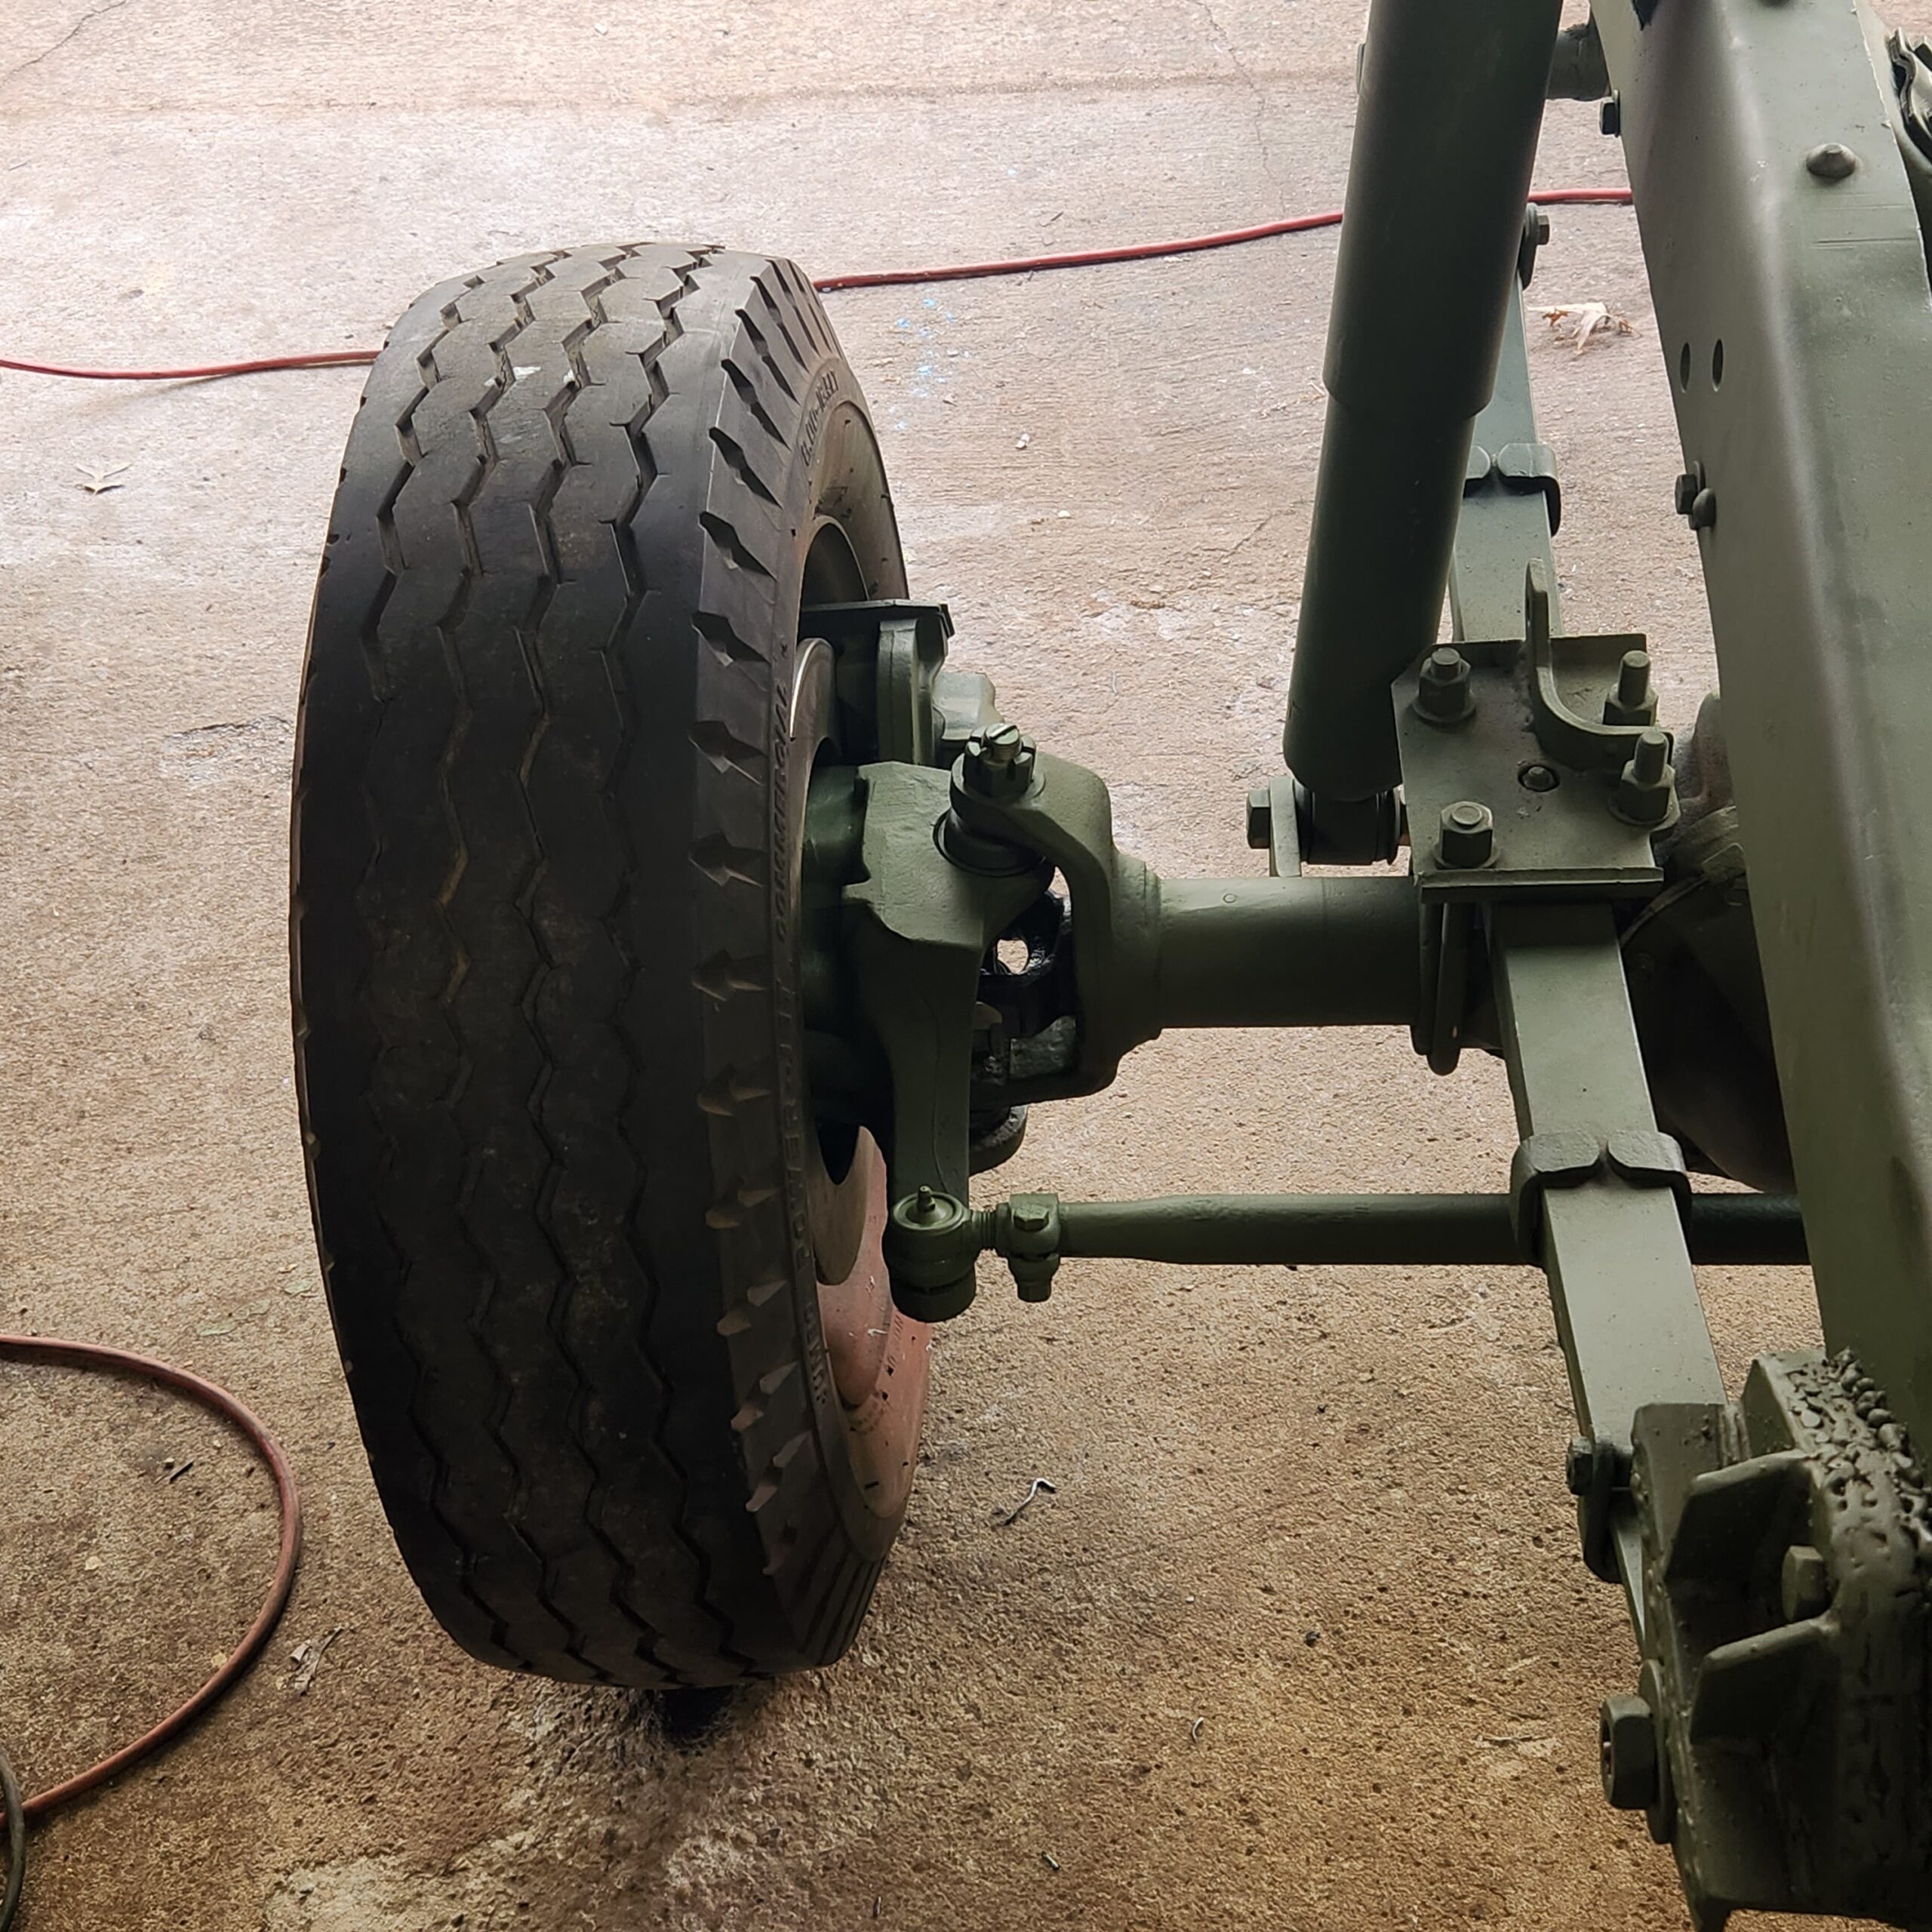
D-side complete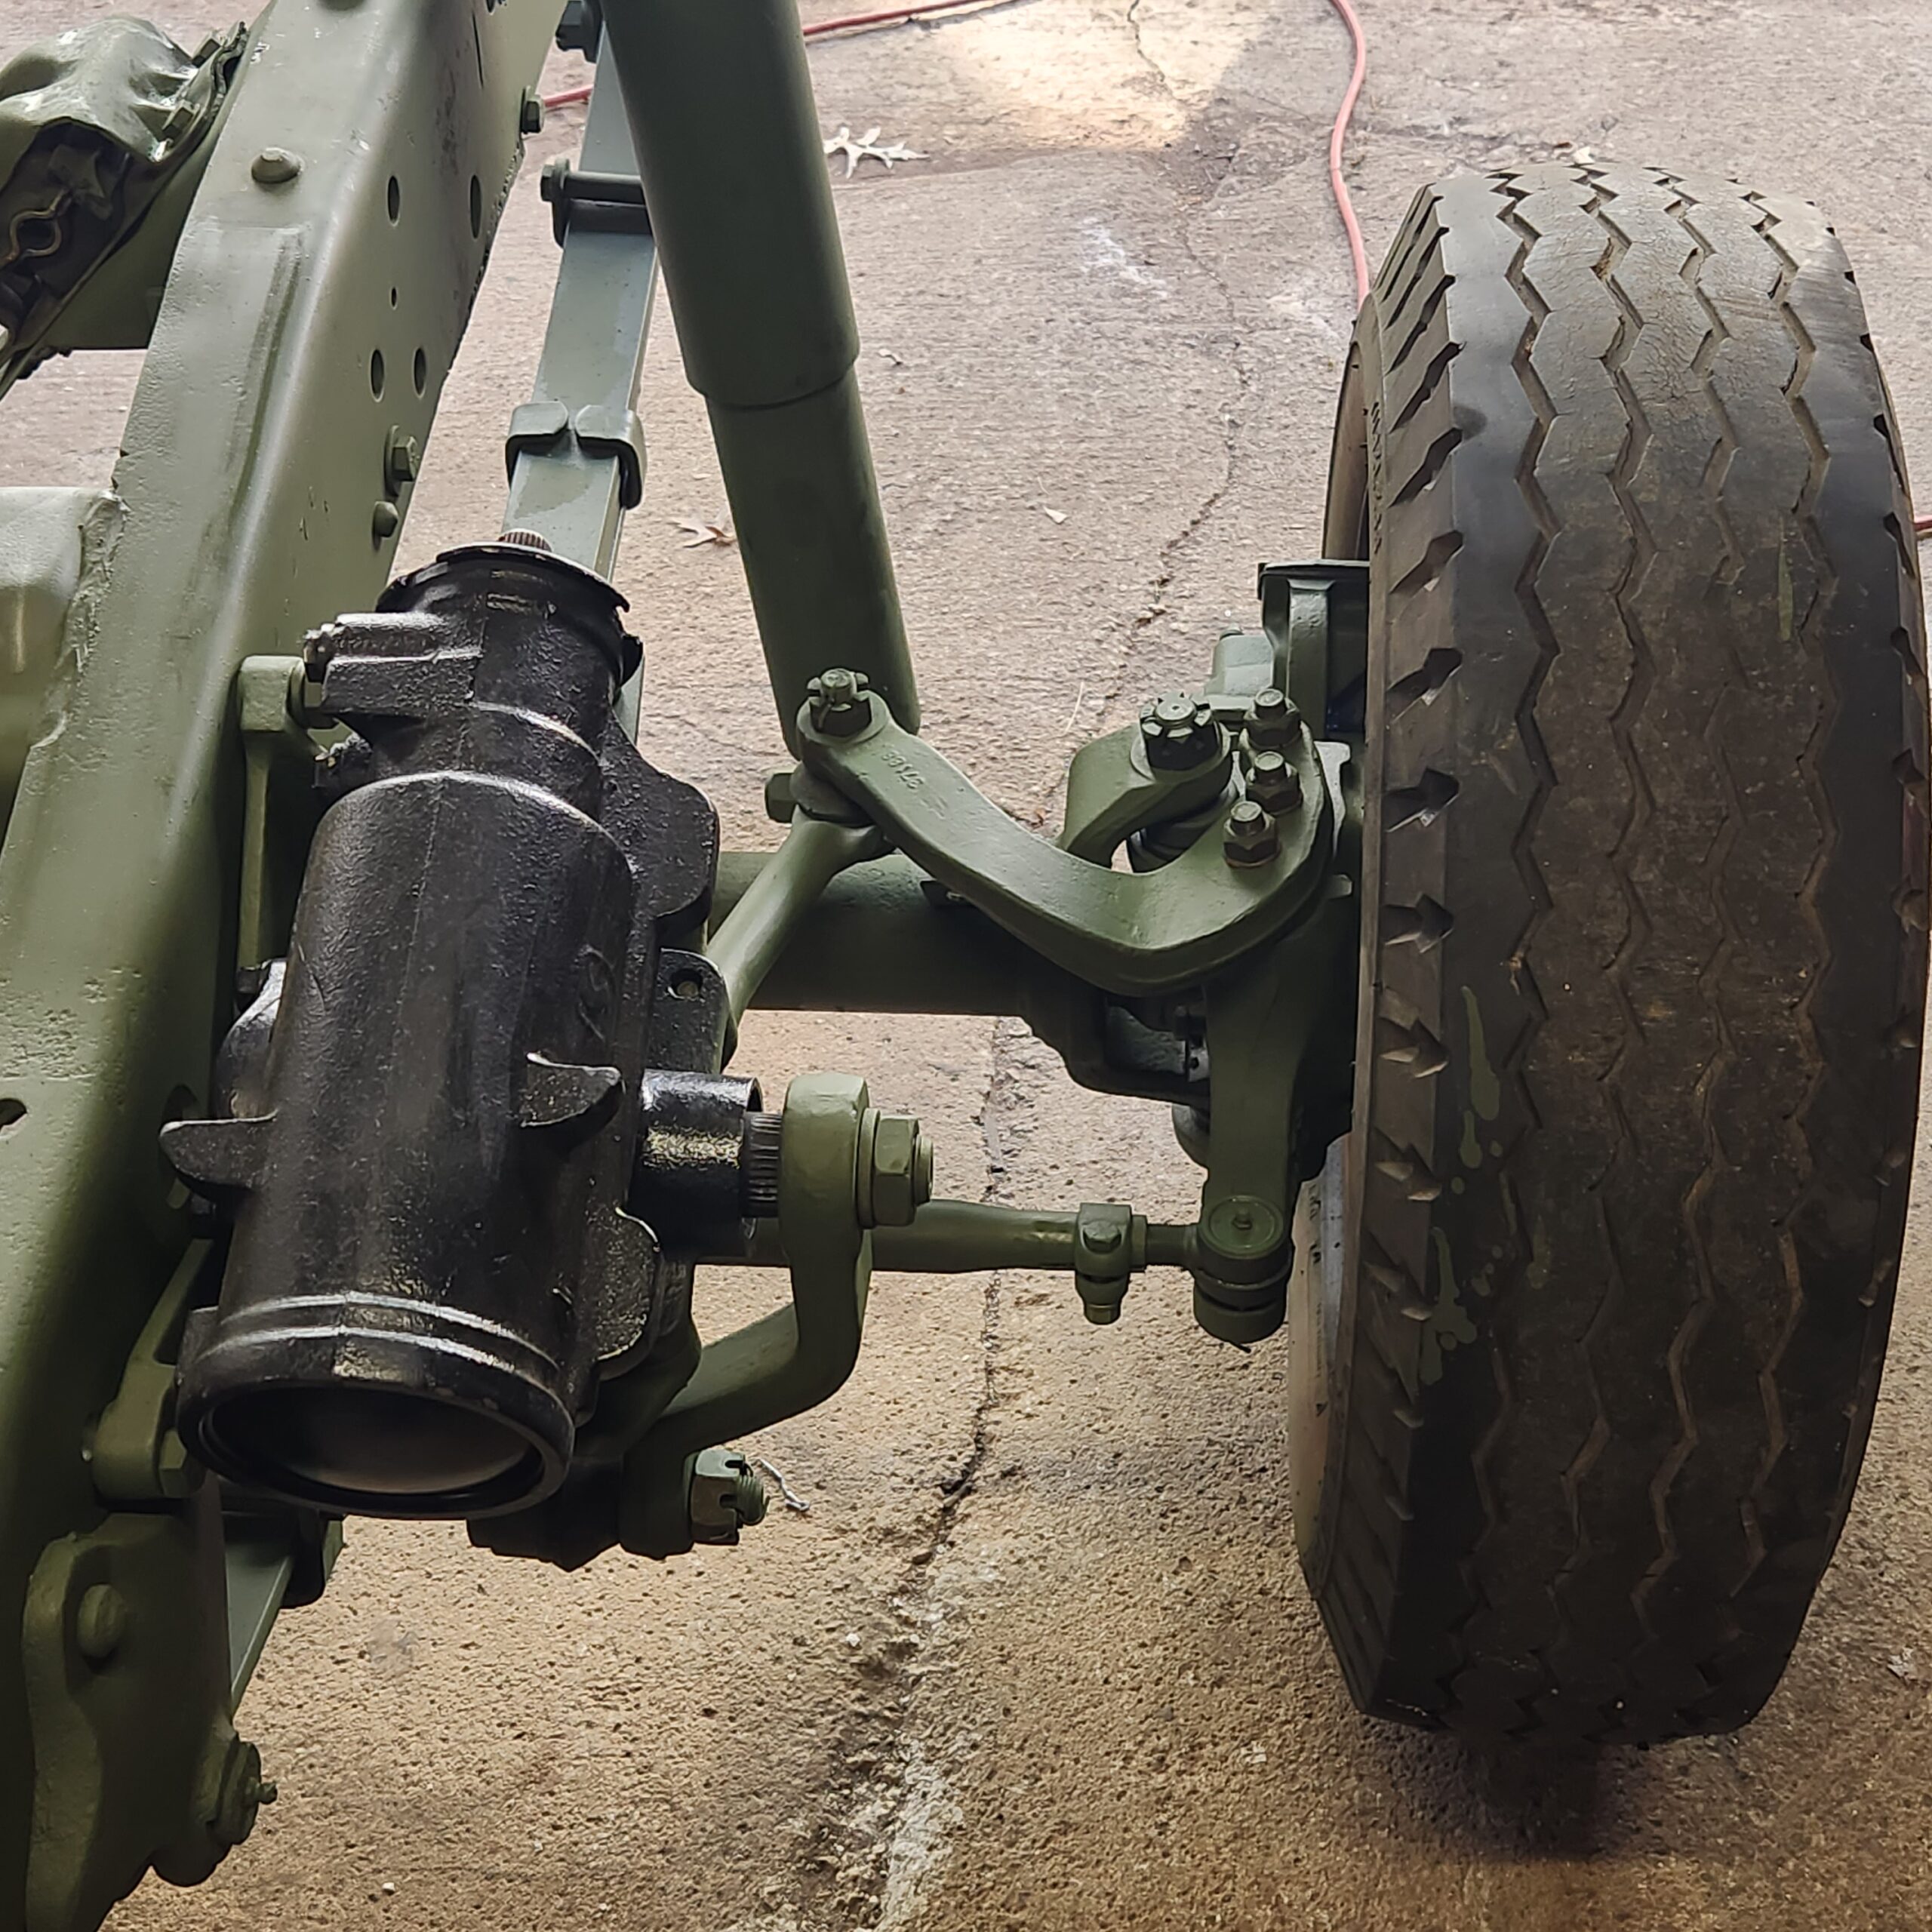
Next on my list is fuel system and bake lines. My tank is full of rust and scale. My options are go to Gas Tank Renu and have it rebuilt for 300-400 bucks, Spend 120 and try POR-15 gas tank refurbish stuff myself, or spend about the same amount on a new S-10 blazer tank or mid 80's Ford Bronco tank and then try to figure out how to make the GI sender work etc. Any thoughts you all might have are welcomed.
M37s are HMMWV in my world!


Re: M37B3 Project
I've heard the full size ford van tanks are a good fit and larger (22 gallons?) than the S10 tanks (18 gallons?). There have been some posts on it in Steel Soldiers and on the Dodge M37/M43 Facebook group.
1951 M37 "Brutus" w/Winch and 251 engine

Re: M37B3 Project
Rebuilding the tank can be expensive (wasn't aware until I received the cost estimation from several places  ). I think that's why a lot of folks get a S10 tank as it will fit flawlessly (needs neck extension tho). The old Econoline is worth to try, I believe it's the same as the Bronco.
As usual, depends on your budget and if you have the time to dedicate.
As usual, depends on your budget and if you have the time to dedicate.
Sebastian
(sorry, I only speak in METRIC)
(sorry, I only speak in METRIC)
Re: M37B3 Project
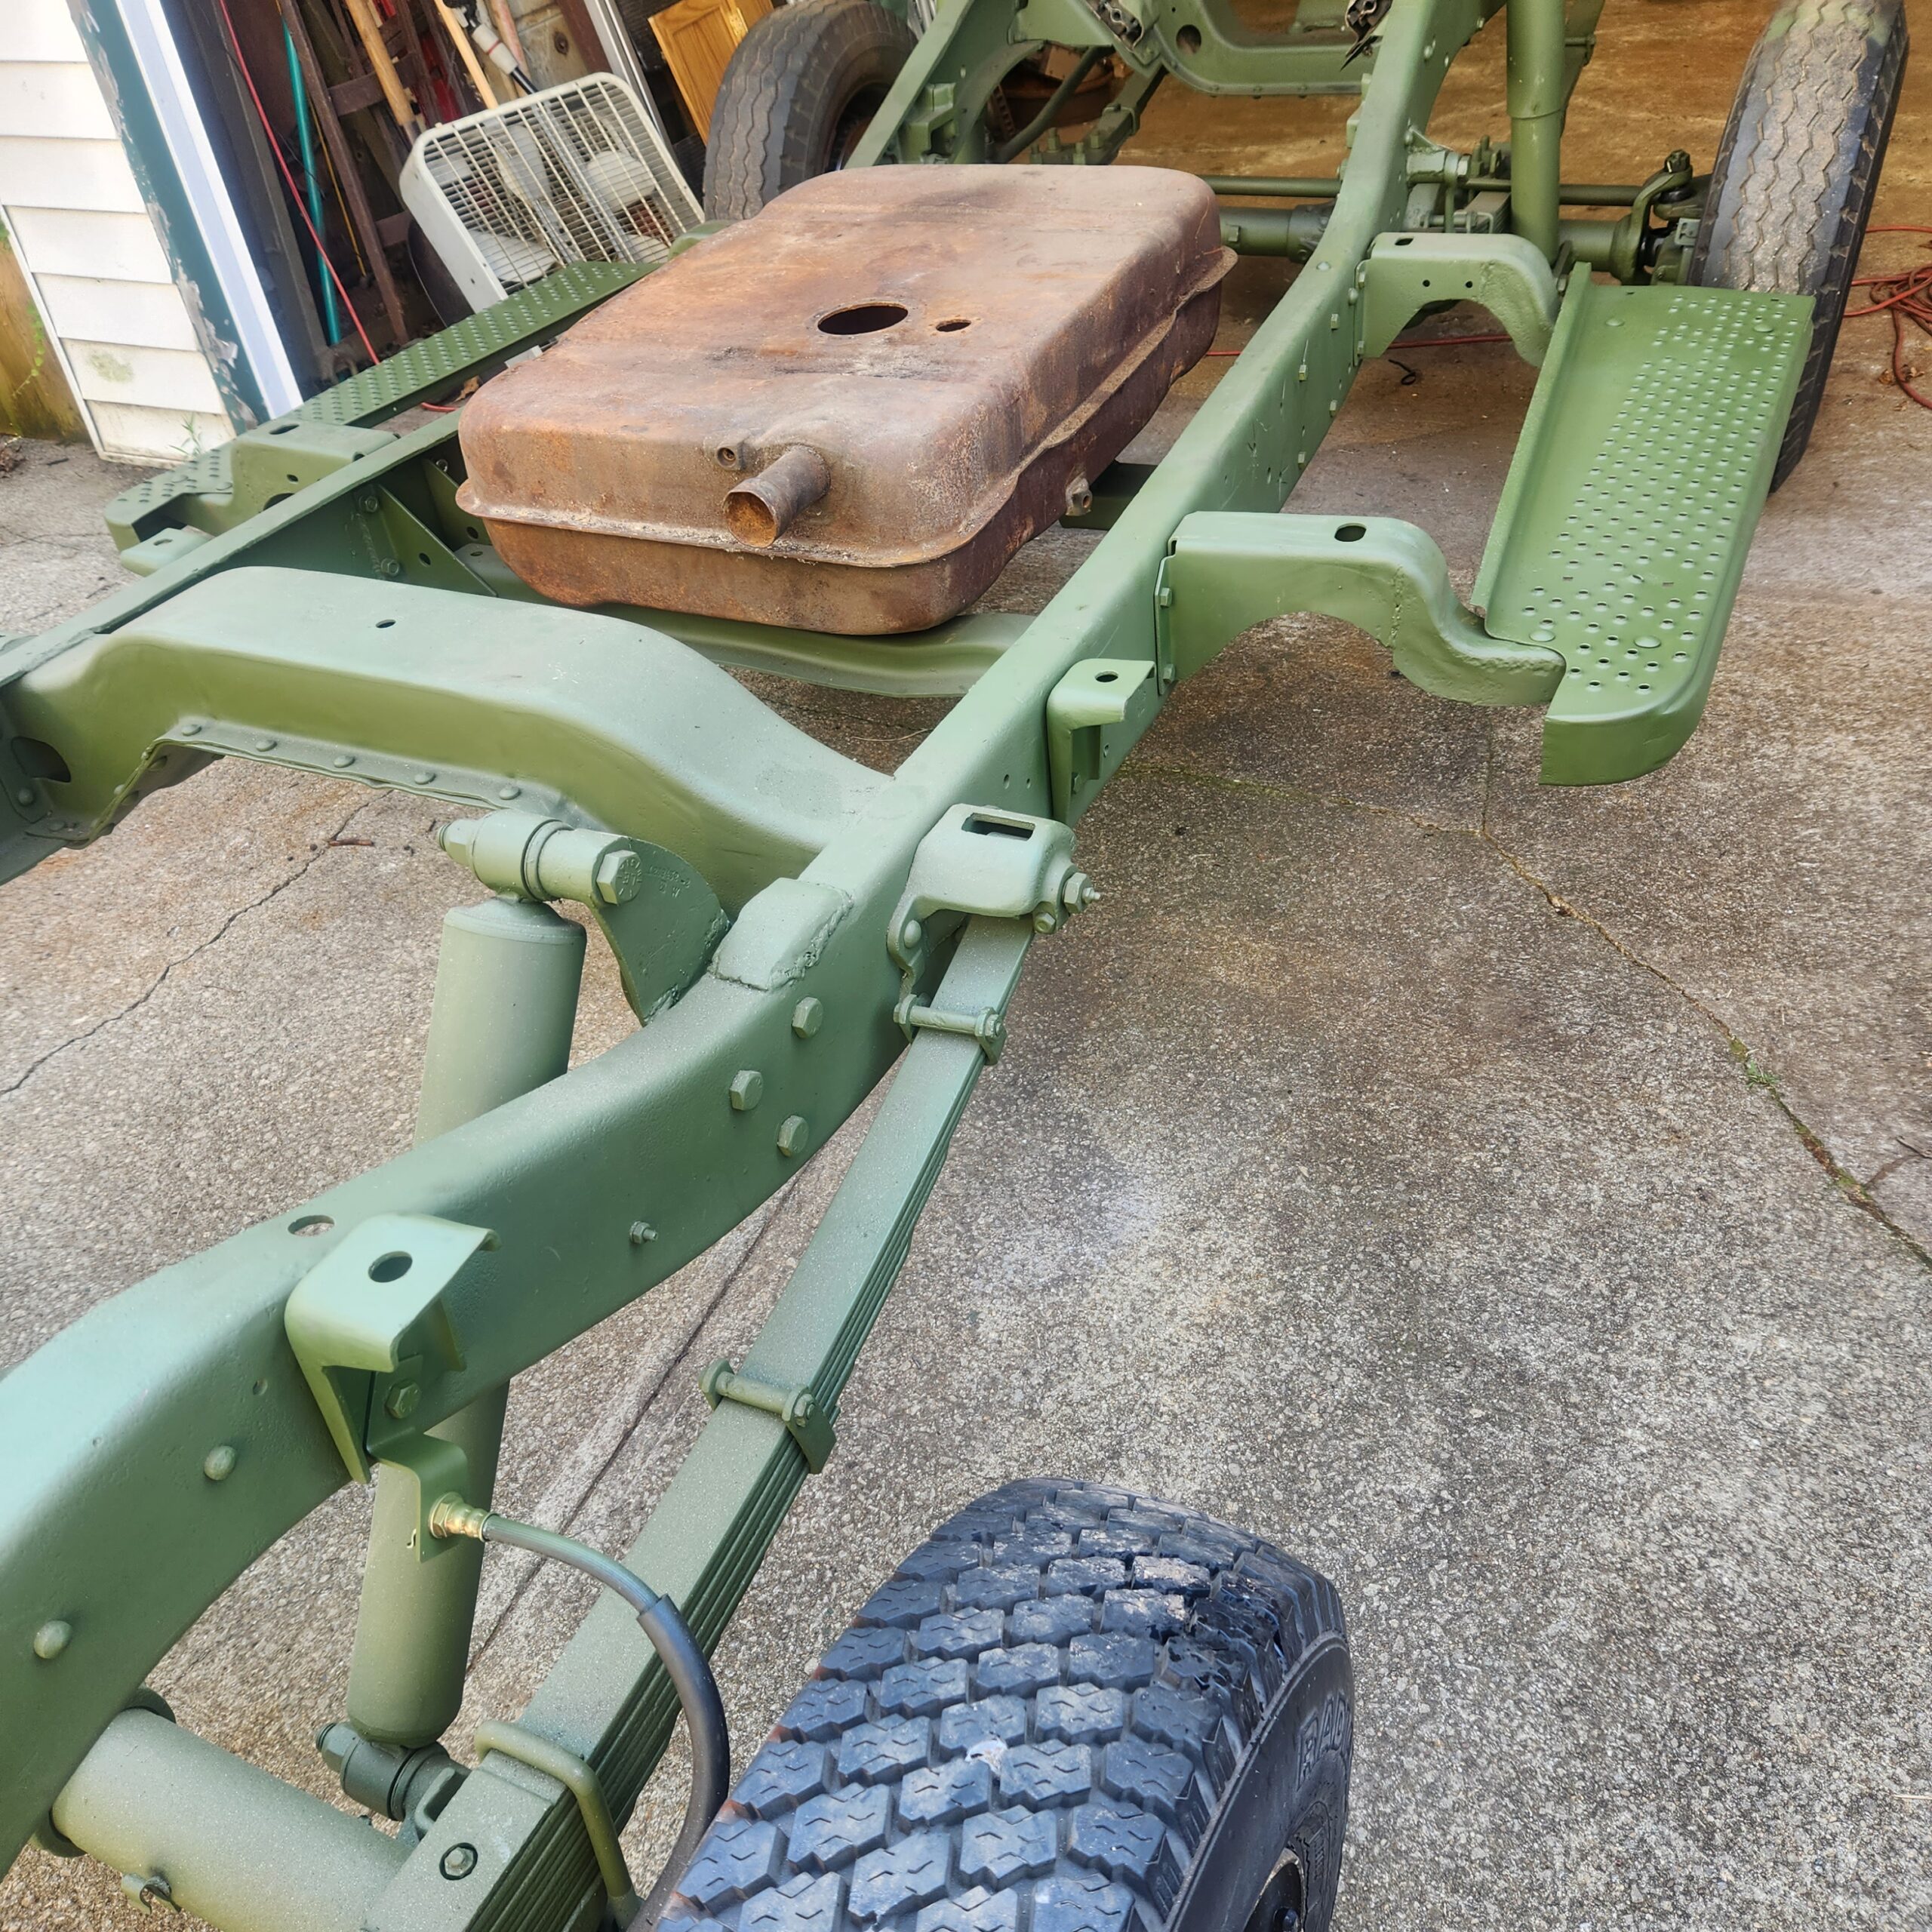
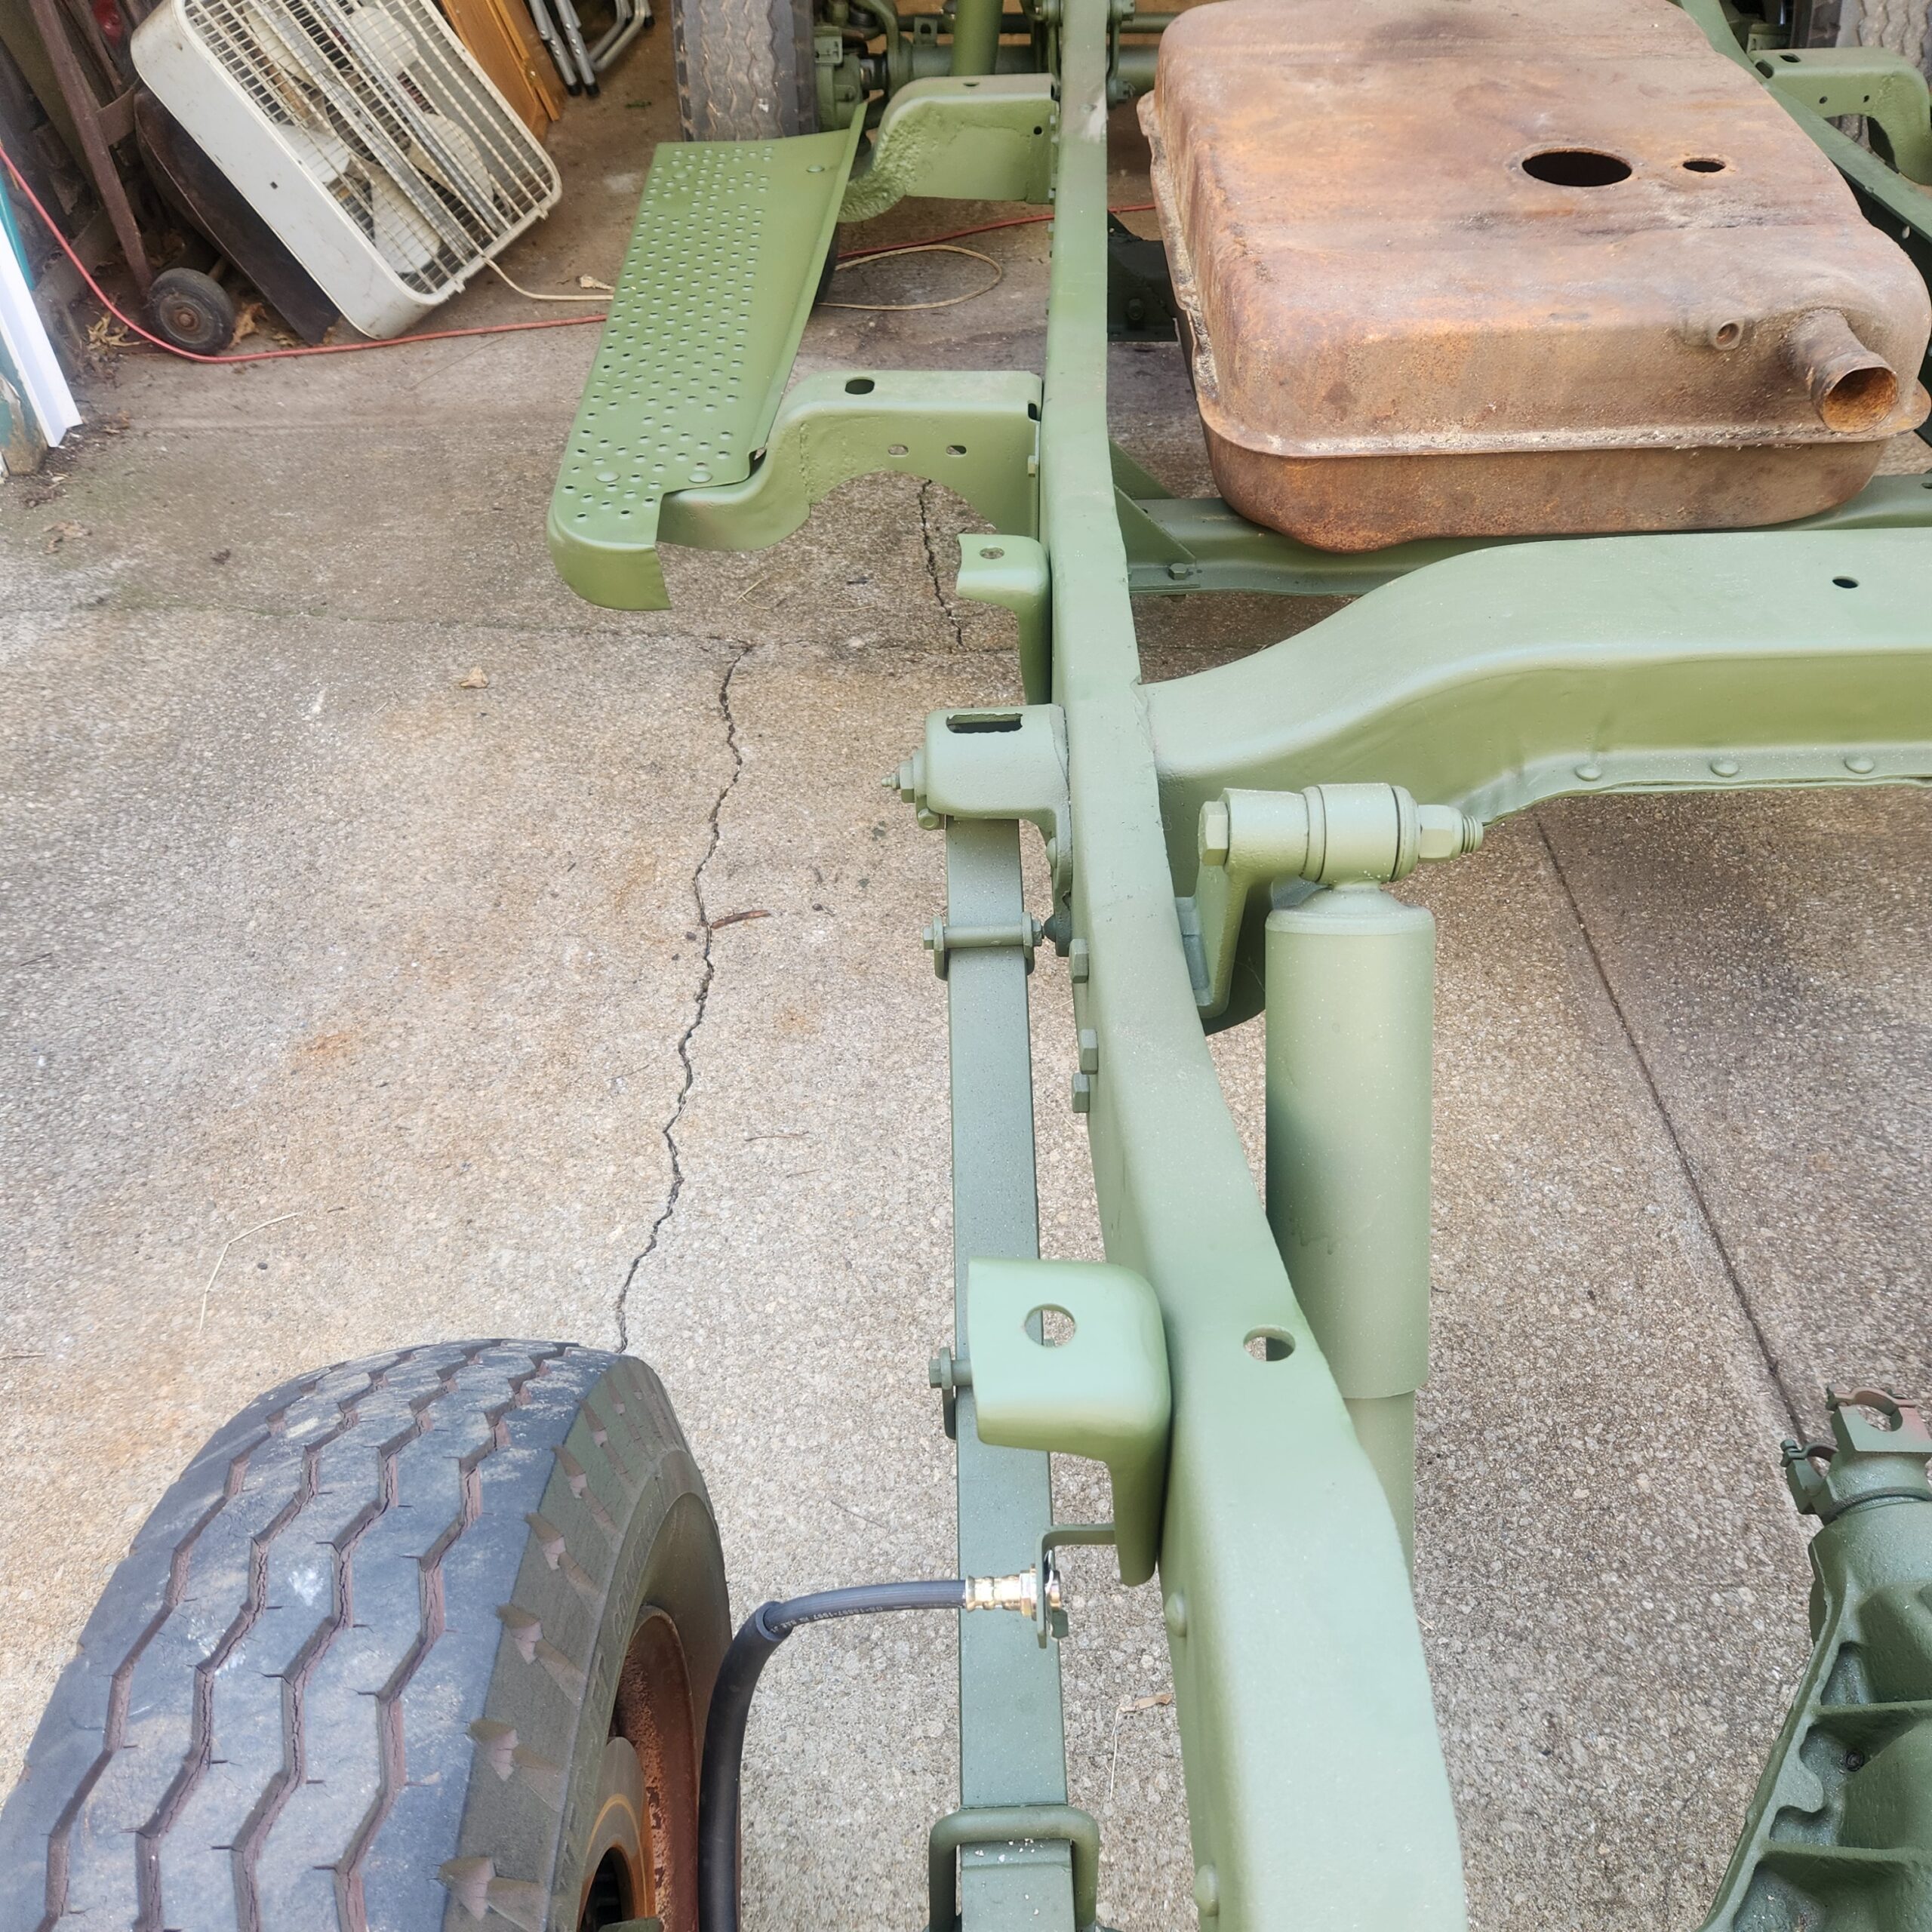
Haven had much time to get anything major done on the truck. Been doing little things. I've also been doing little things that are part of bigger things but haven't gotten all the little things together to post about the big things...if that makes any sense. Anyway, I wanted to post a little update. I got the running boards blasted, primed and painter along with the brackets that bolt to frame that the bed bolts to. I also designed and mounted a small bracket on each side for the rear flexible brake hoses to mount to. This is very similar to how the rear brake hoses mount on my 2018 Ram 1500. Next projects will be the brake lines and the front brake hoses. Still giving that some thought. Here two pics for you all. The gas tank is just resting there on the frame until for lack of anywhere else to put it. I will also be working on that soon.
M37s are HMMWV in my world!
Re: M37B3 Project
I finally have some time to post and update. Now that the warm weather has flown south for the winter the truck is going to be tucked away in the garage. I may if we get any mild days go out and tinker here and there, but the majority of my work especially painting is done till next spring.
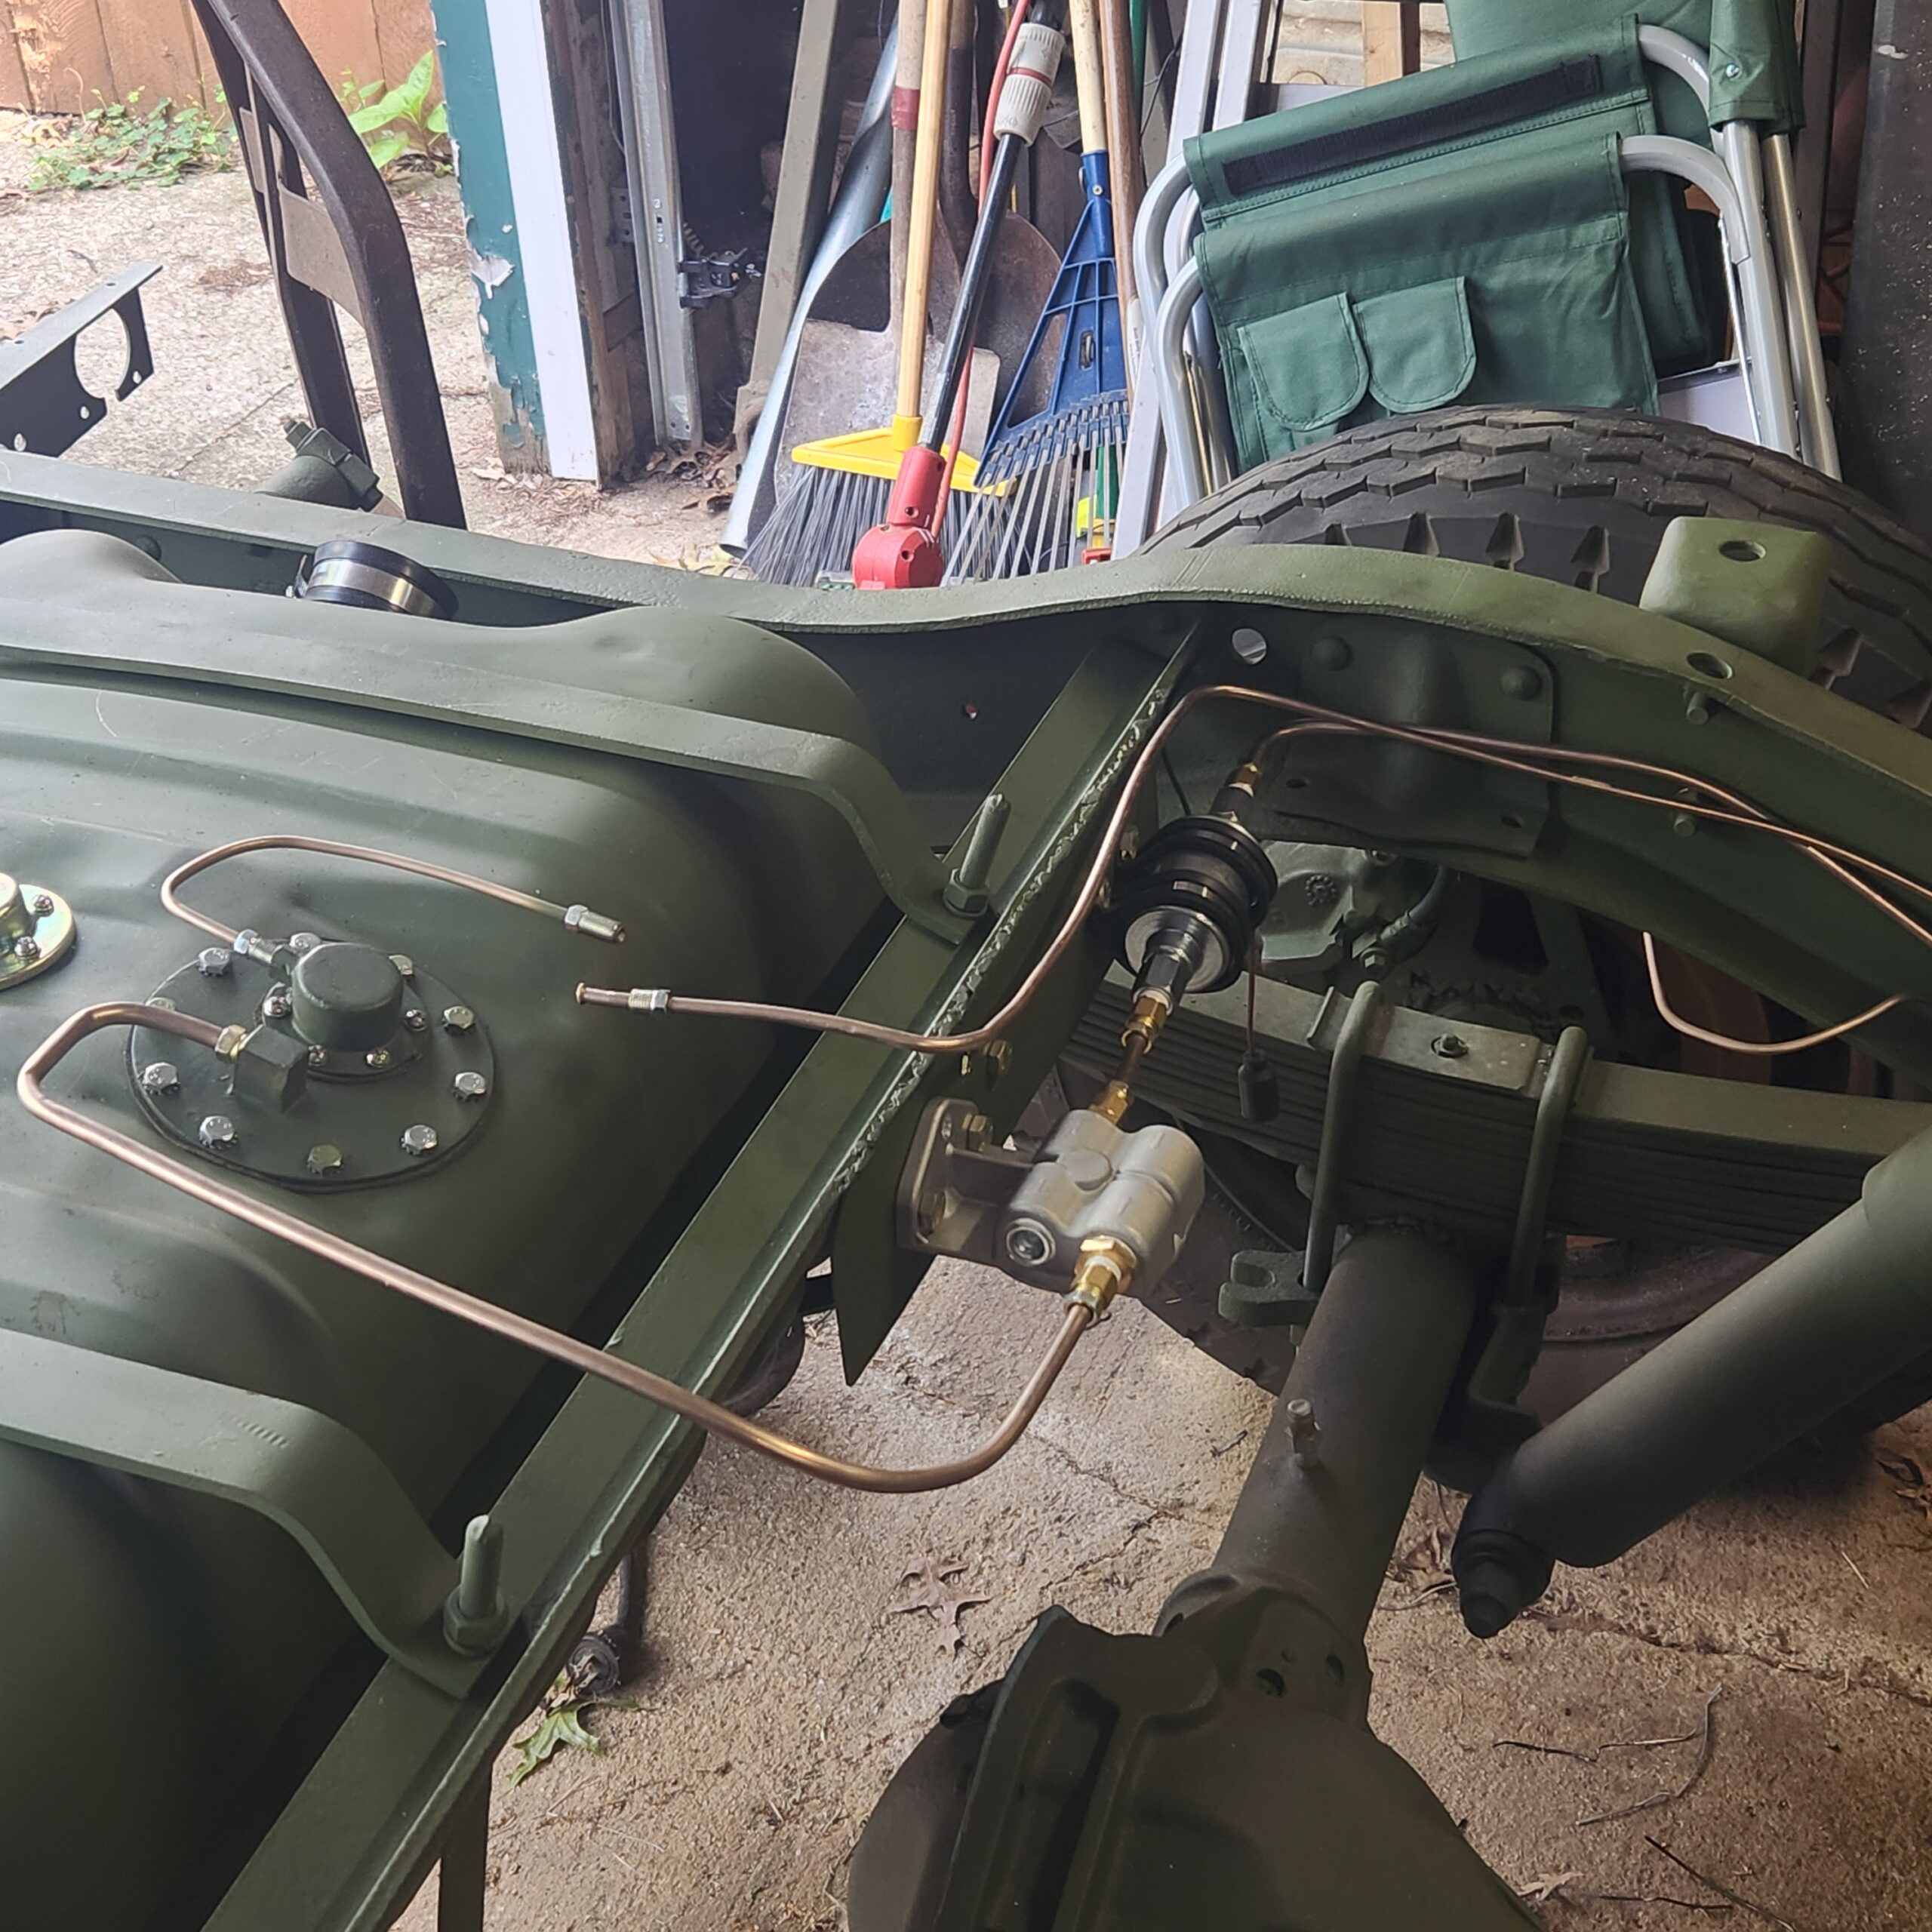
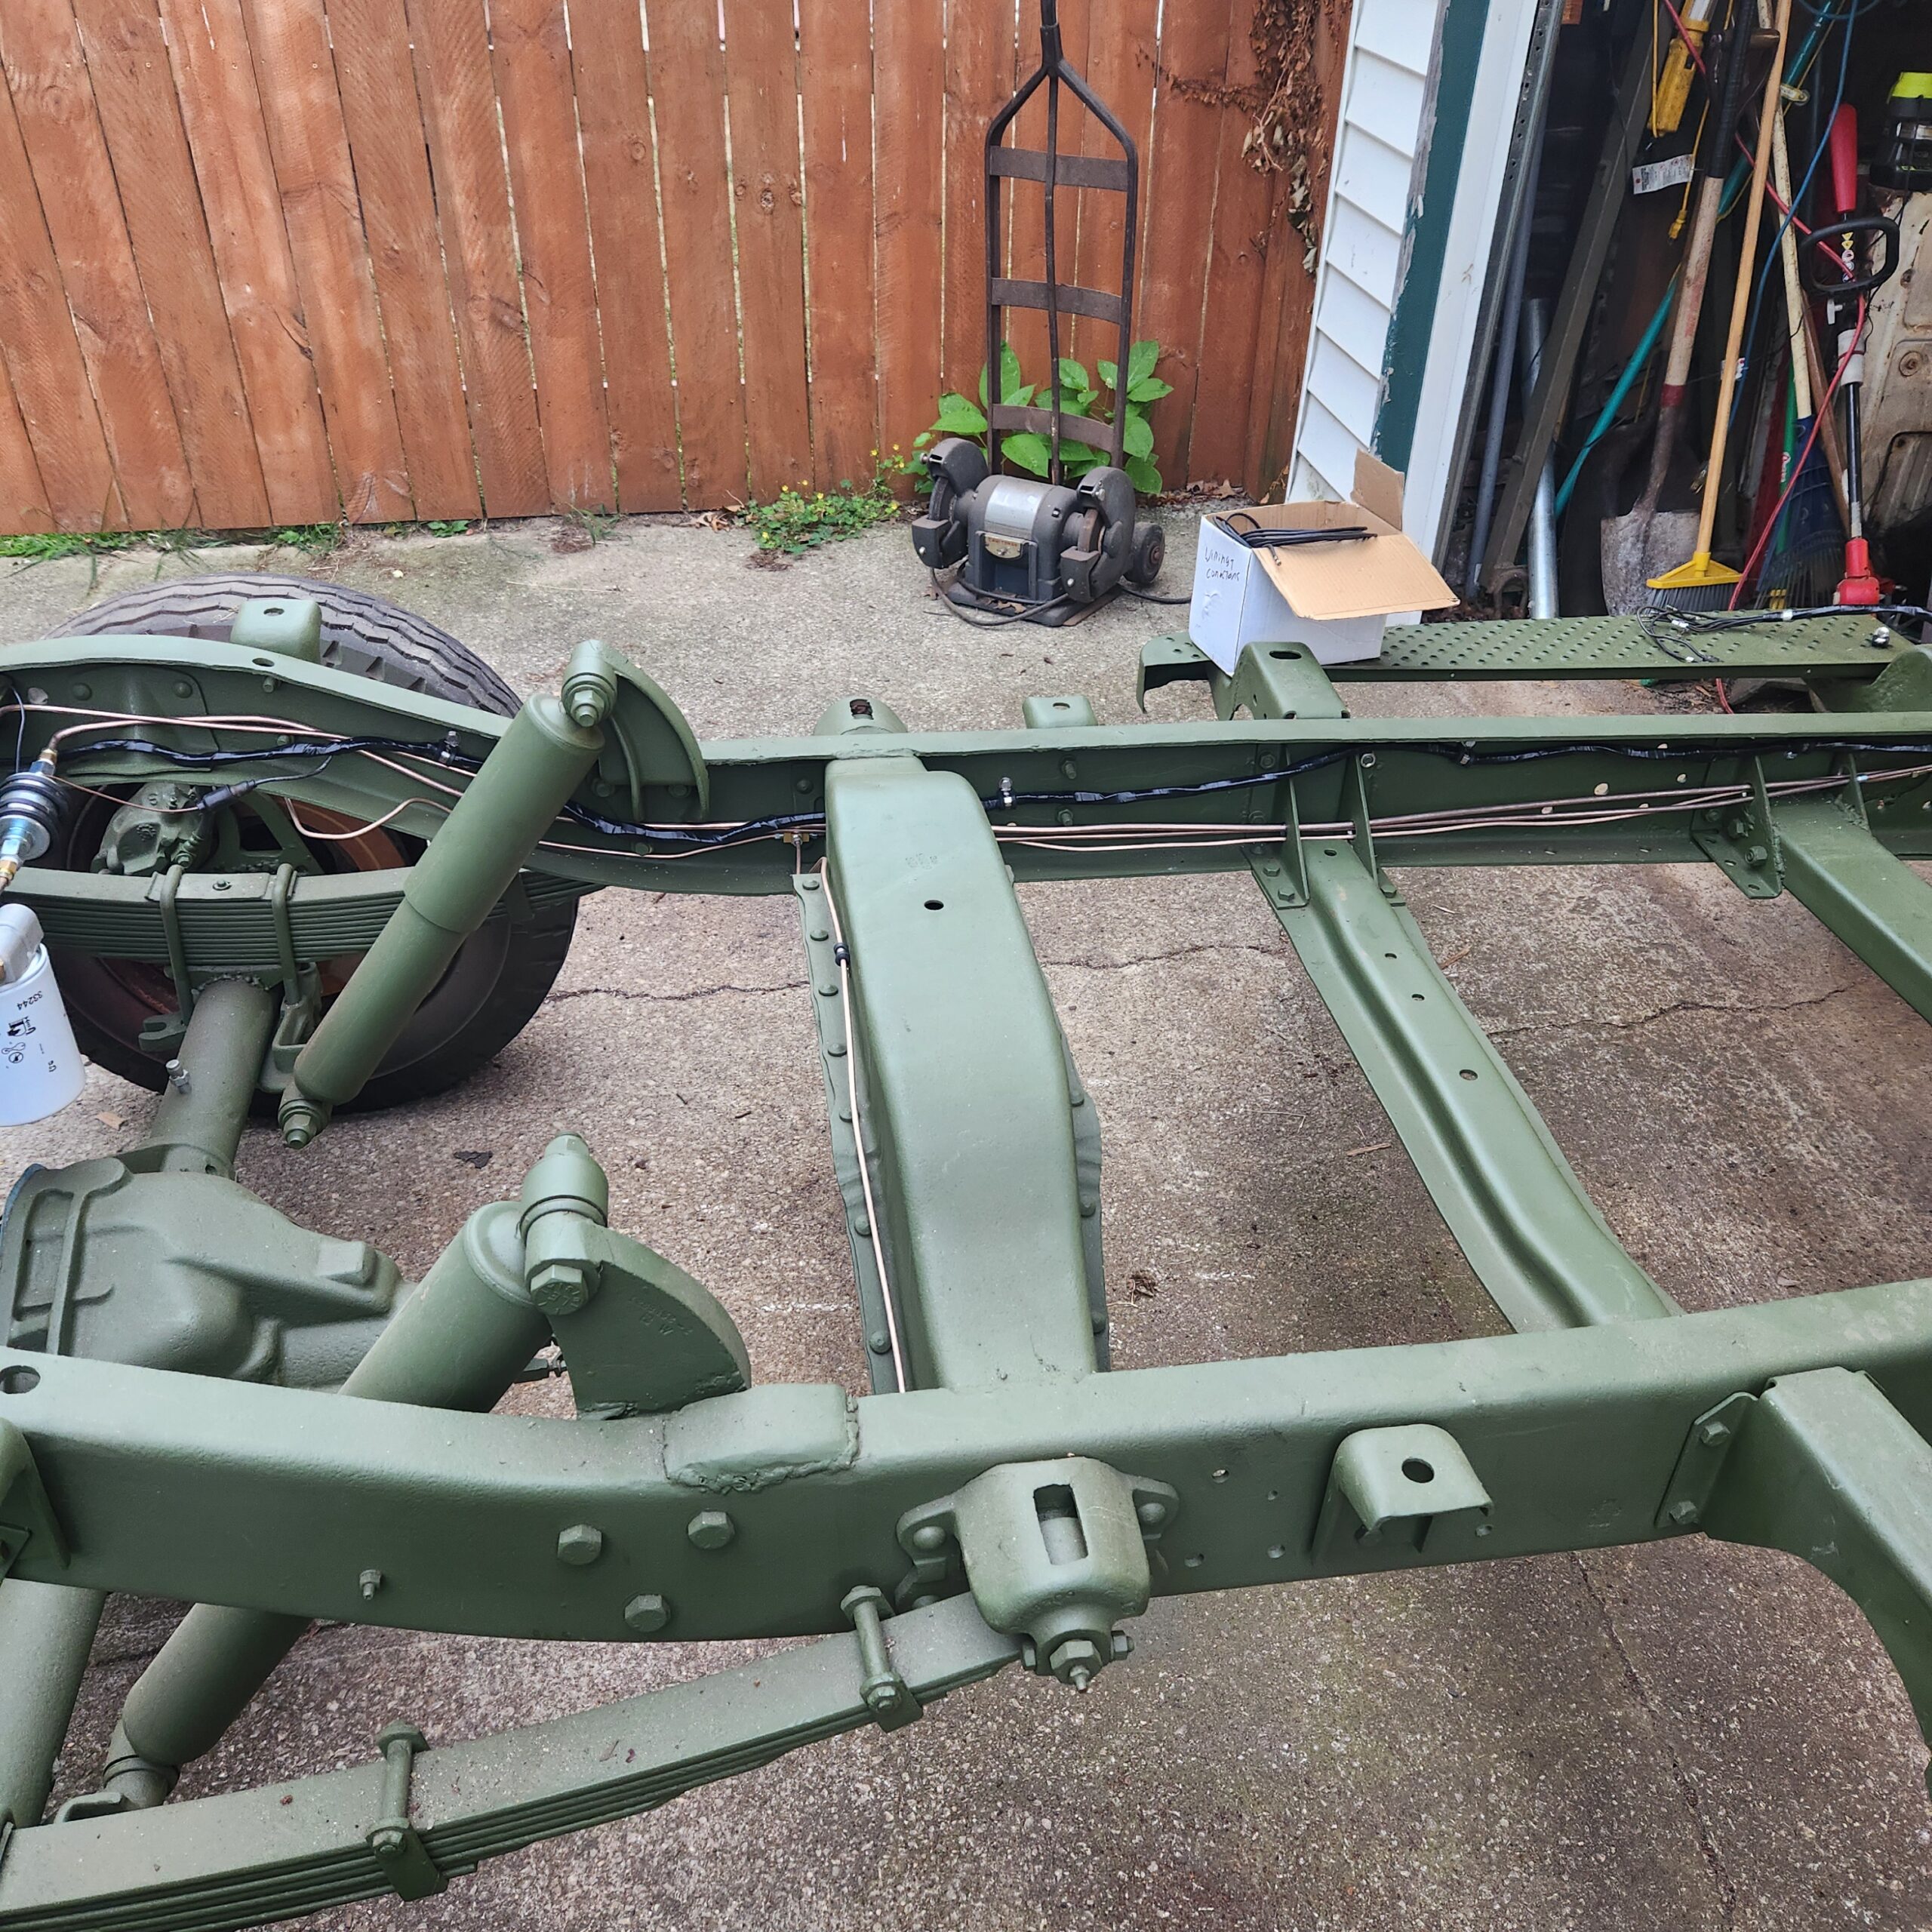
I got the brake lines run on the frame. I used 3/16 copper nickel brake line. It’s a modern line that is easy to bend and holds up to the weather. I started with picture wire that I ran as I wanted the line to run. This gave me a template to follow.
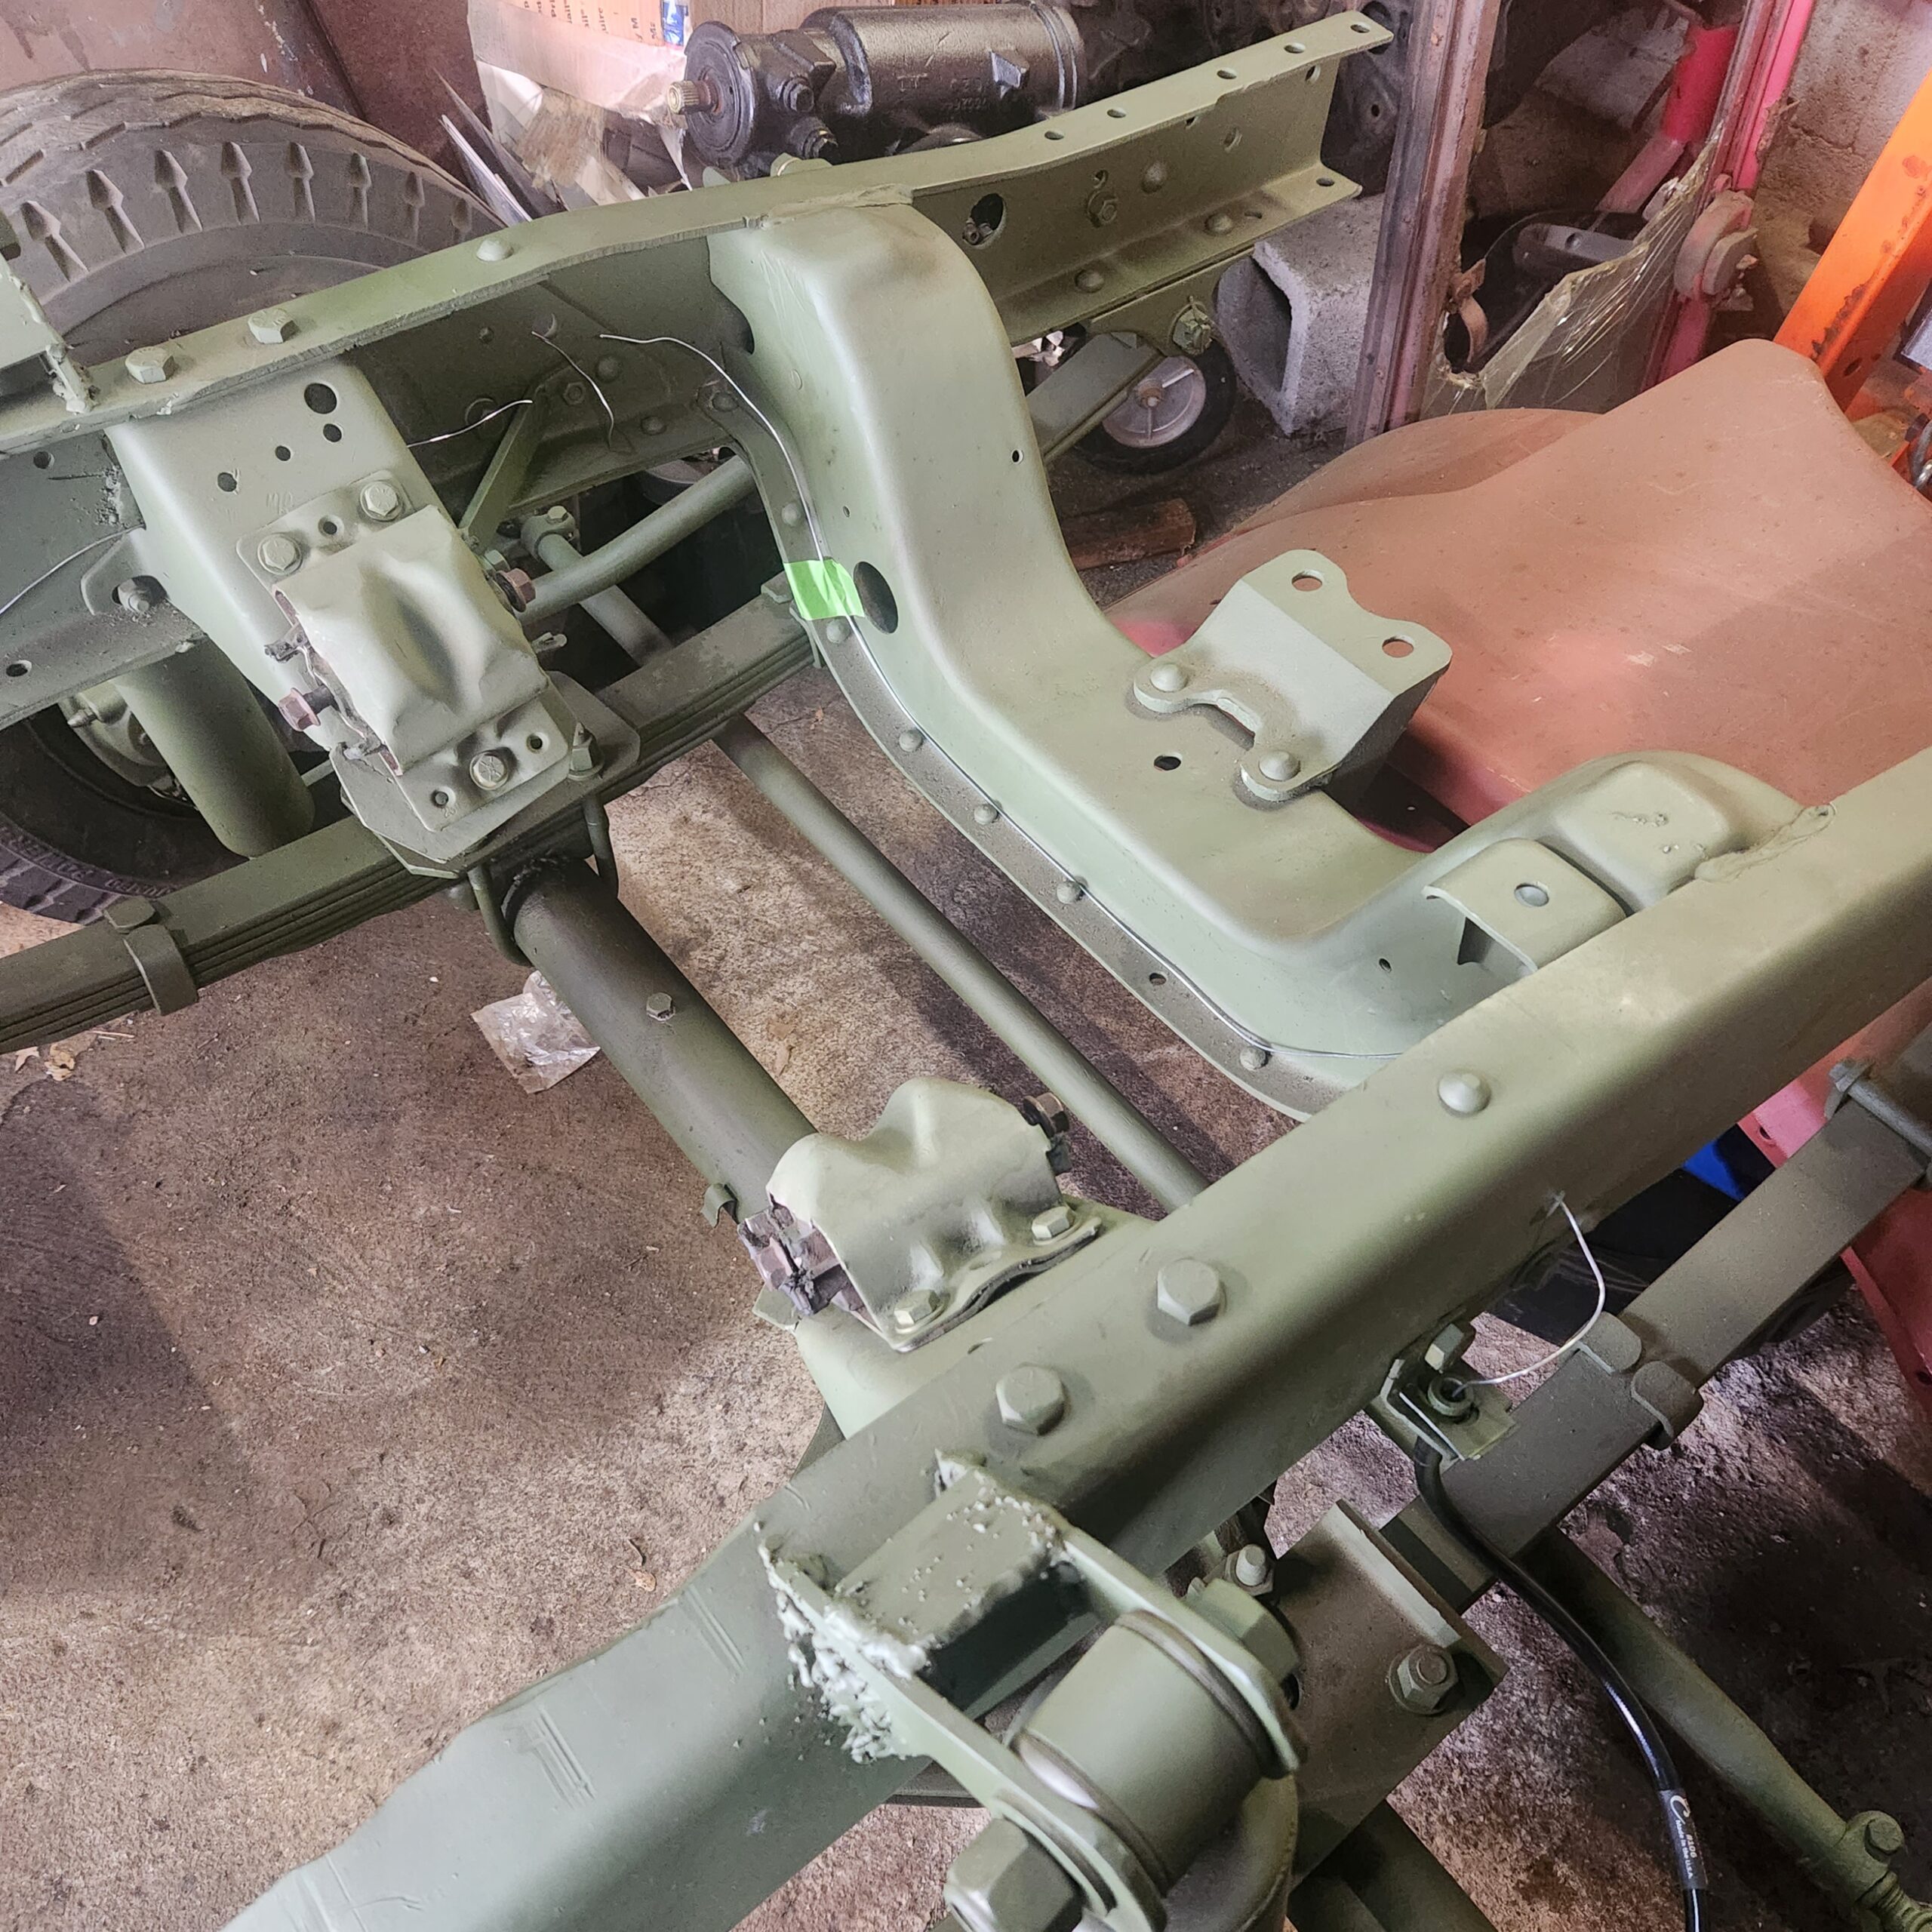
I then cut the line to length and bent them up and installed on the frame.
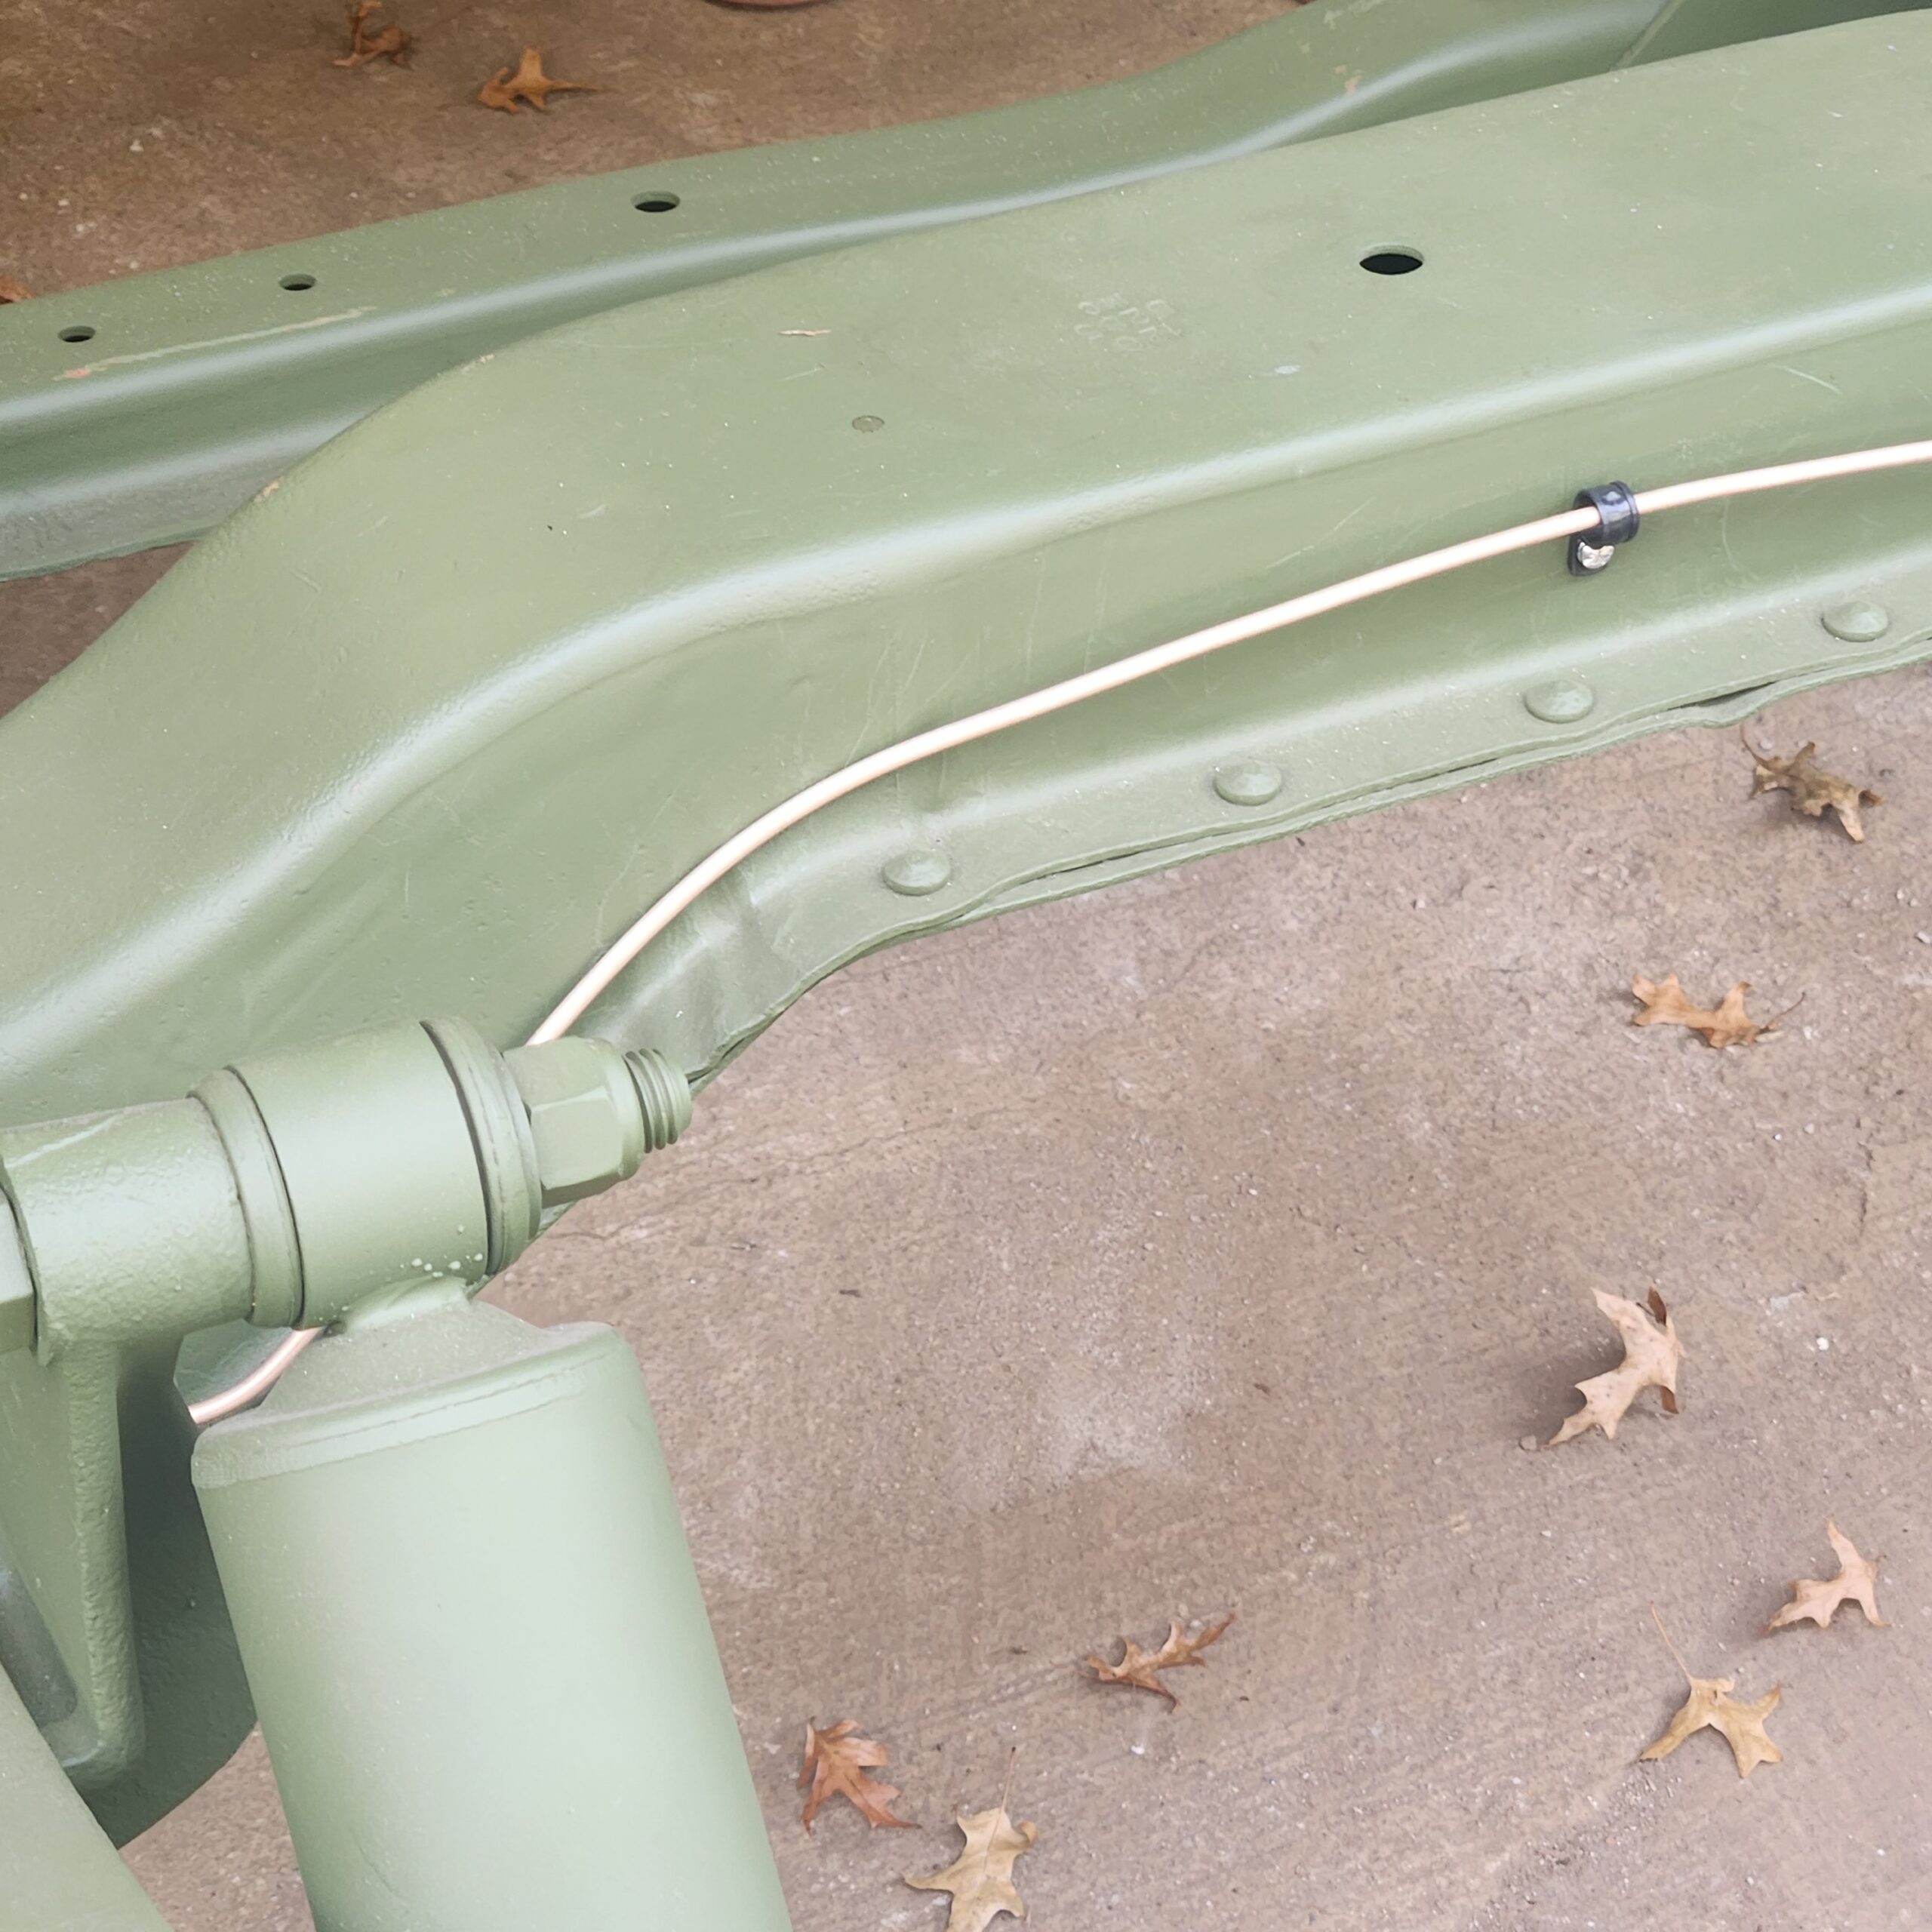
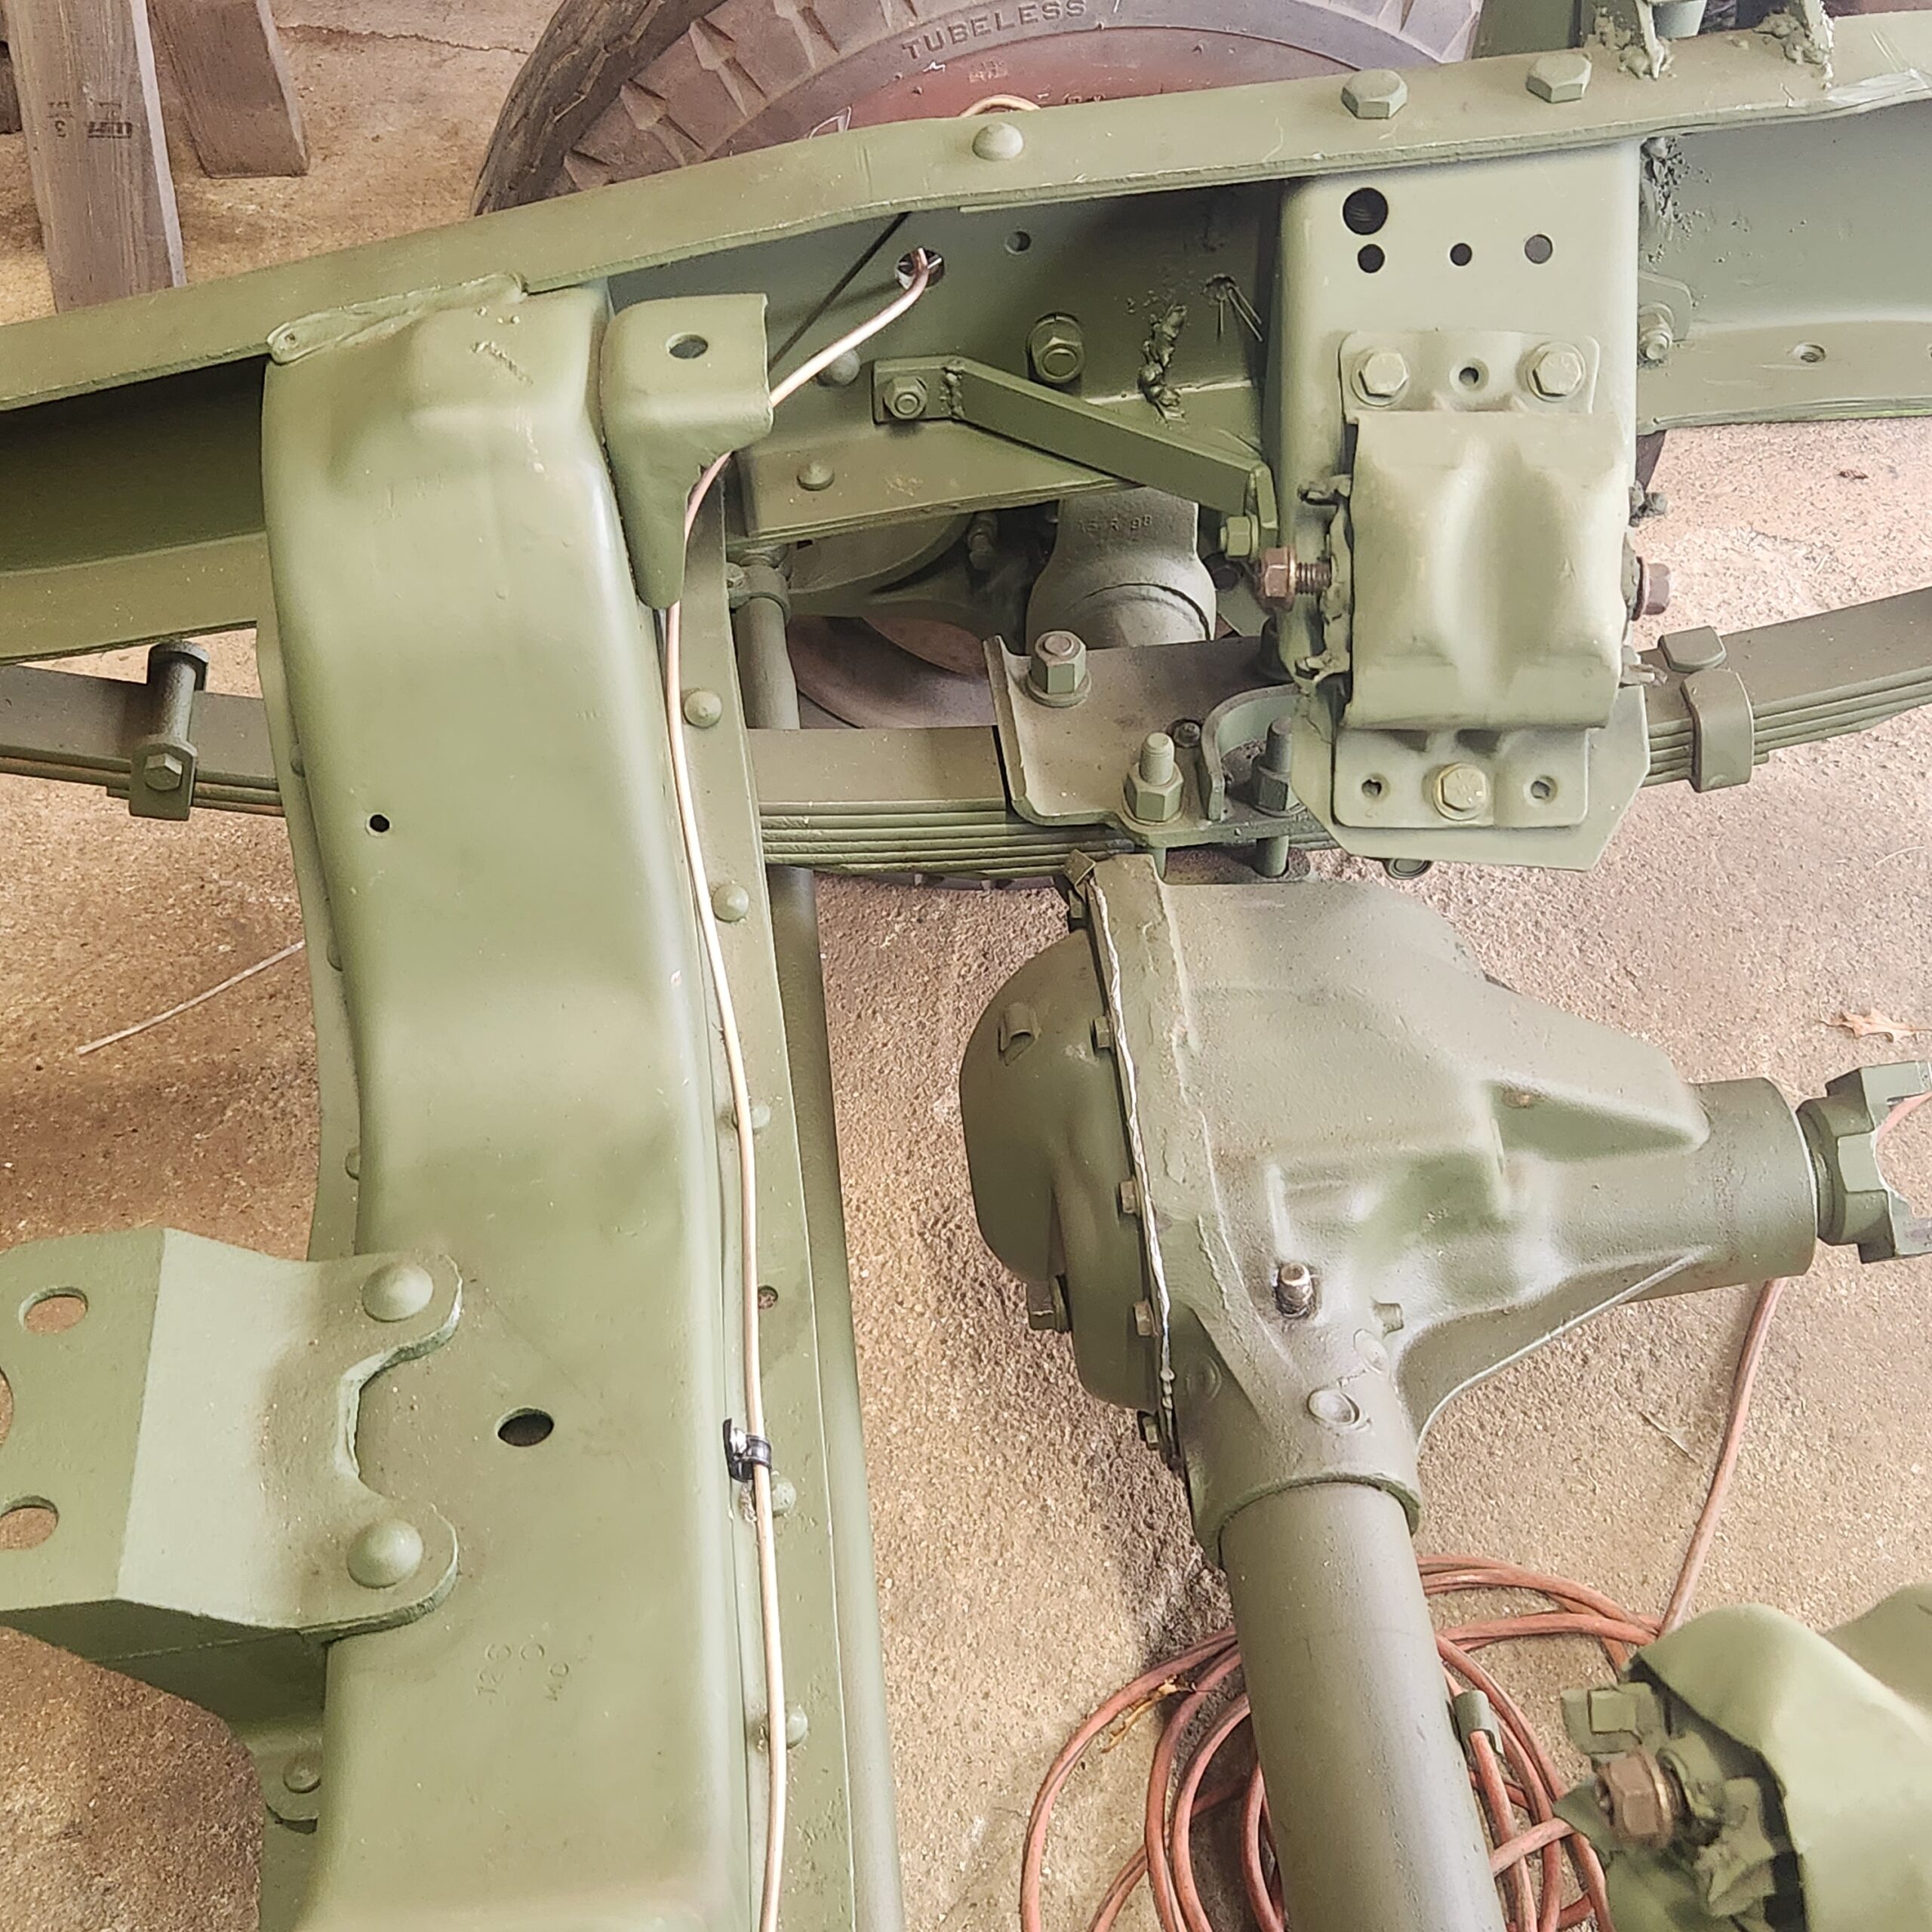
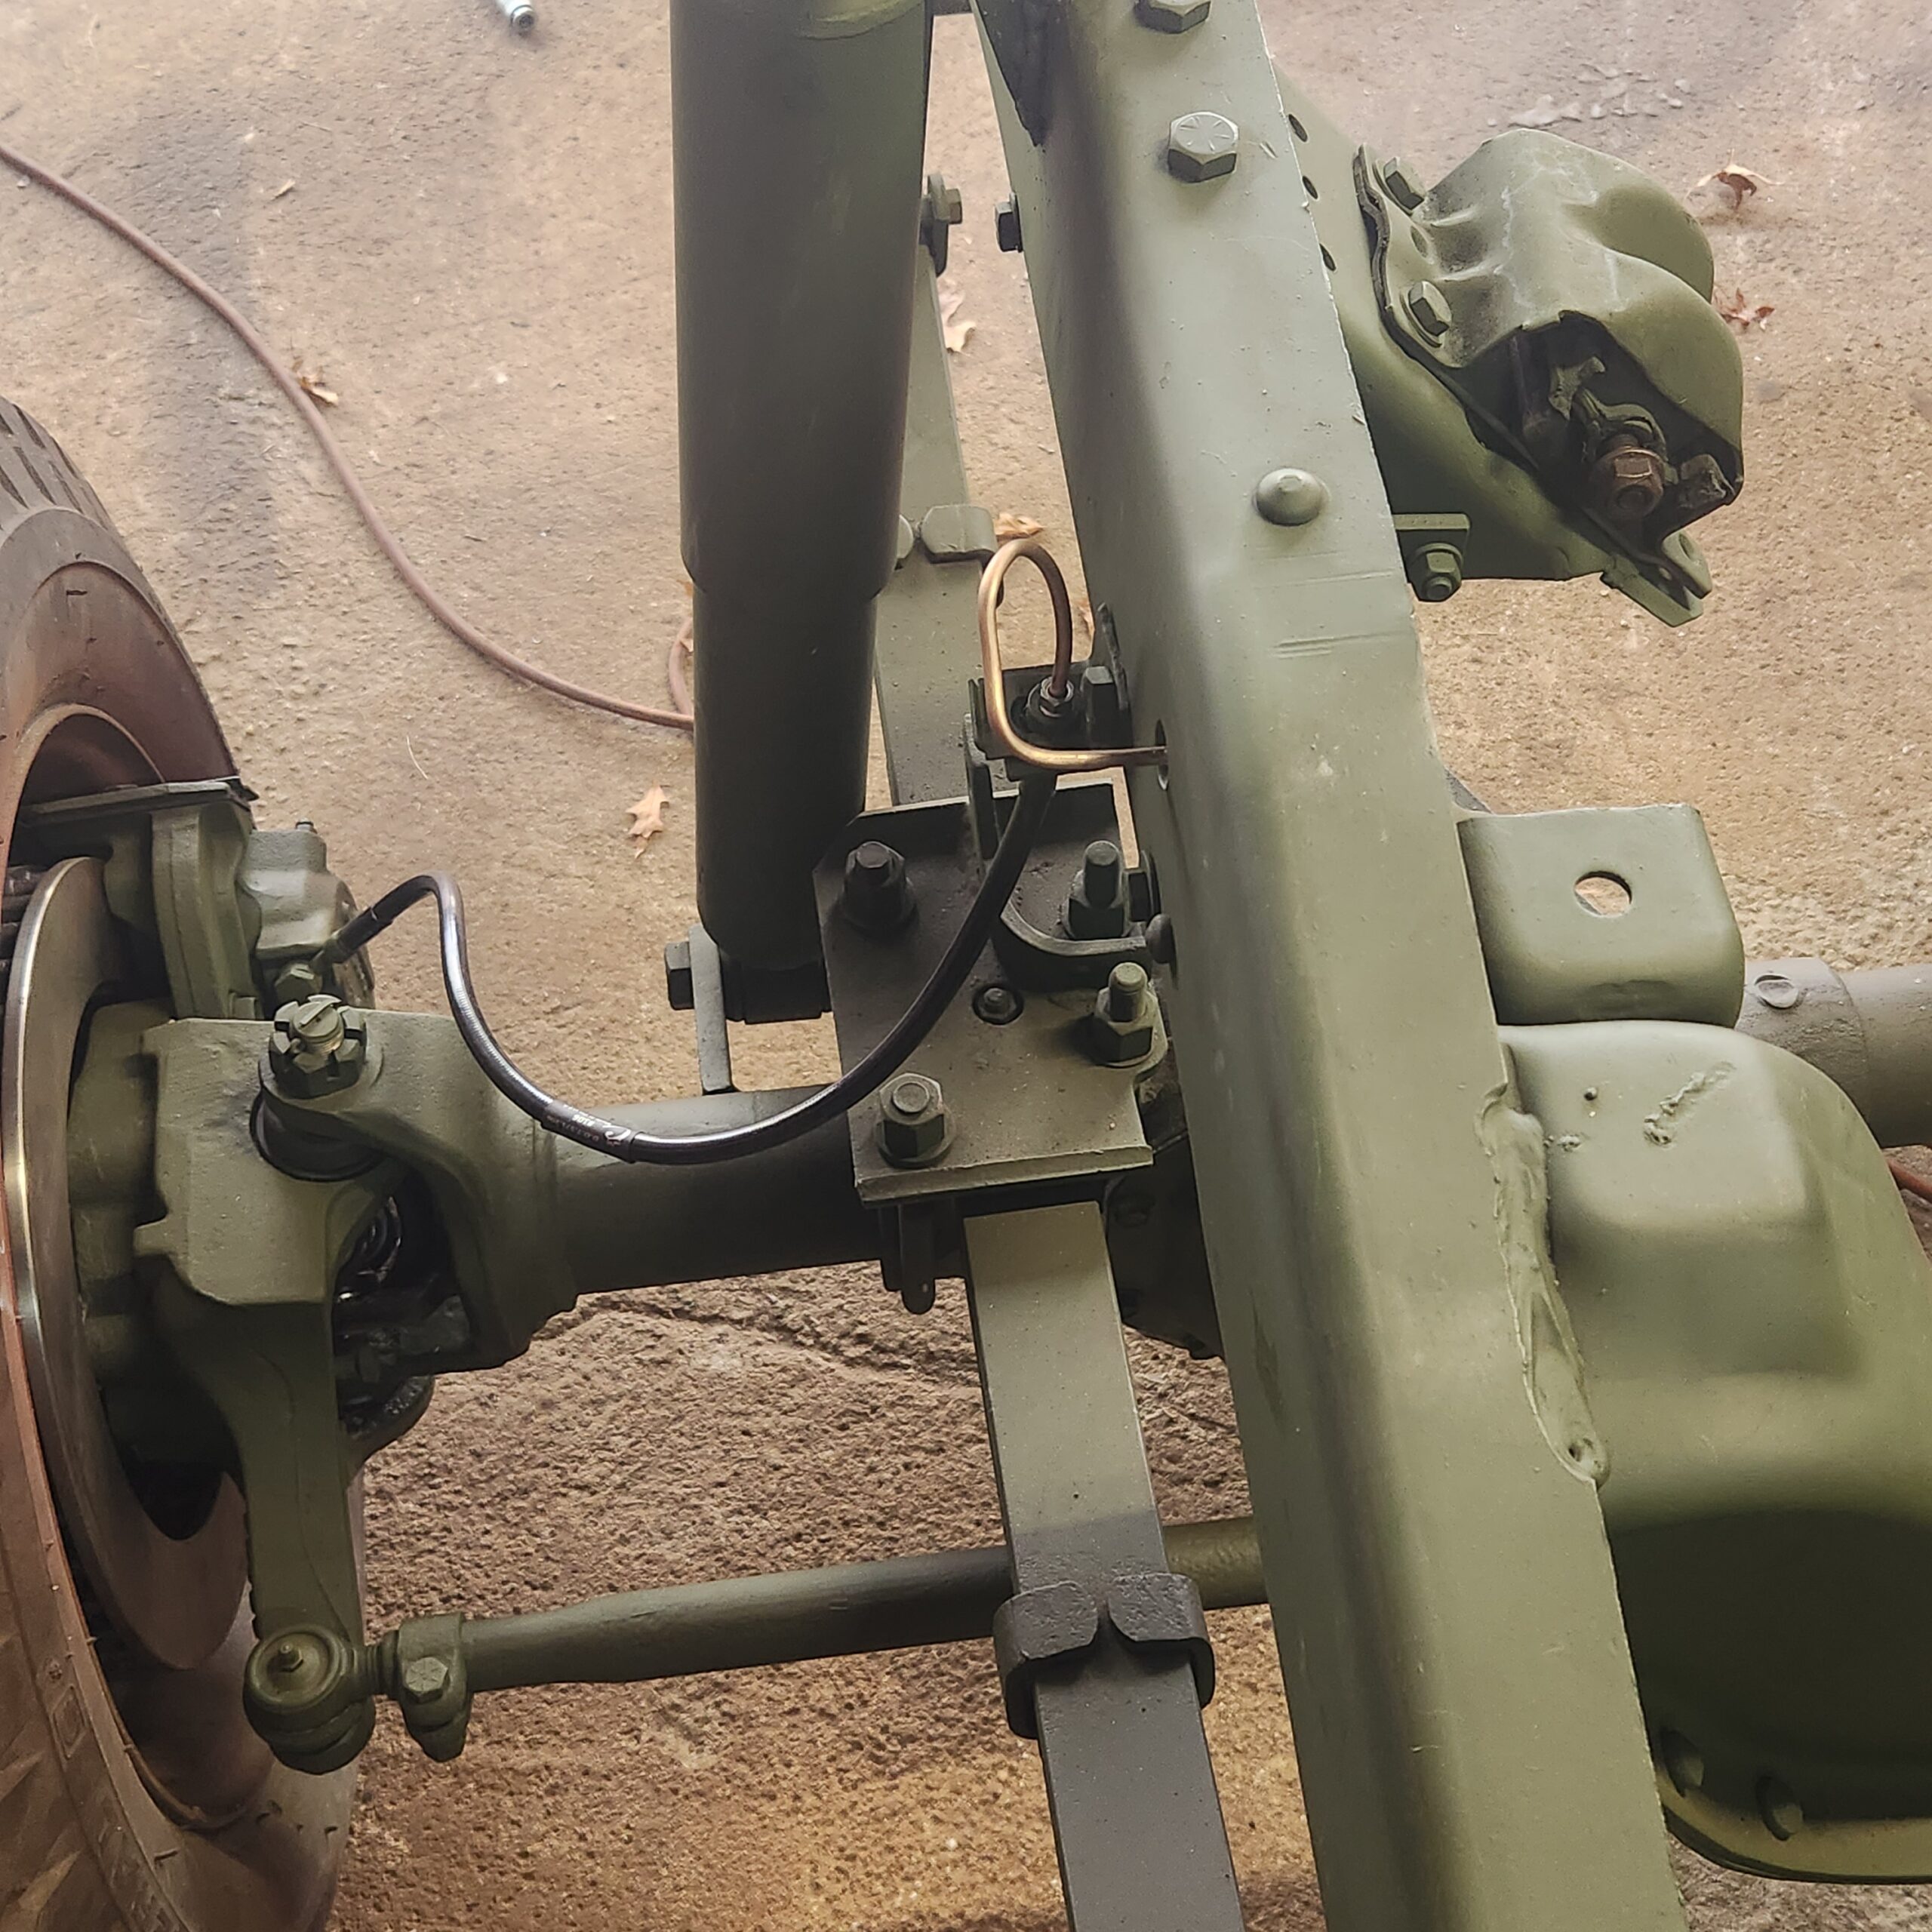
I have since put rubber grommets around the line where they go through the frame to protect them from rubbing against the frame.
I also installed a new fuel tank, but I'm going to put that in a different post so that it might help others. Here is the post. http://www.g741.org/PHPBB/viewtopic.php?t=9886
Stay tuned for more fun as it comes.
I got the brake lines run on the frame. I used 3/16 copper nickel brake line. It’s a modern line that is easy to bend and holds up to the weather. I started with picture wire that I ran as I wanted the line to run. This gave me a template to follow.
I then cut the line to length and bent them up and installed on the frame.
I have since put rubber grommets around the line where they go through the frame to protect them from rubbing against the frame.
I also installed a new fuel tank, but I'm going to put that in a different post so that it might help others. Here is the post. http://www.g741.org/PHPBB/viewtopic.php?t=9886
Stay tuned for more fun as it comes.
M37s are HMMWV in my world!

Re: M37B3 Project
Nice work Joe, don't give up!
Gary
Gary
Cal_Gary
1954 M37 W/W
MVPA Correspondent #28500
1954 M37 W/W
MVPA Correspondent #28500
Re: M37B3 Project
Well, I finally got back out to the garage for 2024. I decided to start working on the "craigslist" engine rebuild. Got the engine dug out of the rear of the garage and then I got it mounted to the engine stand. I wanted to check to make sure it was mounted correctly so I went to turn the engine on a 45 degree turn to see how it rotated in the engine stand. OMG the thing got away from me and flipped over so that the oil pan was pointing up and all the coolant and 4 quarts of motor oil flew out of the engine through the open ports on top which were now the lowest point my lord what a mess to clean up. My shoes are now designated working in the garage shoes as they when from gray to black with oil. I used 10lbs of cat litter to clean up the spill and still have a mess on my garage floor. But! I soldiered on and started tearing the motor down. It is stuck from sitting for 16 years...so that's my next step before I start cleaning it and making it more betterer.... More to come stay tuned.
M37s are HMMWV in my world!
Re: M37B3 Project
I am laughing. Both at and with you.
Now, I'll let you in on a secret to prevent that from happening.
Don't use an engine stand. I do all my building on a reasonably low 4' square steel table. I learned this about 30 years ago and have never used a tippy floppy engine stand since. I4, I6, V6, V8, gas or diesel. Only way to do the 6BT and the 1693's I've done.
"It may be ugly, but at least it is slow!"
Re: M37B3 Project
Years ago I built a 'rotisserie' out old an old M37 frame. It worked really well for the job, with widely spaced legs on big casters.
Indeed, those flimsy rebuild things are an accident waiting to happen.
Pow
Indeed, those flimsy rebuild things are an accident waiting to happen.
Pow
Re: M37B3 Project
These things always give anecdotes to tell future generations, like when I spent an entire morning grinding the hood to check for possible IDs till the point of making a literal mess of the room with all the palette color green can provide. Yeah, I destroyed the vacuum cleaner after.
The wife got mad.
Sebastian
(sorry, I only speak in METRIC)
(sorry, I only speak in METRIC)
Re: M37B3 Project
Well, a quick update on the engine. As part of this project I am putting a GM diesel in like that of a HMMWV. When I started this project I picked up a 6.2 out of a CUCV that had been a forestry service truck that had rolled down a hill while the engine was running. They guy I got it from told me this and I had no idea the condition of the engine but I got it at a very cheep price and it worked for all the mocking up I had to do. My plan at the time was I'll get this motor for mocking up and then replace it with a good rebuilt 6.5. The cost of a good 6.5 in 2008 was not that bad but now we're starting to get into some big bucks. I figured well I'd clean up the 6.2 and make it work. Nope. The motor is junk. The only way I could get the motor to turn over and only in a clockwise rotation was to use some brute force. I started taking the motor apart and found that the connecting rod bearing for pistons 3-8 are bad with 4-7 being just a little scored, 3 being a little more torn up and #8 completely trashed. The crank is spun on #8 and #8 was what was keeping the engine from turning. According to many sources the GM cranks can't be reground. Adding all the parts up to rebuild the 6.2 I'm at the cost of buying a good takeout 6.5 HMMWV engine. So, yeah I'm on the hunt for a good 6.5 motor. If you or anyone you know has one let me know.  In the mean time I'm working more frame things like finishing the fuel lines for the fuel tank, primary fuel filter and fuel pump. Also installing the rear wiring harness which I will post more about with some pics soon.
M37s are HMMWV in my world!
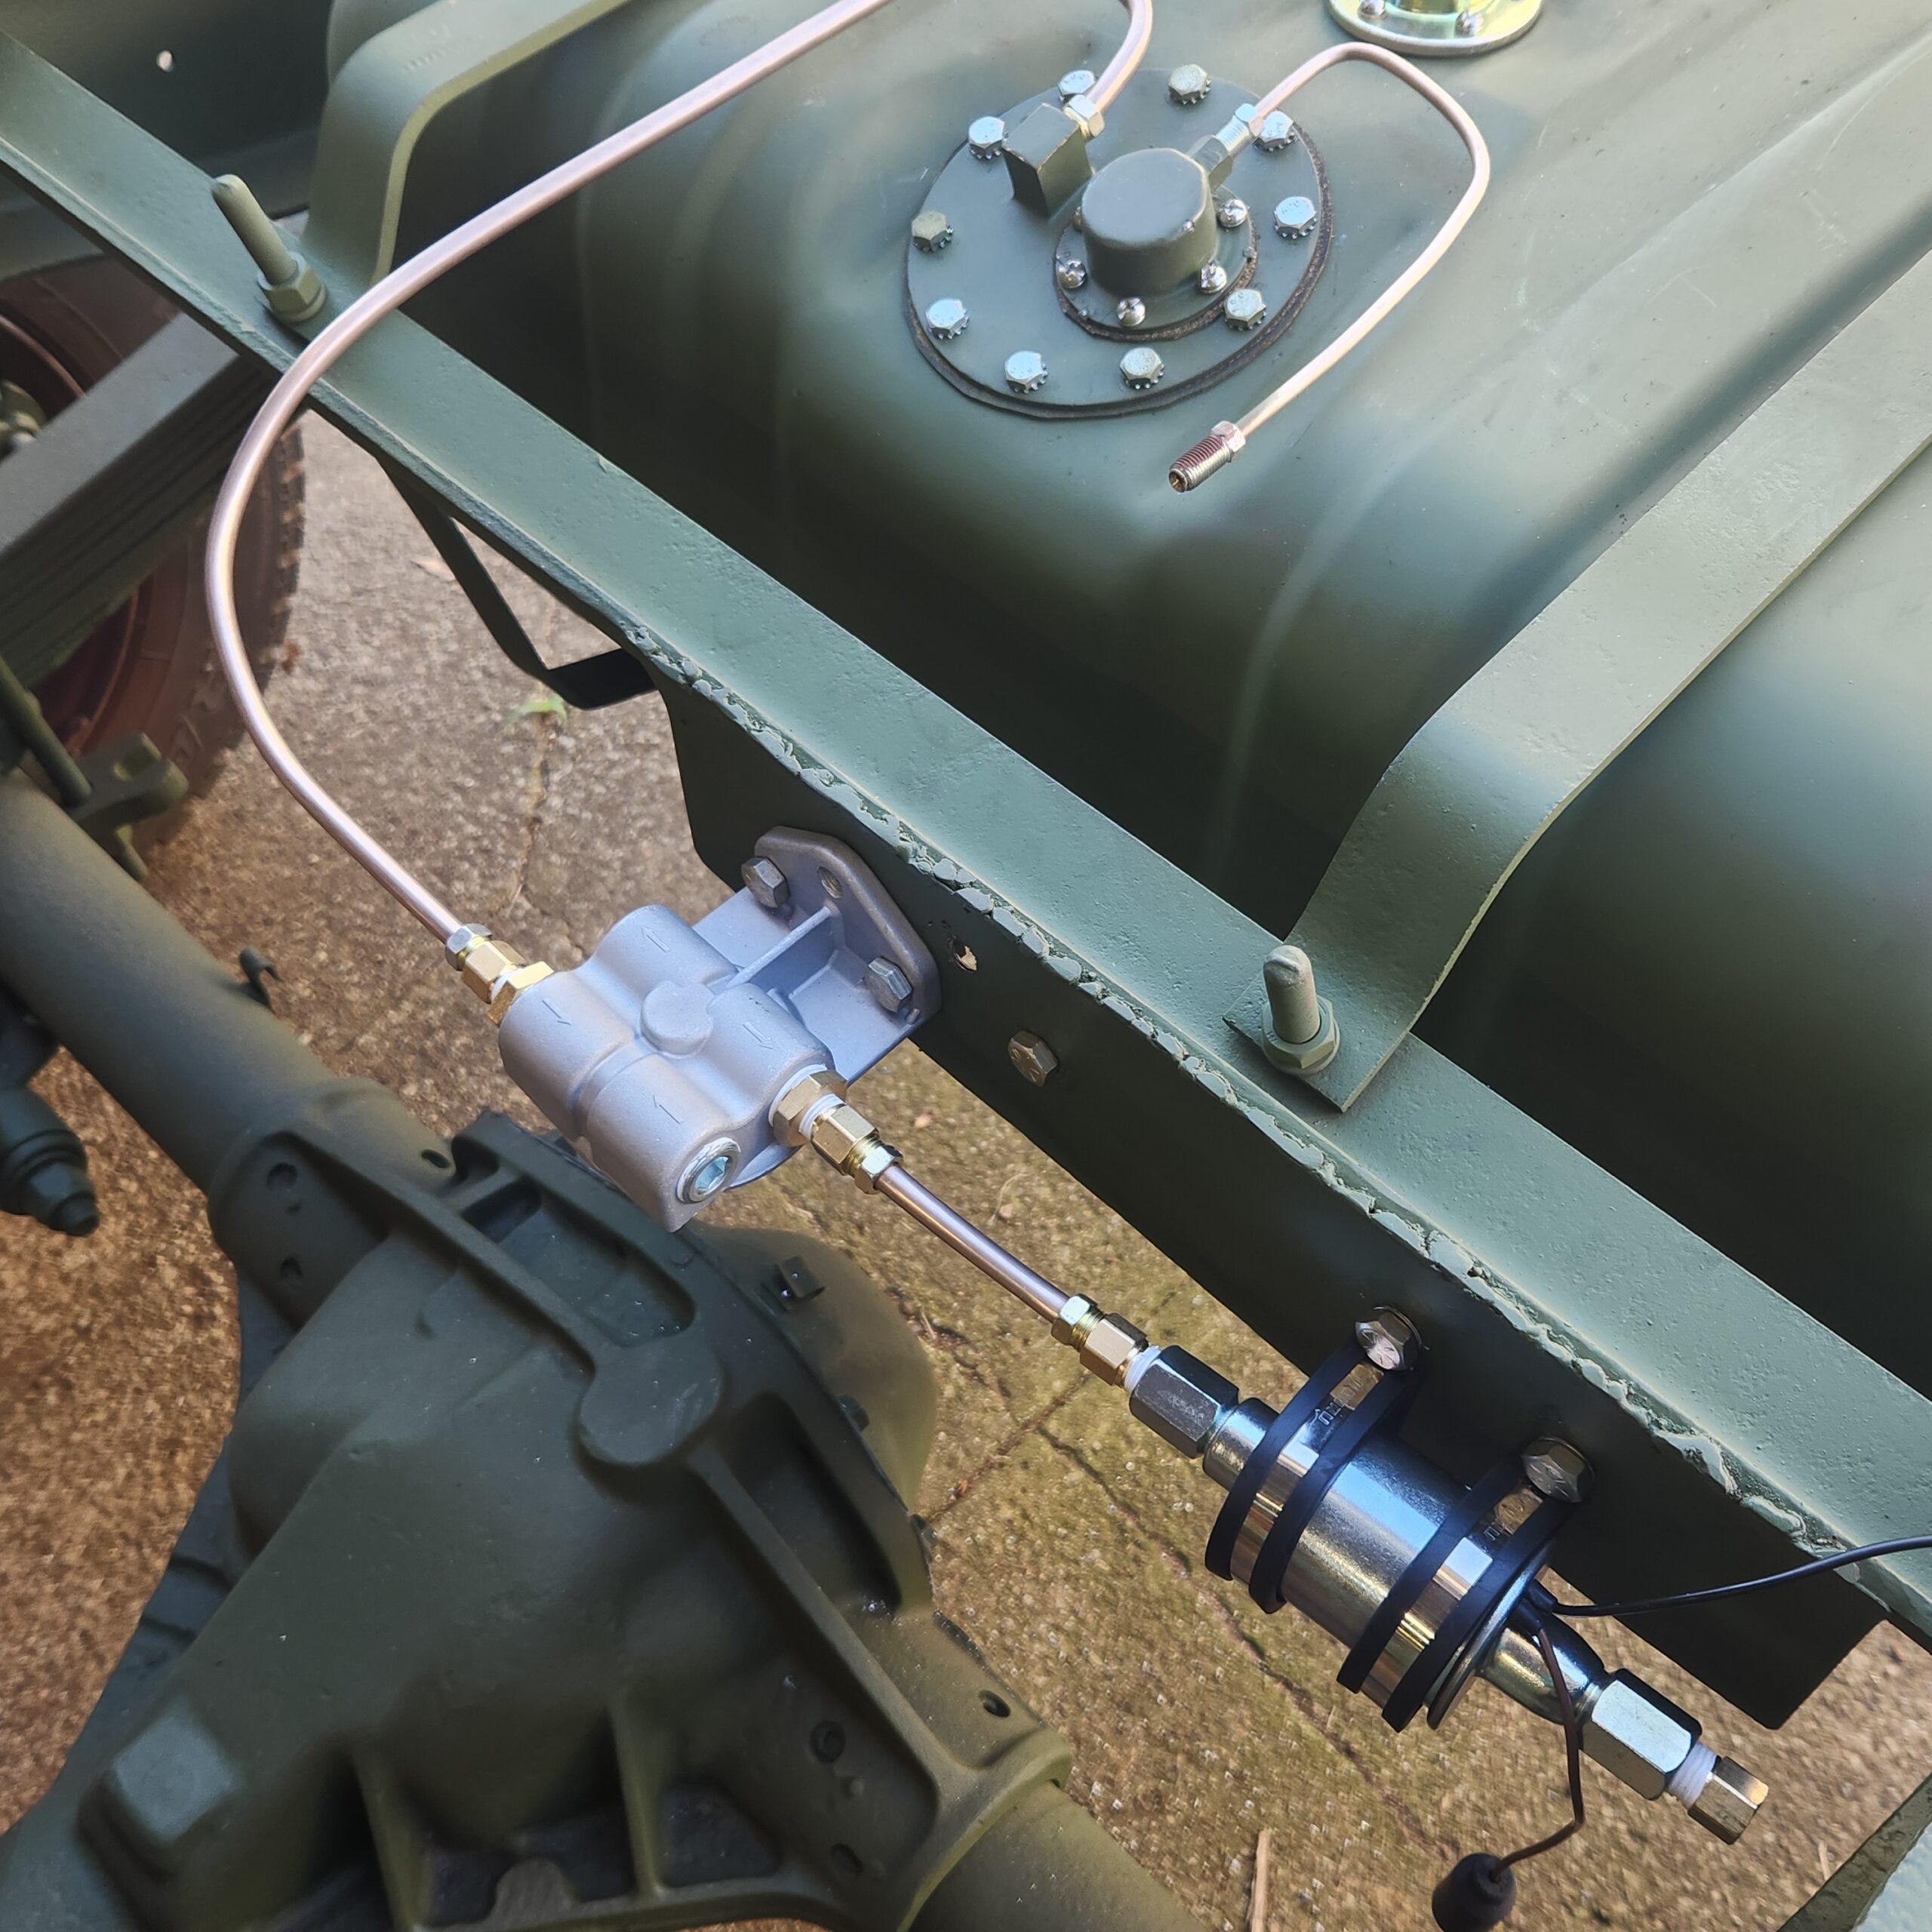
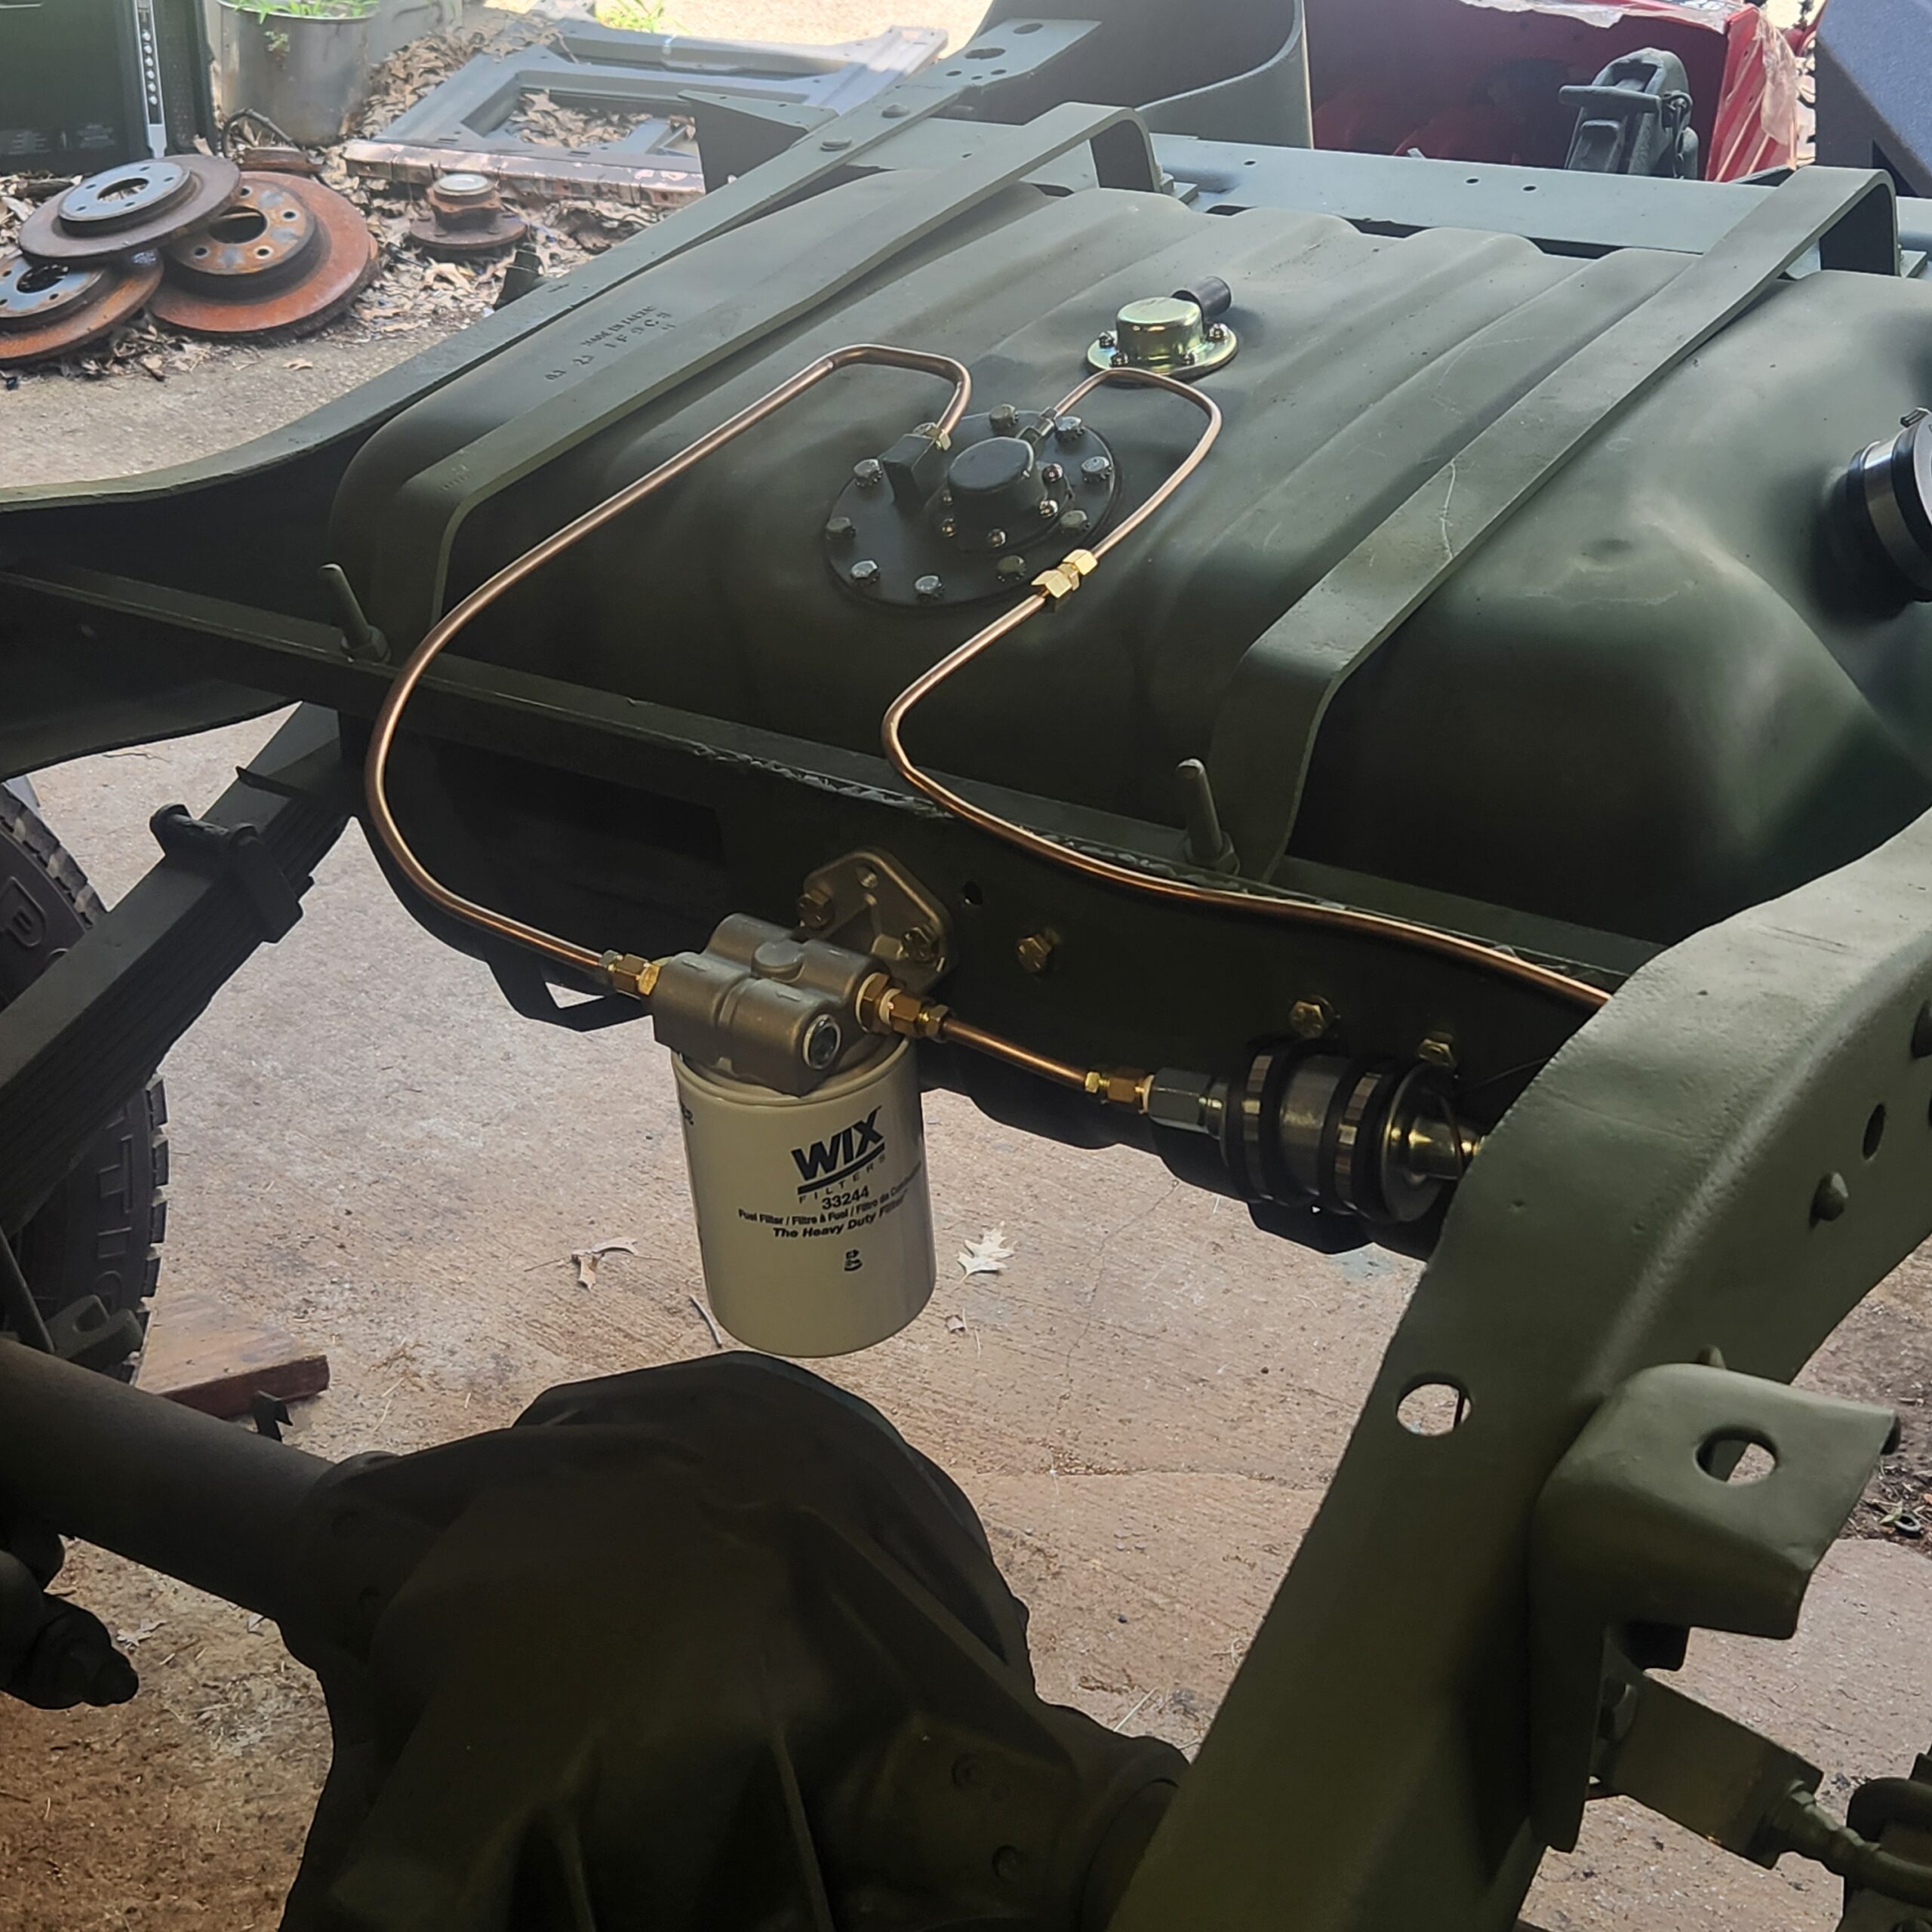
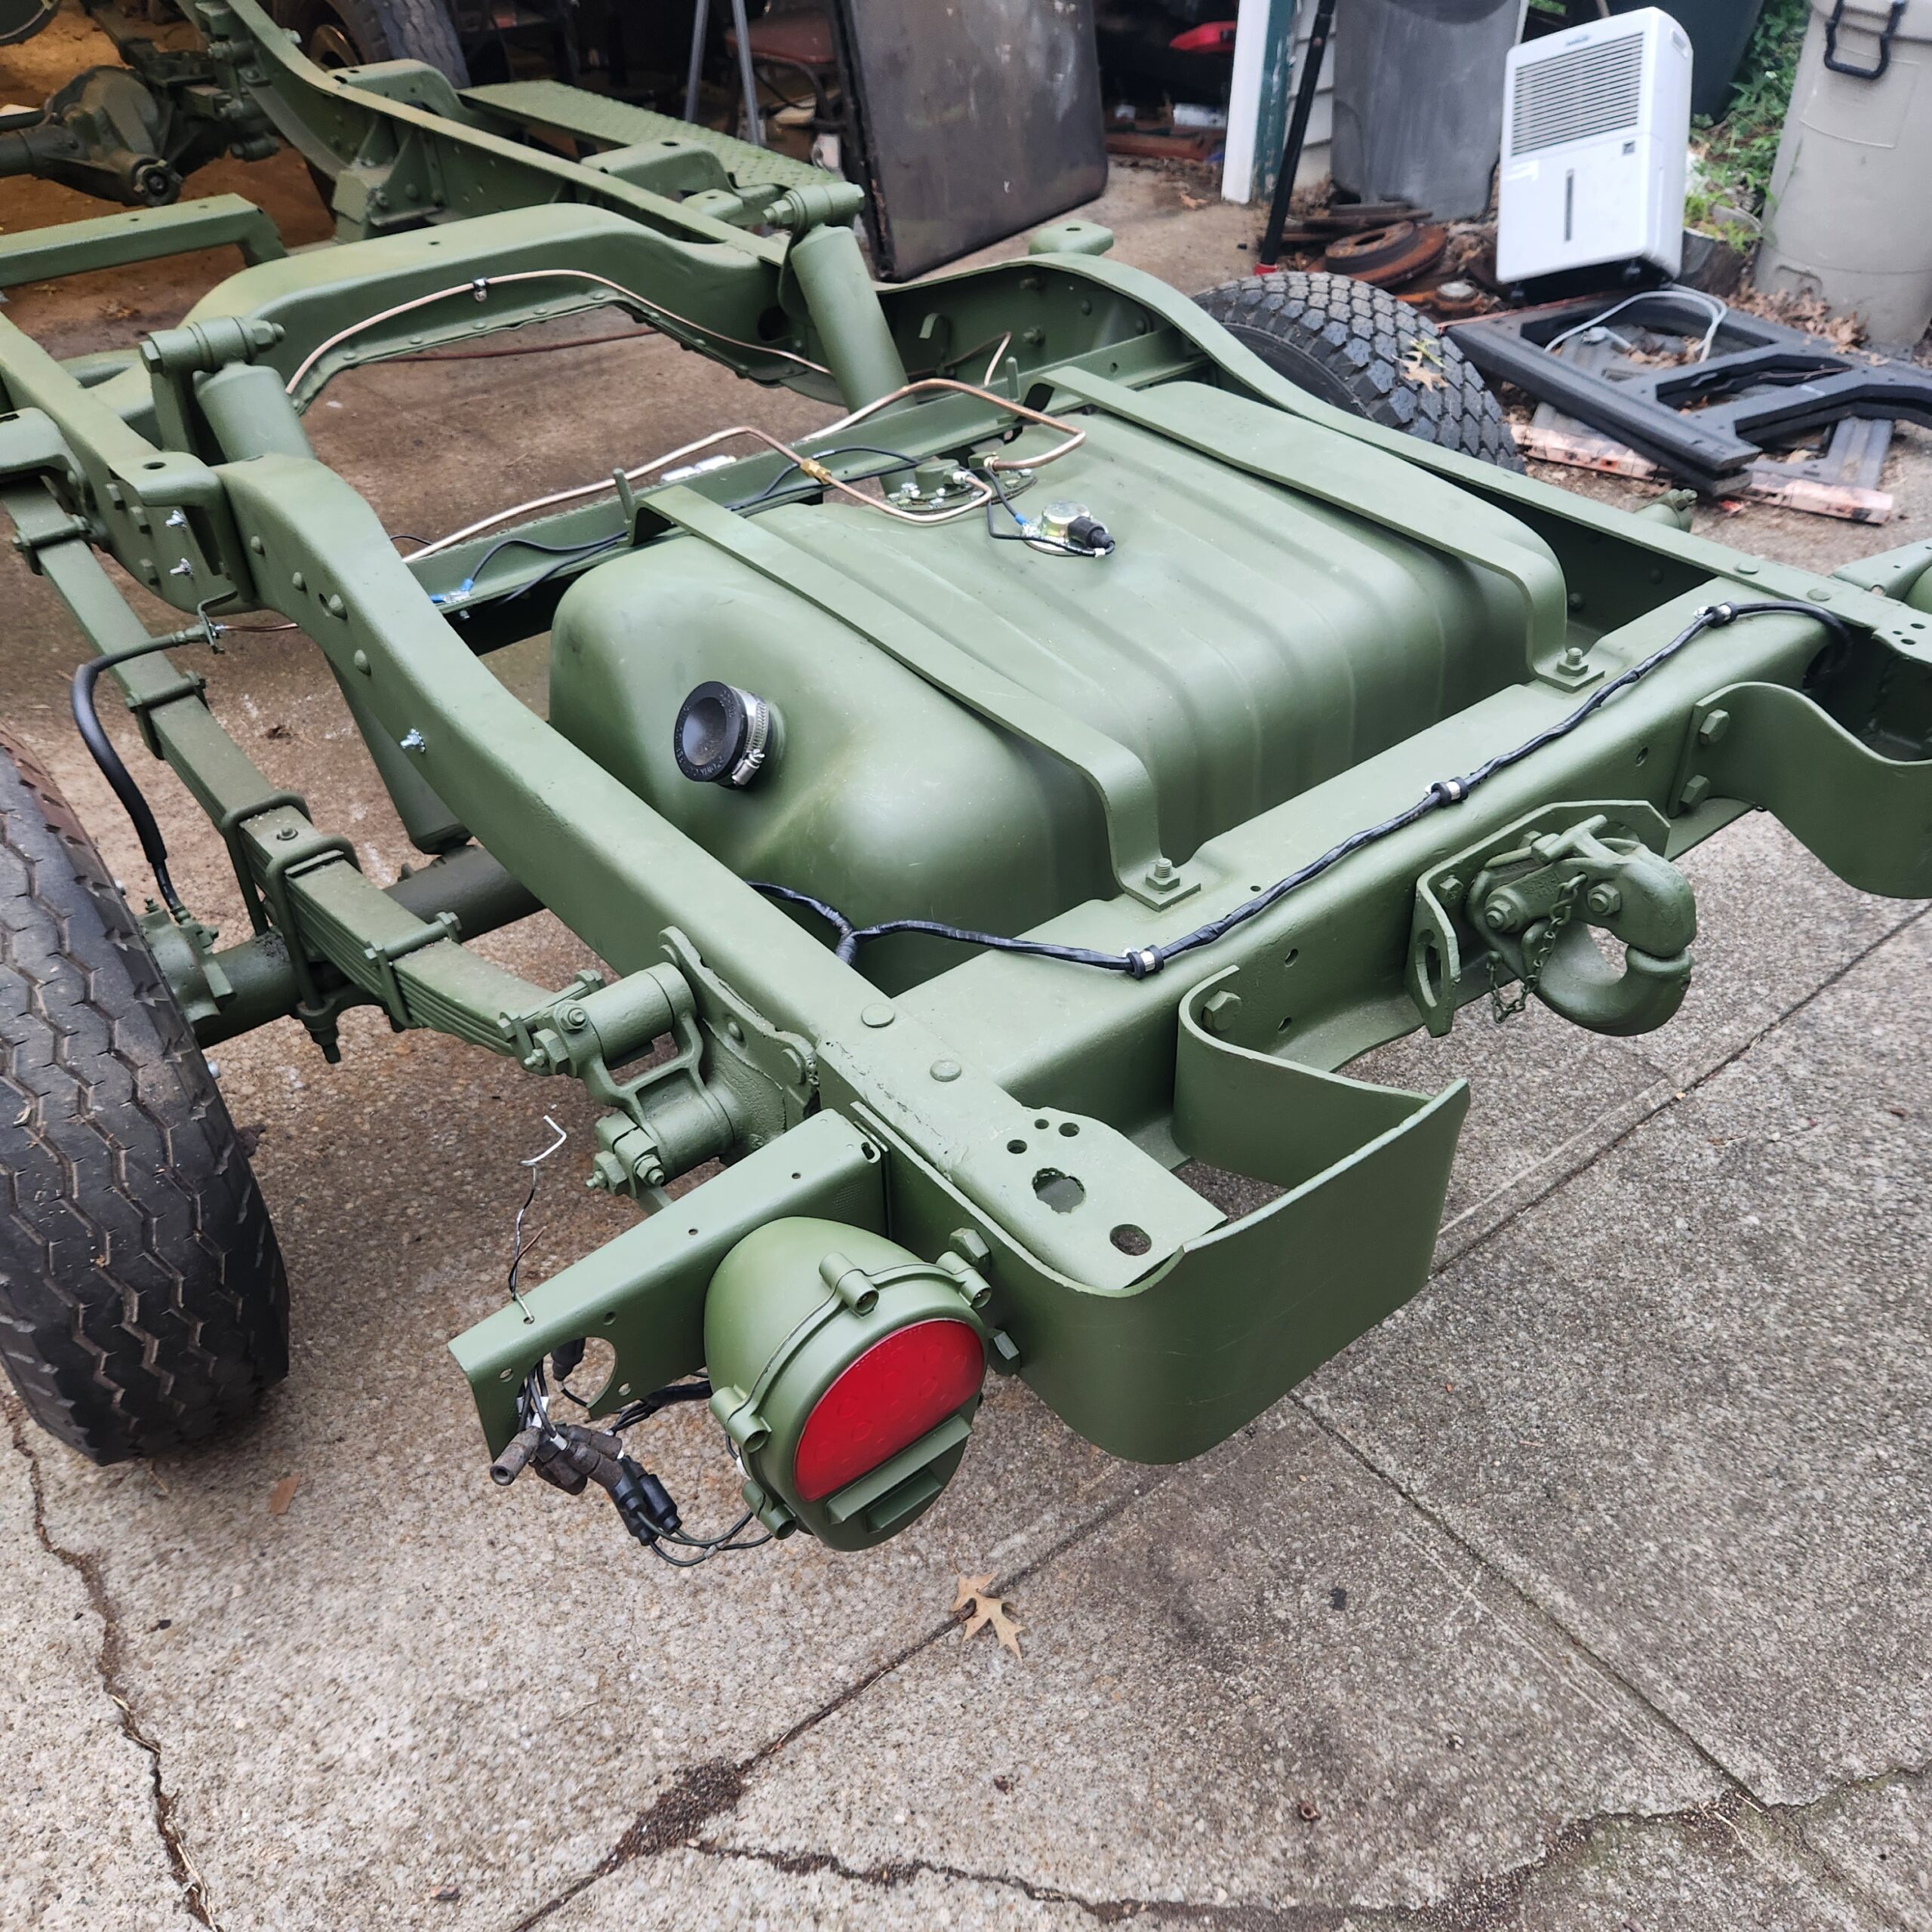
Re: M37B3 Project
I'm making a little progress on the frame. I got the primary fuel filter installed as well at the fuel pump. (Fuel pump is a 24V with the correct gpm to fuel a GM Diesel. I also installed the main fuel line as well as the fuel return line. I also got the rear wiring harness and tail lights installed. Those who know all about M37s wiring will notice that the wiring is running down the driver’s side frame rail and not the passenger side as it is supposed to. That is because I'm using a NOS M151a2 wiring harness because a M151a2 wire harness was a lot less money than a M37s wire harness. Also, it has the more modern Packard connectors, and all I had to do was extend it about 4 feet in length which I did with military wire and heat shrink butt connectors. Took me about 40 mins to extend the harness and add the power wire for the fuel pump and lengthen the fuel sender wire and rewrap the harness. I'm very pleased with how it worked out. I just need to pick up a trailer socket and figure out if I'm going to use stock covers on the tail light brackets or design my own. Here is what it looks like
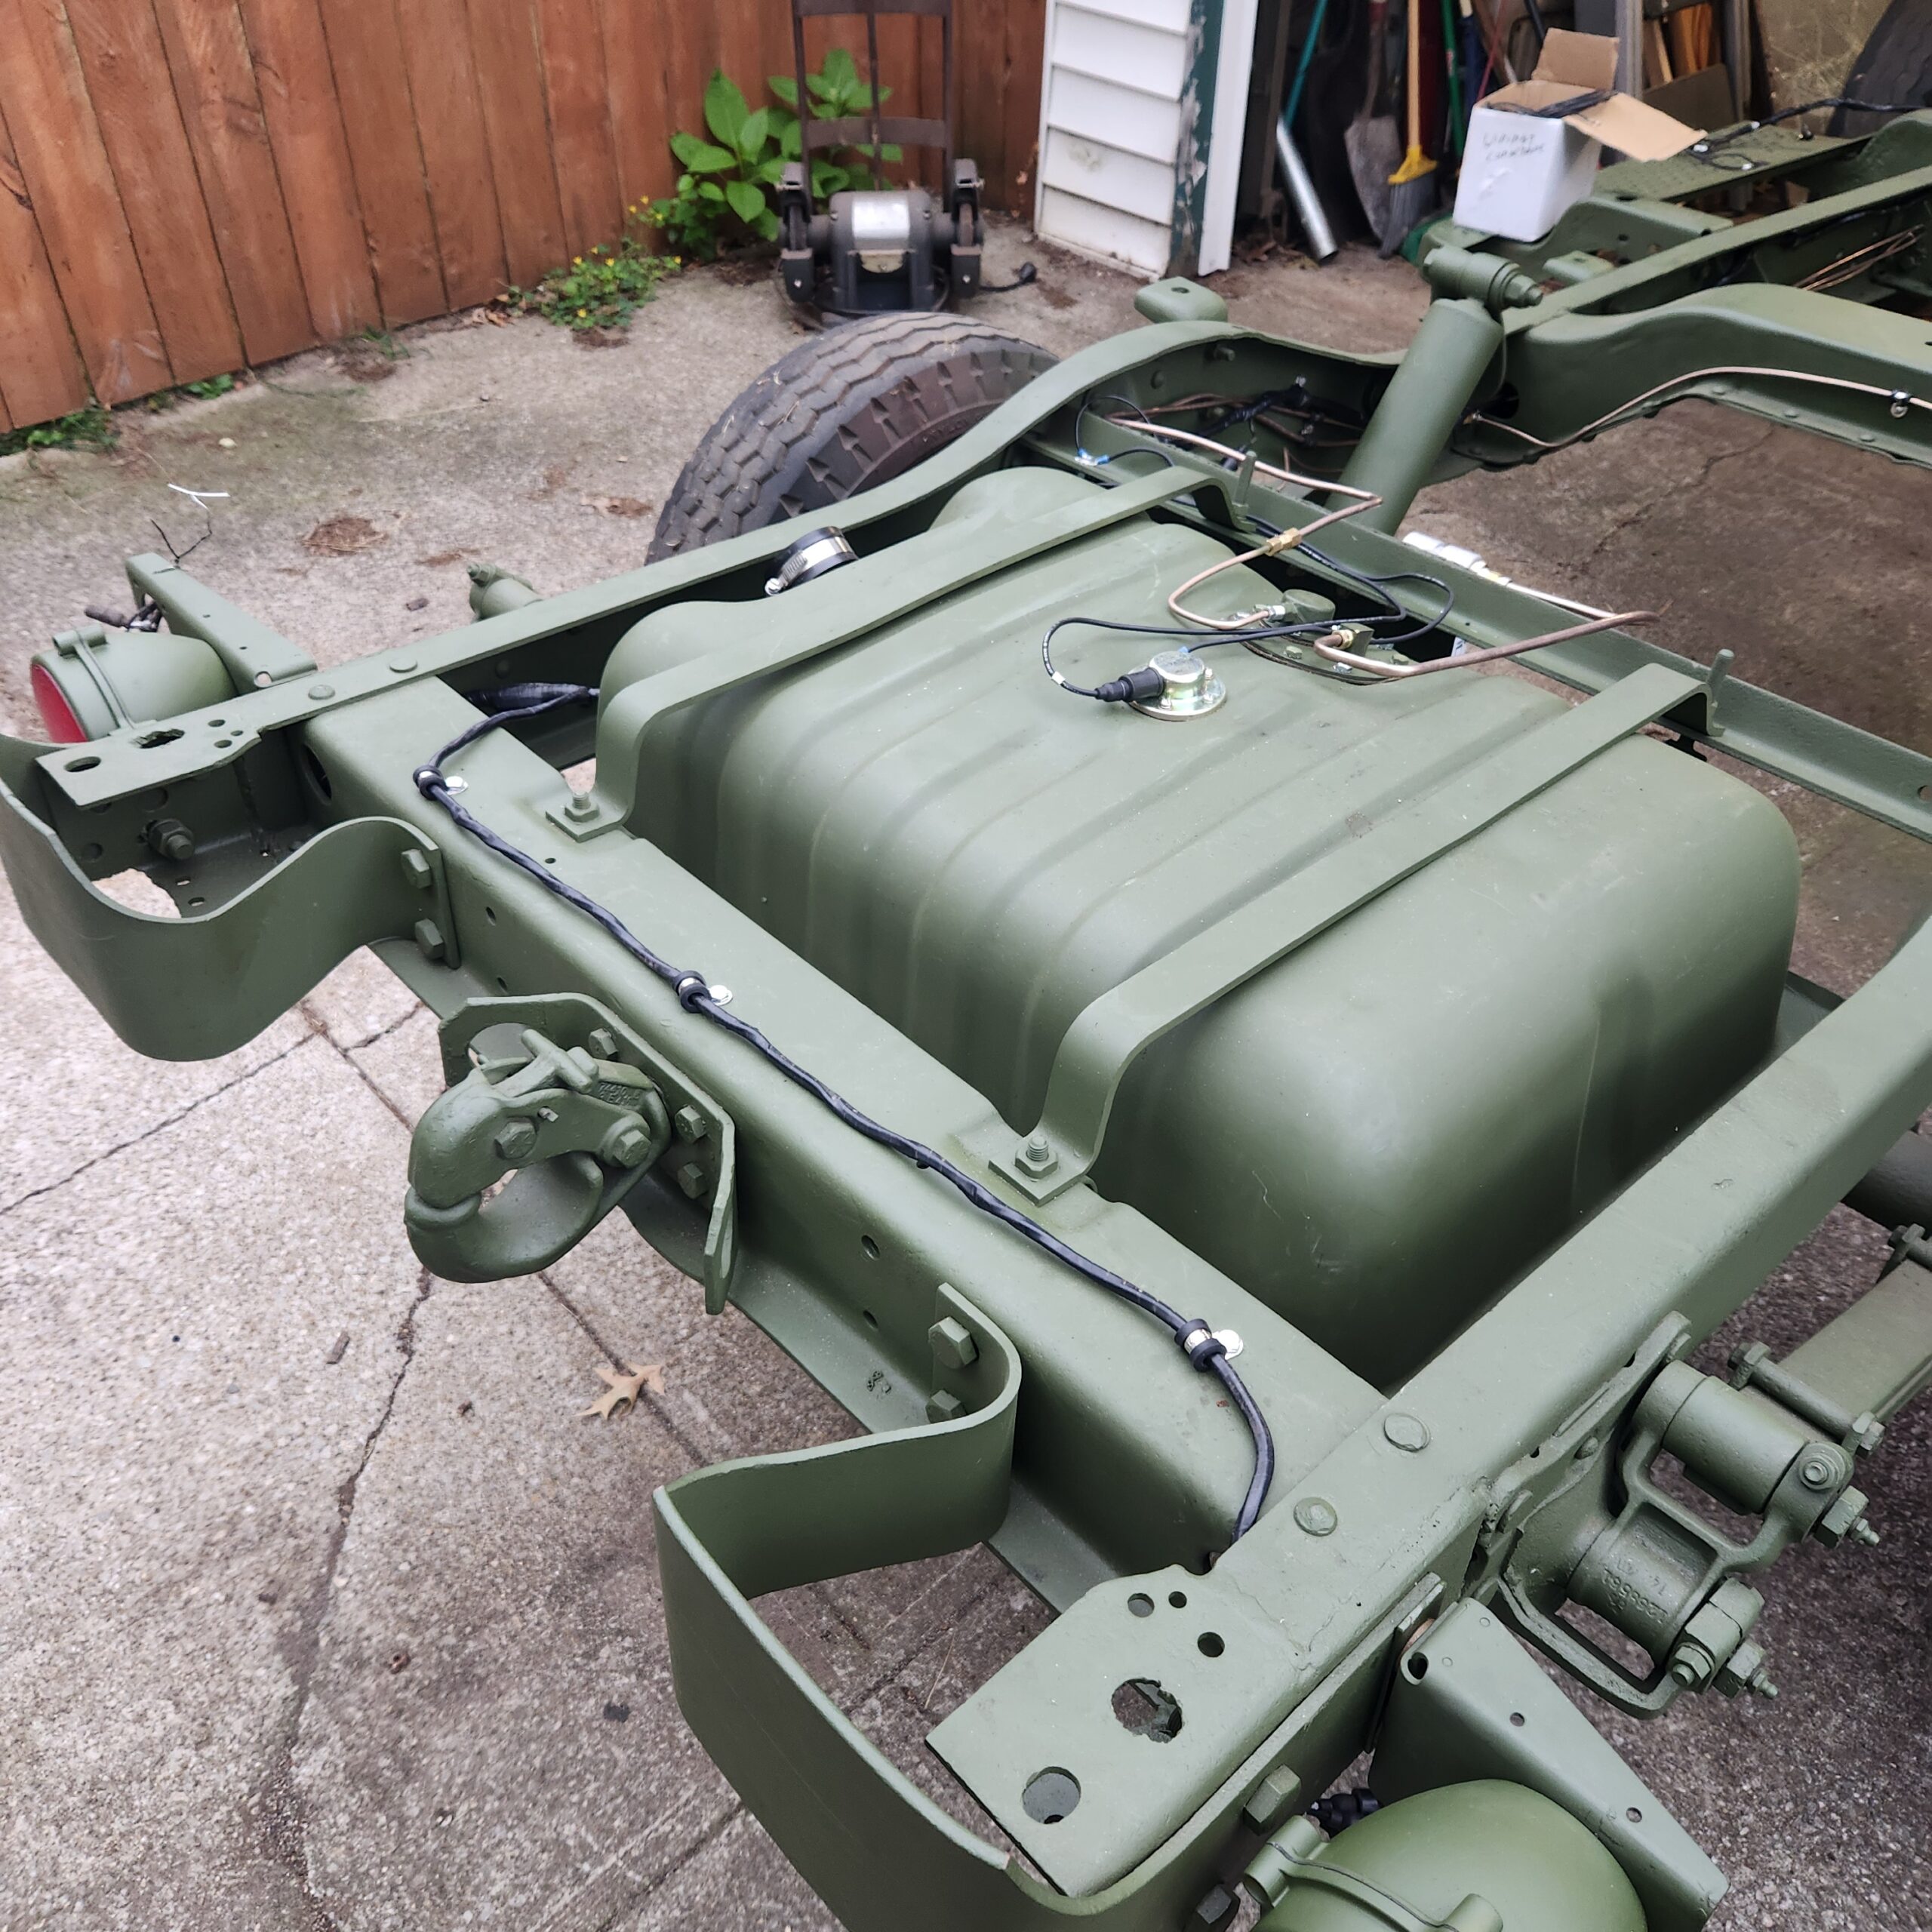
M37s are HMMWV in my world!