Page 3 of 12
Re: Grandpa’s M37
Posted: Sun Dec 13, 2020 10:48 am
by greeno
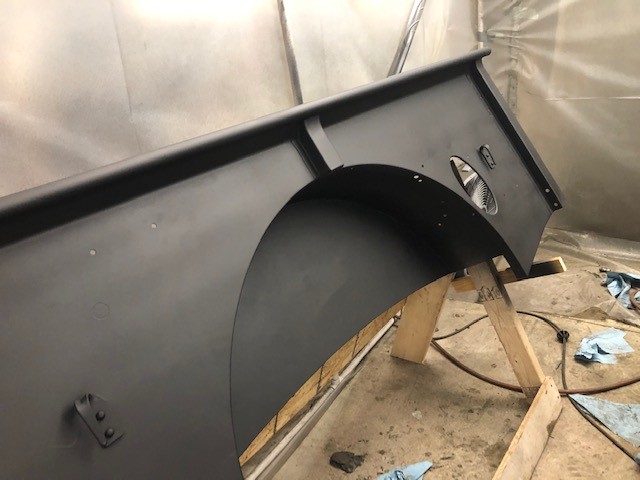
Strippin’ paint, coating with Ospho. Now I have a sanding booth and coating booth. Jealous of you guys painting outside in the winter, the garage is a mess!
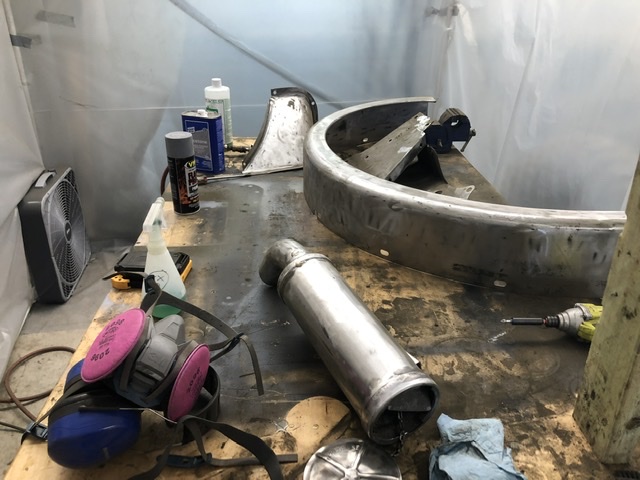
- 0B50910D-1838-4FC2-8455-E05FC47B8F2E.jpeg (99.02 KiB) Viewed 3312 times
Re: Grandpa’s M37
Posted: Sun Dec 13, 2020 10:35 pm
by Cal_Gary
Nice work!
Gary
Re: Grandpa’s M37
Posted: Mon Dec 14, 2020 4:22 am
by NAM VET
I had half of my garage packed with parts for almost a year, and did the truck outside, but in UpState SC, it was usually ok to do whatever project I was on outside. When it was done, well, these trucks are never really "done", I just was so happy to also have my garage back. Used two quarts of Ospho, too. Looking good,, NV
Re: Grandpa’s M37
Posted: Wed Dec 16, 2020 12:40 pm
by greeno
Only two quarts? I might be too liberal with my application lol. I just ordered another gallon after seeing how far my quart went.
Re: Grandpa’s M37
Posted: Thu Dec 17, 2020 5:05 am
by NAM VET
I am sure you know how to use the Ospho, and how how it seems to work. I think it is some sort of acid, and isn't like some of the other products, where you wash it off, and have some sort of phosphate dust left over. I dried it into seams, like the rolled edges off my finder, and after wiping it onto my metal, I wiped it off, leaving just a thin "coat", and let it dry or whatever it does, overnight or longer, and then painted over it. For under my dash, and hidden places, I sprayed some Cavity Coater, a wax like spray, the solvent evaporates, leaving a waxy coat. Inside my doors and such. Used my HVLP system and thinned the Gillespie oil based paint with Xylene, for spraying over my primer, which I think was Rustoleum. I did not use any two part epoxy paints. For the stencil numbers and warnings, we got them from MilStencil and after masking my son sprayed very thin layers right on top of each other, a few minutes to flash dry, used White Gloss Rustoleum, gave perfect edges. We moved the door star up about two inches from center, otherwise if centered the stars just look a bit low on the door. I was lucky with rust, former owner kept it under cover on his farm in Nebraska for twenty years. Virtually no fastener was too rusty to remove, and for just about all the non-showing bolts and nuts, I bought grade 8 in bags from my Fastenal store, hundreds of dollars worth. And I had a lot of left over ARP stainless steel too. I replaced the felt between things like the tunnel with a rubber based tape product. Got what I needed for remaking my vent and fuel and brake lines from another company, he cautioned me that the flare fittings he has are fine, but to reuse my copper nickel "joining" threaded brass ends again, as they are hard to get in quaintly. Always check the ends of your threaded line connections to be sure the flare's are symmetrical inside. I replaced my mechanical fuel pump with a Facet 24v pump, and and used a modified block off plate for my secondary full flow oil return line, with AN 10 ss hoses. That was a thousand dollar project, but gives me a switched full flow filter system in addition to the by pass system. I hooked up my wipers to the fitting on the rear of the intake manifold, works ok. Your work looks first class. Be safe, Hal
Re: Grandpa’s M37
Posted: Mon Dec 21, 2020 6:41 pm
by greeno
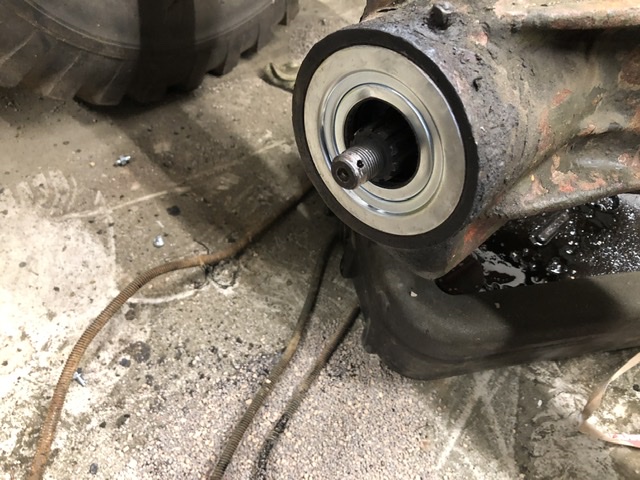
Taking a break from sanding, so replaced the rear pinion seal. Had to break down and buy a oxy/MAPP torch. A tank of O2 later and the seal fell out. Run a shrinker bead all the way round. Could have skipped all the pounding.
Used some anaerobic sealer around the OD of the new lip seal housing from MWM. Waiting on a Speedi sleeve. I don’t want to do this job again!
- FF75EF37-6194-4D65-87D1-6B001DDEF4A9.jpeg (131.15 KiB) Viewed 3248 times
- FEA20E2F-107D-499E-98B7-8D88E5B90903.jpeg (108.48 KiB) Viewed 3248 times
Re: Grandpa’s M37
Posted: Mon Dec 21, 2020 10:11 pm
by Cal_Gary
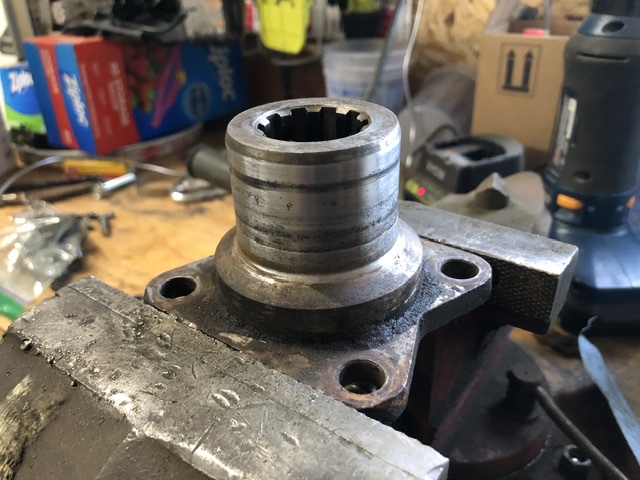
Man that yoke looks all too familiar-speedy sleeve is right!
Gary
Re: Grandpa’s M37
Posted: Tue Dec 22, 2020 5:55 am
by RCrombie
I just went through this job as well, but luckily my seal came out without too much effort. I opted to replace the old leather seal with a new SKF seal, reusing the old seal housing. I also replaced the nut on the pinion gear as it was all cracked up too.
My flange has a large dust shield on it too, unlike yours.
Your finished product looks great. Was the shrinking bead just to reduce the interference for a little?
Cheers
Rob
Re: Grandpa’s M37
Posted: Tue Dec 22, 2020 6:33 am
by sturmtyger380
When I have to get that seal out it's a pain in the butt. Now I just drill a hole for a bolt that fits in my slide hammer in the face of the seal. Tap threads in it. Thread the bolt in and bang away with the slide hammer. Most of the time it will pound on out. Sometimes I have to drill another hole, thread and pound again as the first one pulled out of the threaded hole.
Re: Grandpa’s M37
Posted: Tue Dec 29, 2020 2:35 pm
by greeno
Dropped the frame off at blasting this AM then traded John Bizal some Benjamins for parts. Didn’t do any “work” but certainly a great day!
Re: Grandpa’s M37
Posted: Tue Dec 29, 2020 10:00 pm
by Cal_Gary
Excellent! What goodies did you get from John?
Gary
Re: Grandpa’s M37
Posted: Wed Dec 30, 2020 2:58 pm
by greeno
T case and wheel seals.
Brake and fuel lines
Paint
Wheel cylinders
Gas tank straps
My plan is to work back to front on reassembly.
Re: Grandpa’s M37
Posted: Fri Jan 01, 2021 1:39 pm
by greeno
Tore into the t case today. There is a crack in the retaining flange casting.
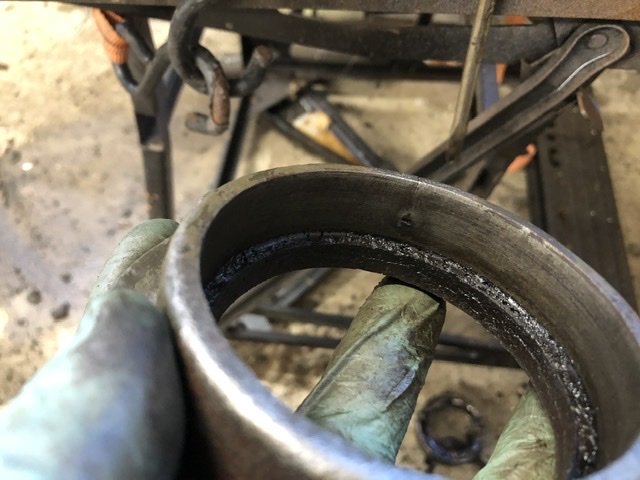
- 5BC7BAEF-8C65-41DF-B049-B9F7F9B55415.jpeg (91.62 KiB) Viewed 3140 times
Re: Grandpa’s M37
Posted: Fri Jan 01, 2021 3:35 pm
by Cal_Gary
T case and wheel seals.
Brake and fuel lines
Paint
Wheel cylinders
Gas tank straps
My plan is to work back to front on reassembly.
Nice-plenty to keep you busy!
Gary
Re: Grandpa’s M37
Posted: Sun Jan 10, 2021 5:11 pm
by greeno
- priming.jpg (59.1 KiB) Viewed 3120 times
Just putting my process out there in case I'm missing something, or someone wants to tackle painting.
Shave beard
Prep part (get to bare steel, treat with Ospho)
Put on Tyvek suit
Put on respirator (before opening any chemical!) Make sure its an OV (organic vapor) respirator.
Put on nitrile gloves
Turn on exhaust fan in booth, spray floor with water to keep the dust down
open windows (until it gets to 60, I'll have to leave the garage door closed)
Clean part with Eastwood Pre Paint (It's a mix of naptha, xelene, and toluene) until rag wipes clean. Wipe in one direction so you're pulling the dirt not swirling it around.
Tack rag parts
Put on goggles
Mix primer (I'm using low-voc 2-part from Eastwood. no Iso. again, not 'safe' but no iso)
Apply primer (as you can see, still trying to figure this out. I guess the place to make mistakes is in the primer not the topcoat)
Clean gun using lacquer thinner
dump spent solution into waste can and seal.
Remove googles, gloves and suit.
Shut windows and lock garage (do not enter for 12 hours)
Remove respirator and store in ziplock. (I change cartridges once a month or 8 shots, whichever is first)
Leave shoes outside until tomorrow.
You can top coat or recoat epoxy within 5 days of spraying, after that you have to scuff it prior. I use a green scrubbie.