Page 9 of 13
Re: SC M37
Posted: Wed Jan 09, 2019 4:25 am
by sturmtyger380
I haven’t posted in a while on the build thread but have been working on the M37.
Since I got blocked on rebuilding the old differential core I looked at options. I contacted Charles about doing it and got his cost. I already had collected all the parts for the rebuild, and I felt like I could do the work so I sprang for the ARB Airlocker.
I started by removing the old races and installing the new ones.
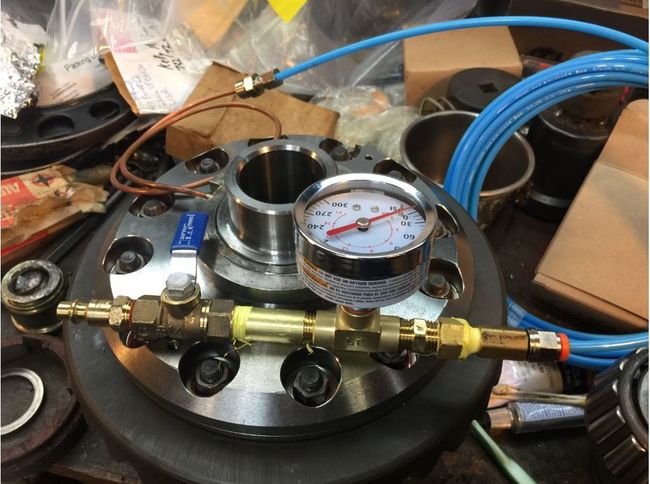
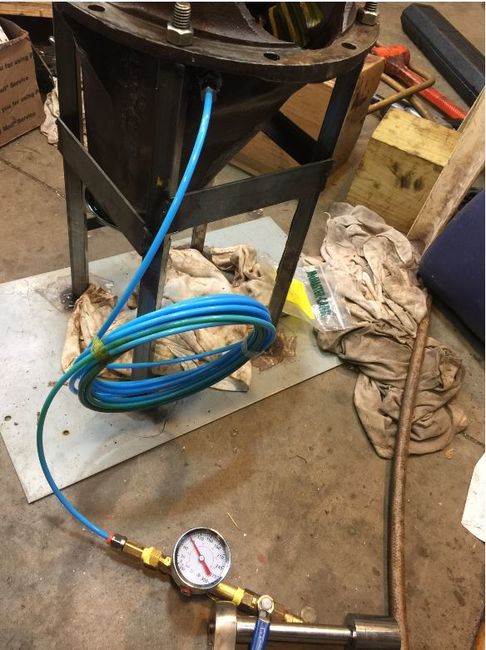
You are supposed to bench test the locker, so I had to build a valve and gauge to test it.
I had a new experience setting the preload of the pinion:
http://www.g741.org/PHPBB/viewtopic.php?f=3&t=8839
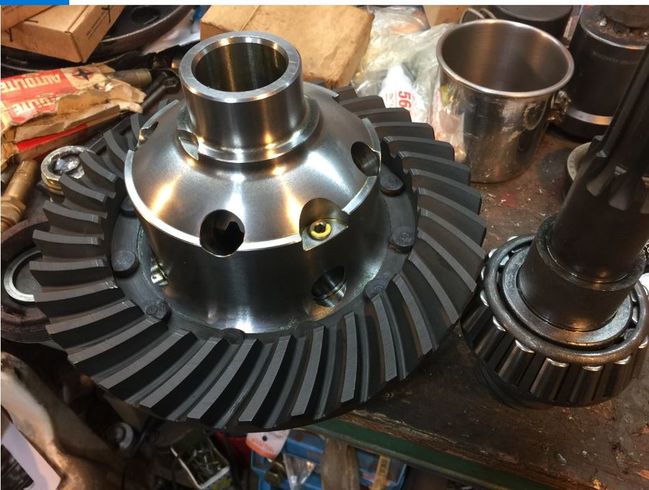
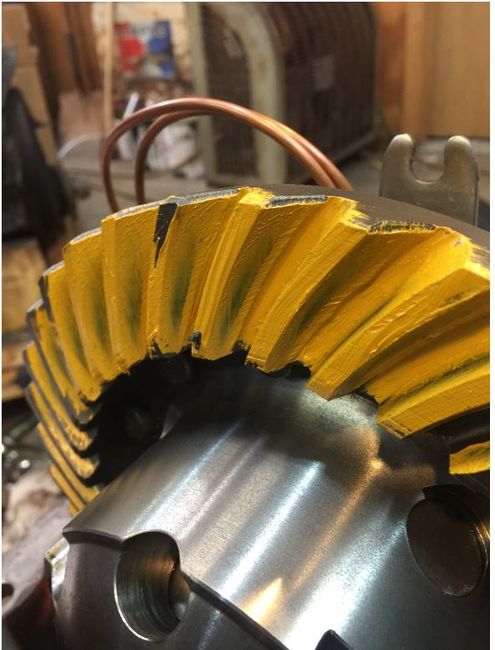
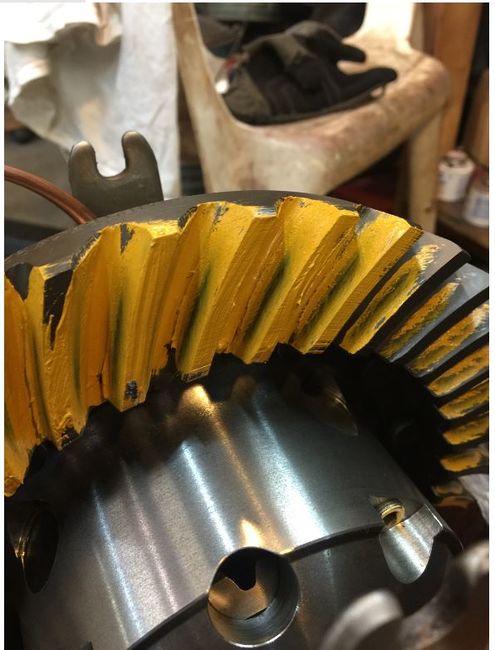
I got everything assembled and ready to find the smallest backlash to start tightening the bearings and coming up with the final backlash.
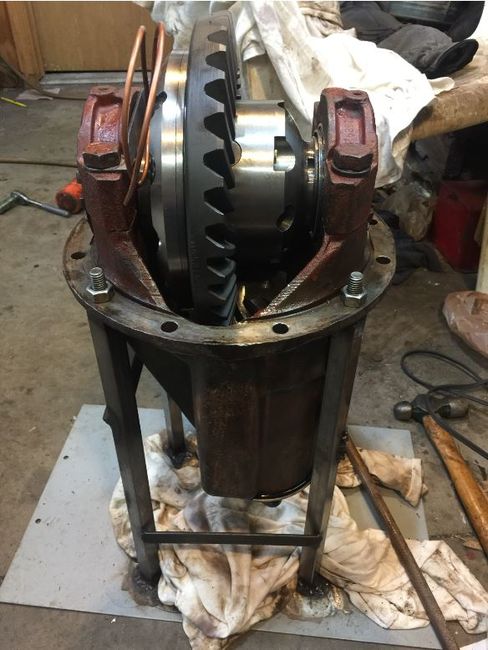
This pattern was as good as I could get on the ring gear.
The assembly held at 90 lbs for over 2 hours.
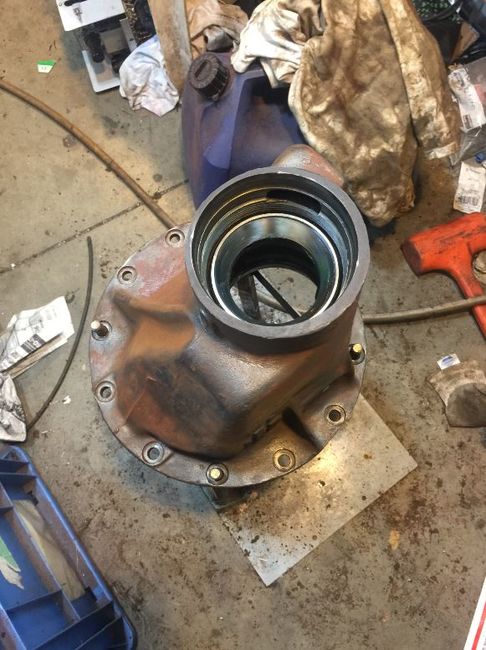
Getting ready to put the diff back in.
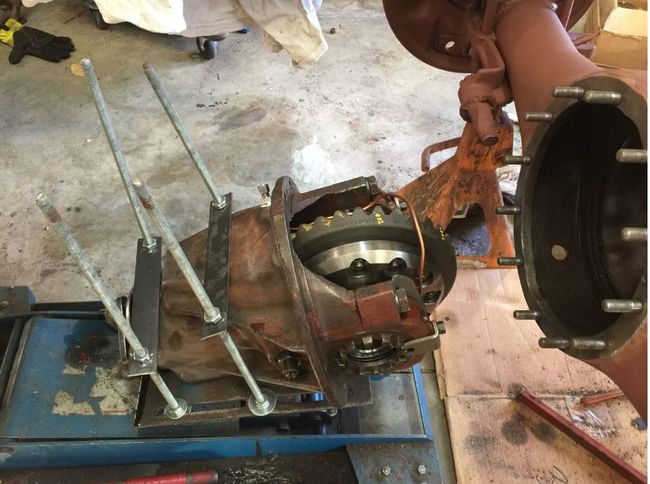
Now for the final push!
I installed the new seal and a sleeve, then primed the flange and seal area.
I had to make a tool to hold the flange.

It feels good to get this done.
Re: SC M37
Posted: Wed Jan 09, 2019 6:10 am
by rickf
Re: SC M37
Posted: Wed Jan 09, 2019 12:01 pm
by m-37Bruce
You still are Rick!
Re: SC M37
Posted: Sun Feb 24, 2019 4:25 am
by sturmtyger380
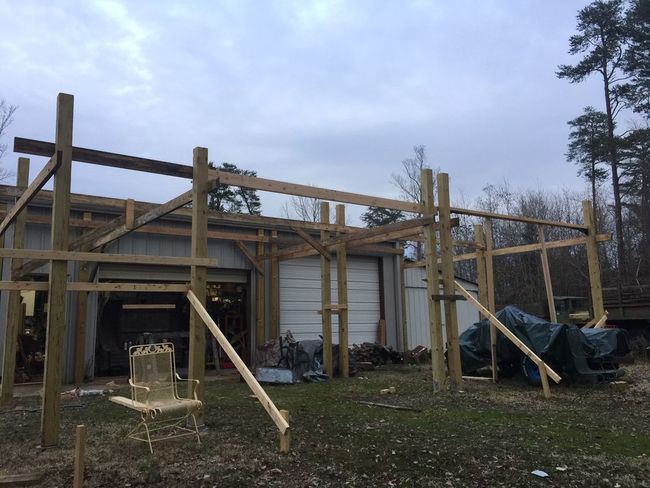
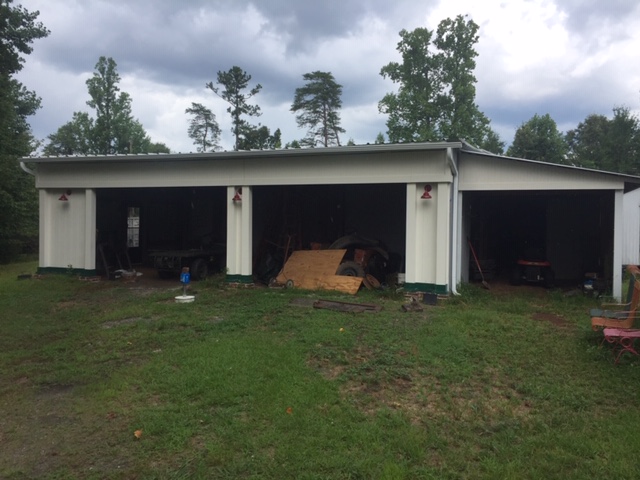
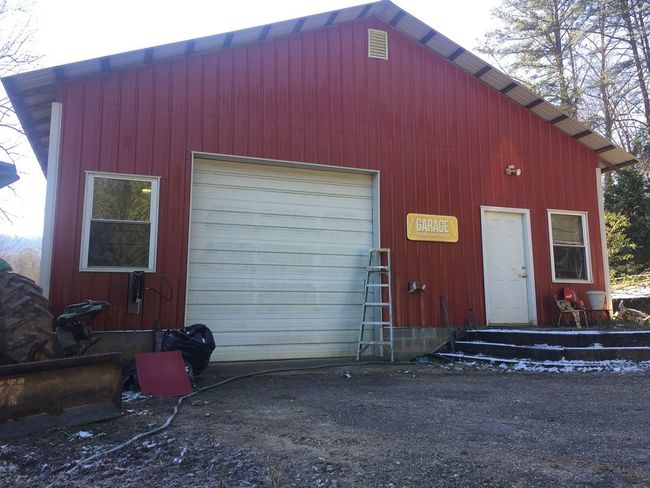
I seem to get distracted easily. I have always wanted to add on to the front of my shop some sort of porch or car port type thing. The shop is crammed full of projects and parts. So, when the family car needs an oil change I am doing it outside. The idea is to make it look somewhat like a 1950's gas station. I still don't have it all figured out but the weather took a turn for the warm side here in the south. When that happens we southerners go outside and get things done and build in the winter when it's cooler to do labor type work outside.
Here is what it looks like before the 7 days of rain hit us.
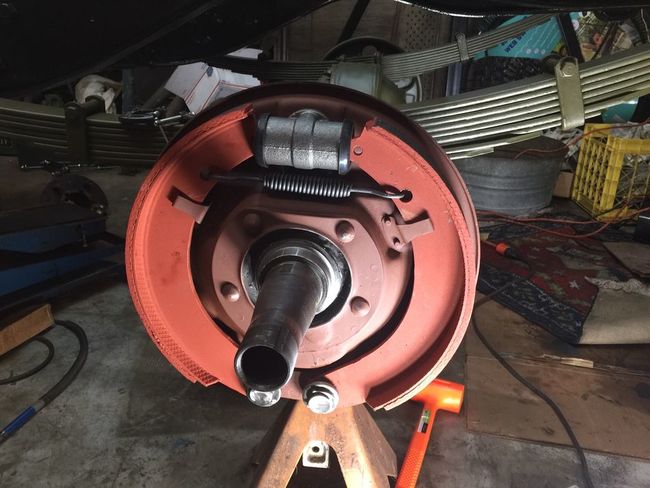
When the rain came I just shifted back to the M37. I got the rear brakes done!
Re: SC M37
Posted: Wed Jul 29, 2020 10:13 am
by sturmtyger380
While working on the Carport I did take time off to restore the winch I got from the guy down in Charleston who was repowering his truck.
I am coming into the home stretch on the Carport.
Since the Carport is slowing down I took the time to open up the NP transmission I got along with the winch deal. I am amazed how nice the transmission looks inside. It's like new. I don't ever get this lucky.

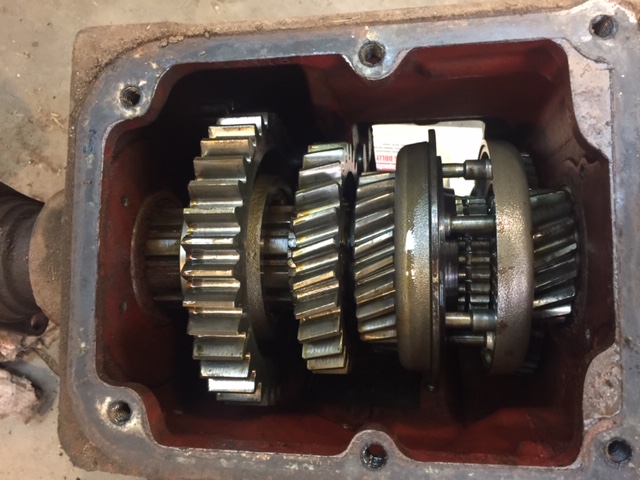
Even the plastic finger inserts on the shit fingers look like new.
I need to take a look at the engine that came with the deal too.
Re: SC M37
Posted: Wed Jul 29, 2020 8:40 pm
by Cal_Gary
That does look like it's in good shape, Sturm-thanks for the pictures too!
Gary
Re: SC M37
Posted: Sun Sep 13, 2020 11:54 am
by sturmtyger380
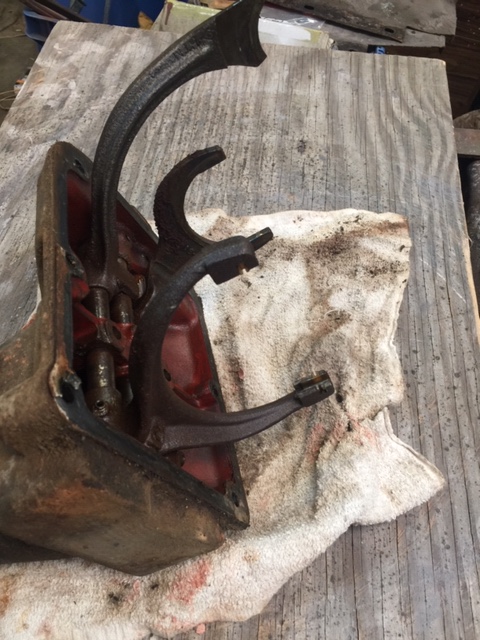
After I showed pictures of the inside gears of the NP420 I had gotten I took the rear output flange out, and I could see the seal was in not too good shape. I took the housing off the rear main shaft and I could see the bearing was in bad shape.
So, I pulled the input shaft off and those bearings were not too good as well. So, I began a search for bearings.
The not too happy bearings:
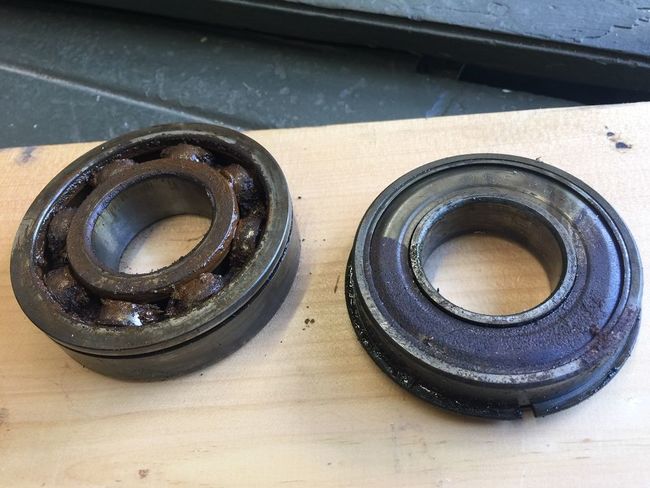
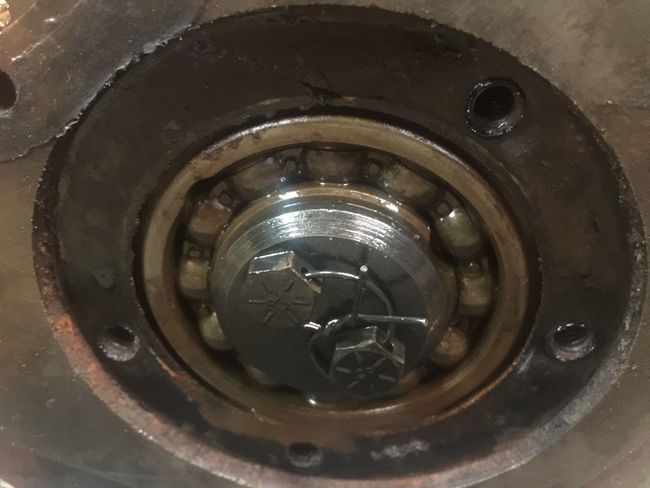
Since I had the main shafts out, I decided to pull the counter shaft out and check its bearings. The lower front bearings were not too bad but the counter shaft where it rides in the rear needle bearings was not good.
Front bearings:
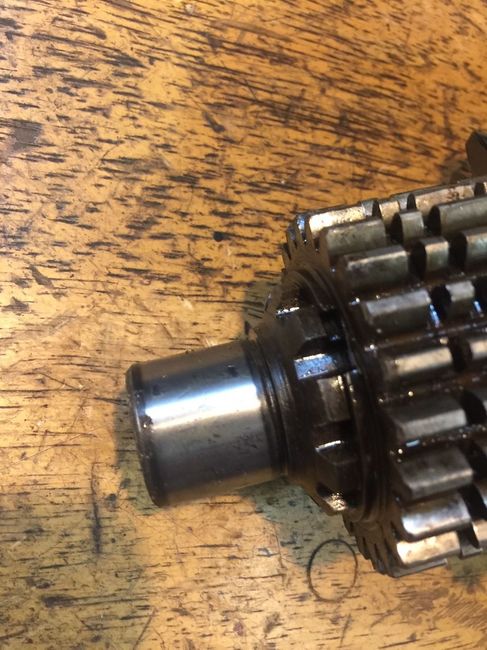
Rear of the counter shaft:

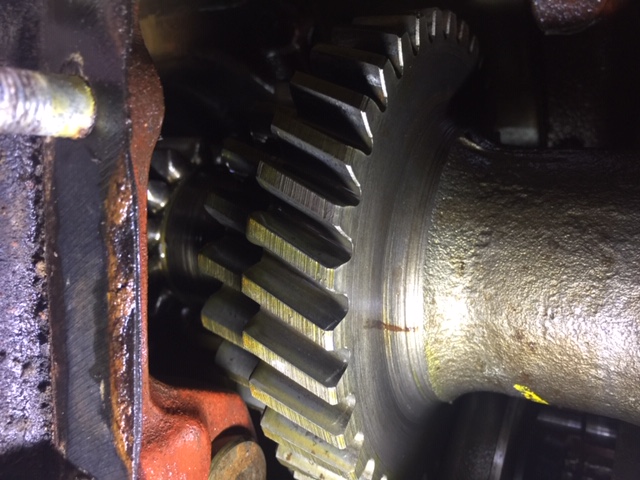
In the background of the counter shaft is an early counter shaft that I was comparing it to. It might be hard to see but just under where the bearings ride the gears of the NP shaft in the foreground are larger and stronger than the early one.
The upper main shaft has a polished area that is inserted into the input main shaft. There are roller bearings there. The inside of the input shaft was pitted as well as the nose of the main shaft.
Main shaft pitting:
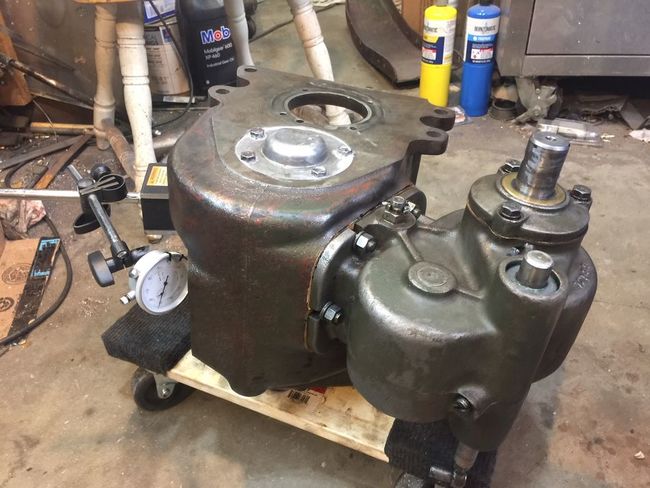
Going on at the same time I was rebuilding the PTO using a bearing set from DC Truck Parts. It turned out nice.
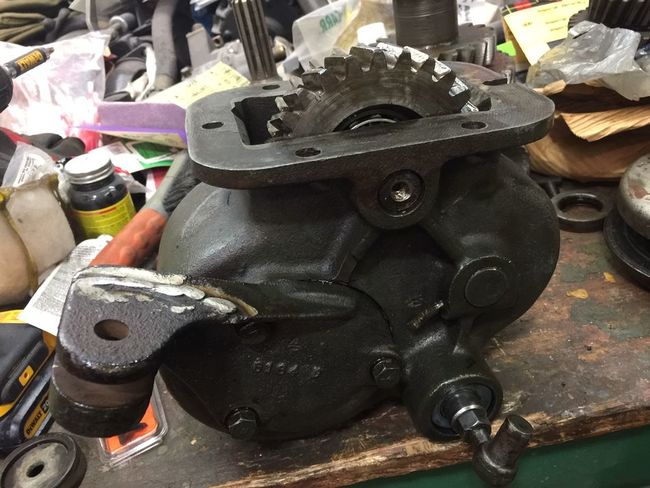
With the new NP420 bearings in hand and a counter shaft I installed that, the reverse idlers and placed the gasket on for the PTO.
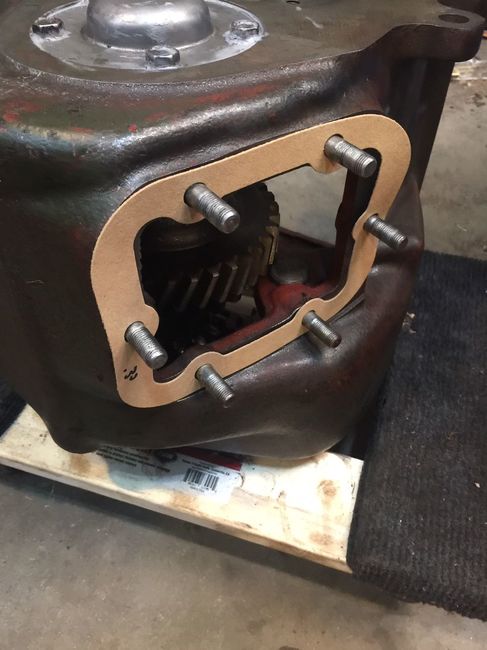
The manual calls for using six 0.005 gaskets for the PTO to start with to set the preload. Since there were two 0.030 gaskets in the kit, I chose to use one of those to start with. I bolted the PTO on and used my dial indicator to check the play in the counter shaft. The specs call for 0.003 to 0.008.
My play was right at 0.003 movement. Since this was at the bottom end of the range, I added a 0.005 gasket and the play came up to 0.005. I left it at that and left the PTO installed.
I am going to have to stop work on the M37 transmission for a bit as the battery is about to fall out of its holder on the M274 Mule. There is always something else to work on.
Re: SC M37
Posted: Sun Sep 13, 2020 10:16 pm
by Cal_Gary
That's some great progress, Sturm! Thanks for the pix, too.
I'm also sending you a PM.
Thanks,
Gary
Re: SC M37
Posted: Mon Dec 21, 2020 8:22 am
by sturmtyger380
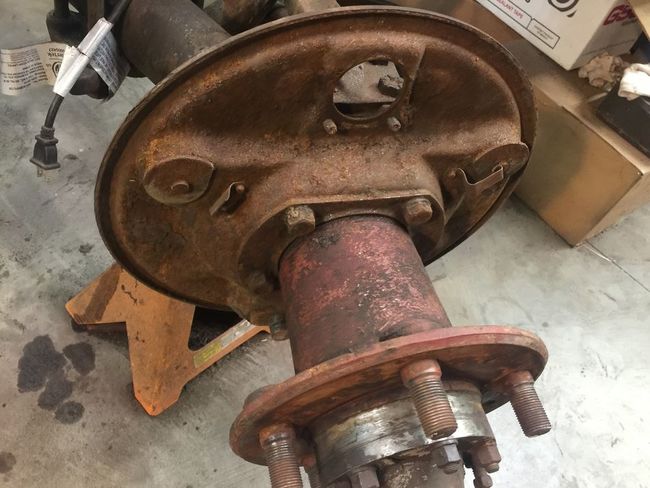
I have been lazy giving updates on my truck. Since the transmission got finished, I started pulling the front end apart to inspect and rebuild that since the rear is done. The passenger side brake backing plate was in okay shape, but the driver’s side had heavy rust on it, and I could tell if I poked at the plate it would have holes. Now I had to make a decision to replace the backing plate or head in a new direction with the front brakes.
Rusted Backing Plate:
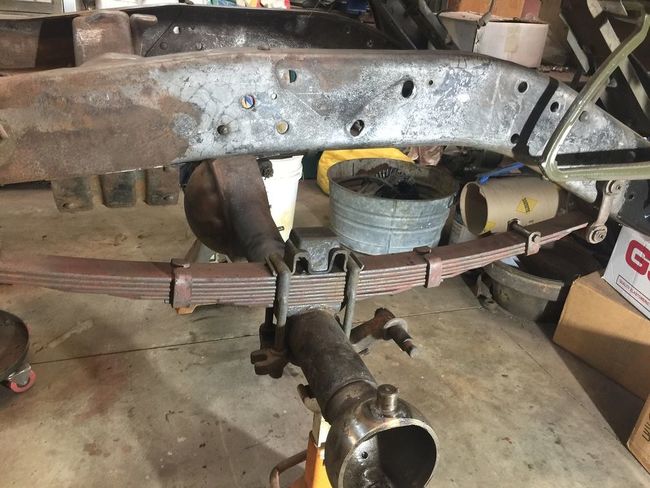
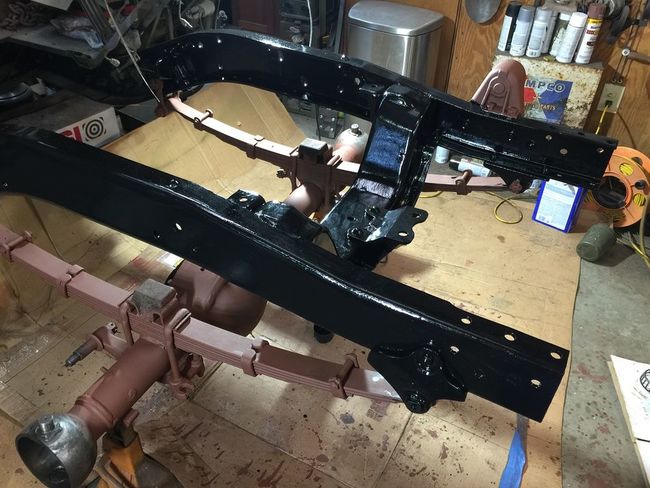
While investigating options with brakes I kept working on the frame.
Frame Stripped:
Frame Treated with rust killer:
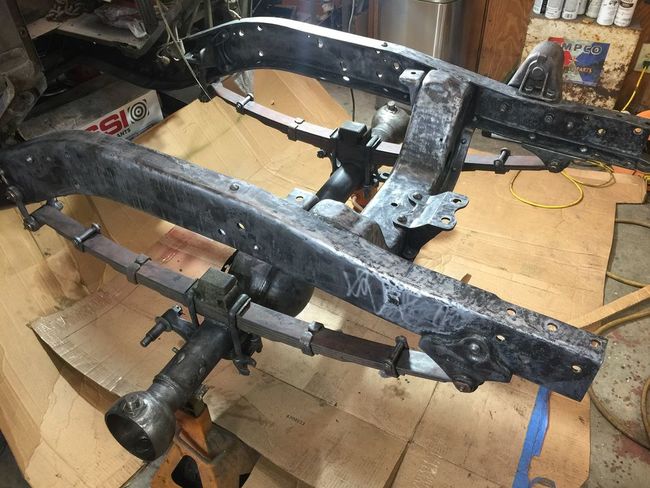
Frame Primed:

Frame Painted:
Like most of the things on this truck the knuckle bearings were shot. I already had the bearings in hand so installed them and had to go through the shim selection process to get the preload set right.
New Knuckle Bearings:
Knuckle Done:
In my studies of what to do about the brakes I looked at a number of options. Most of you know of Ray’s uglytruckling site. Ray has a kit for the front and rear disk brakes for the M37. Ray has retired and was living outside of the US for a while, but I understand he is back in the States. He is not making any new disk brake kits but has a few left that he will sell until they run out. The pictures on Ray’s site show the instructions step by step to use his kit. He also has a lot of good advice about the brake lines.
I also looked at Charles disk brake sets that he offers on his M-Series website. The M-Series kit I would say would be the better way to go if you don’t want to fiddle with the kit as I had to do. I always want to save a buck or two. Plus, I have an adventure to share.
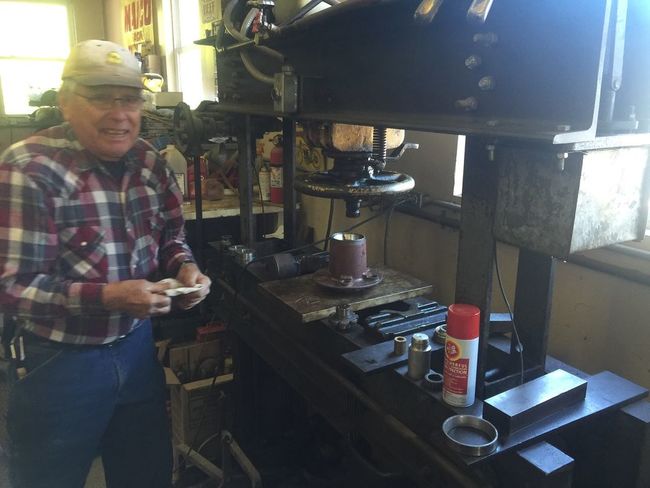
When you get Ray’s kit, he puts you in contact with his guy that does the machine work on the hubs you supply. Normally you would ship your hubs to his machinist and once done they would get shipped back to you. Since the machinist is not too far from where I lived, I made arraignments to drive my hubs down and he agreed to do them the same day and I would carry them back.
So, during the week I took a drive down into the mountains of North Georgia to Joe’s Place:
Here is Joe at his 50 ton press making sure my bearing races are seated to mount the hub on the lathe.
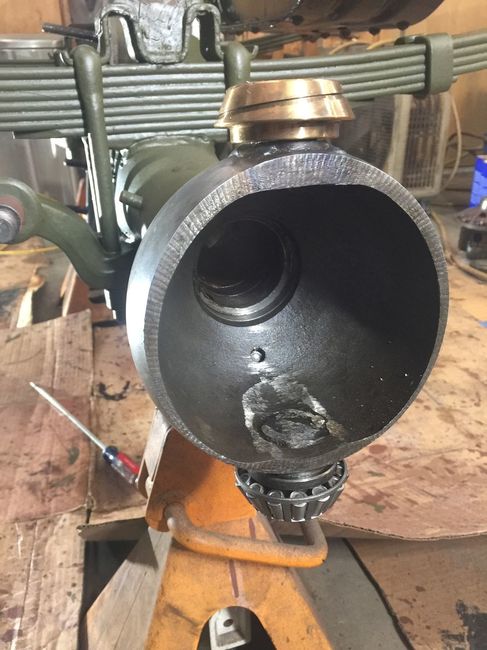
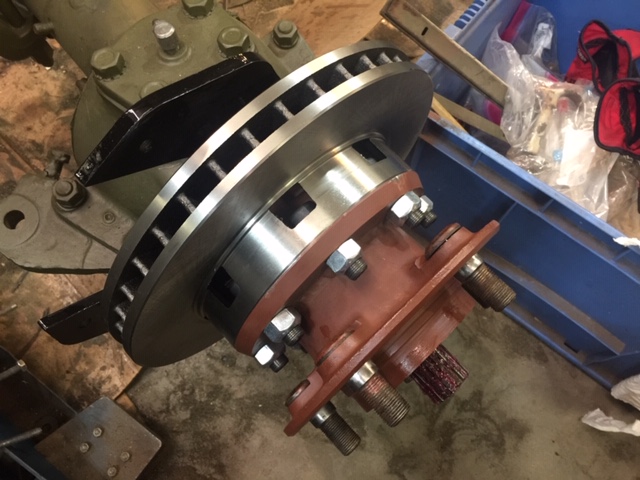
Here is a picture of the GM rotor and the Rotor Mount Flange. Joe supplies the mount flange to weld to your hub.
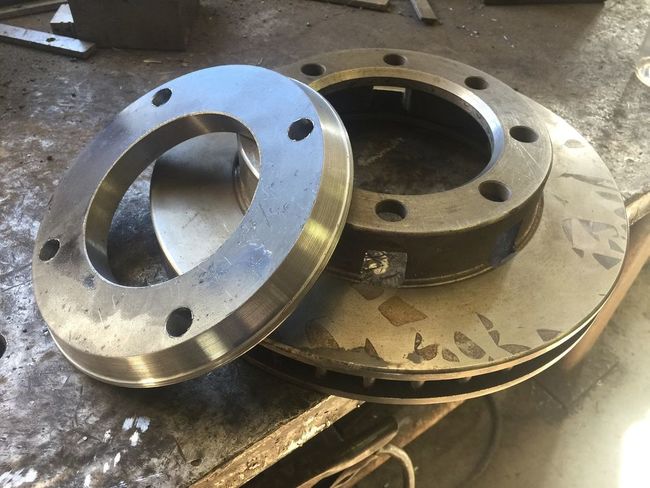
Once the Rotor Mount Flange is welded to your hub it gets a bead blasting and it is then the Finished Hub:
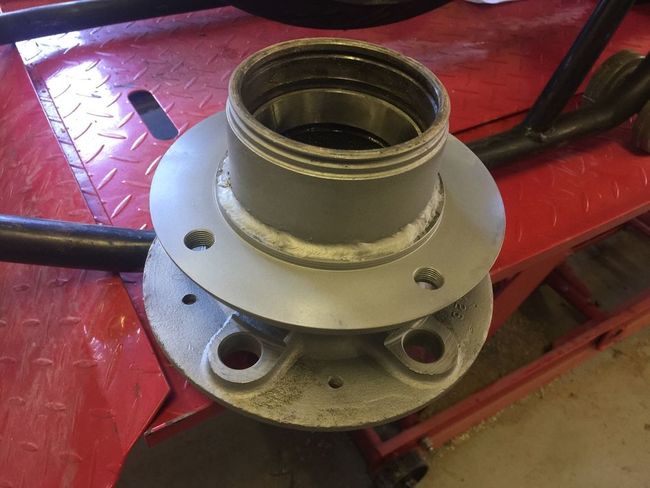
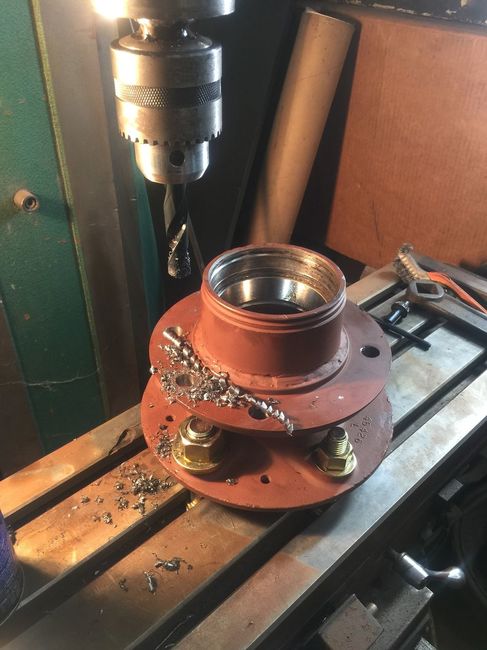
If you noticed the brake rotor comes with 8 holes and the finished hub with 4. Having only 4 holes as the kit is planned for is probably okay but I couldn’t resist adding 4 more holes to my hubs.
So, when I got home, I mounted my hubs on to my milling machine table and got to work.
Drilling Holes:
Tapping Holes:
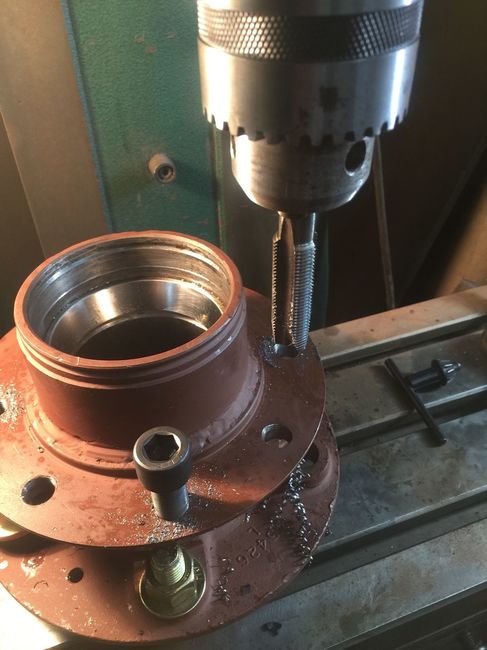
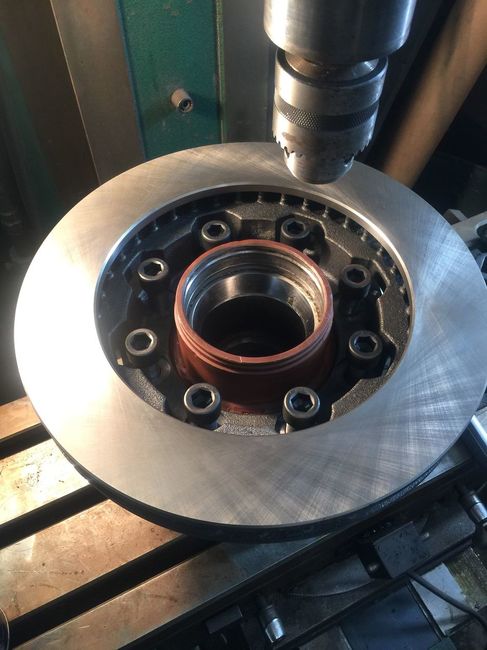
Now with 8 holes I feel better and consider the hubs done:
Re: SC M37
Posted: Mon Dec 21, 2020 10:10 pm
by Cal_Gary
Man that is some awesome progress! Always nice to have a specialist nearby to save shipping costs, and time. Great photos too!
Thanks!
Gary
Re: SC M37
Posted: Wed Jan 27, 2021 10:27 am
by sturmtyger380
Re: SC M37
Posted: Fri Feb 26, 2021 10:51 am
by sturmtyger380
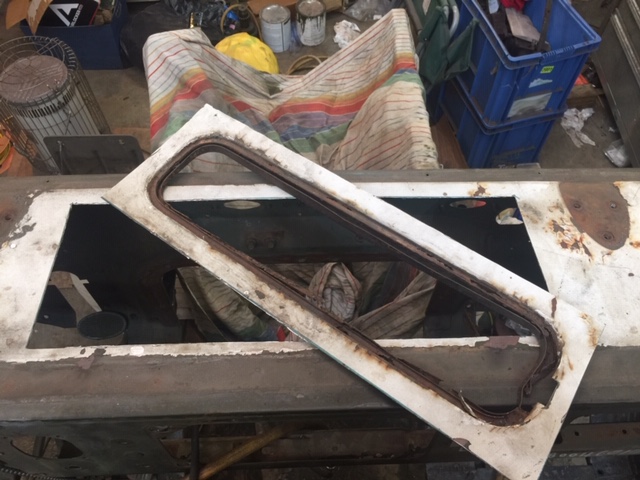
Now that the cowl vent is repaired as shown in the other tread on the Tech forum.
http://www.g741.org/PHPBB/viewtopic.php?f=3&t=9316
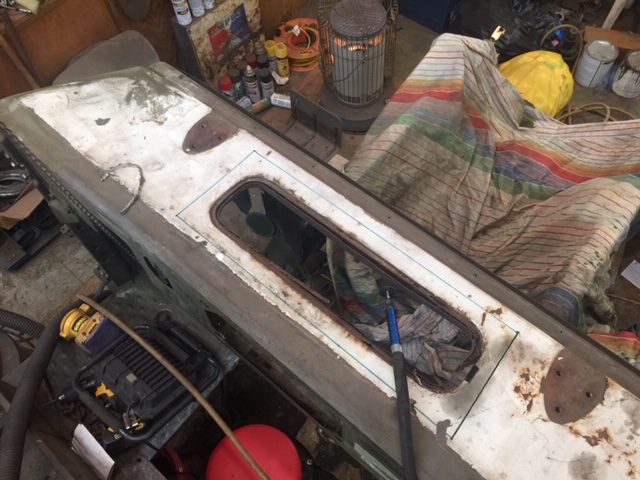
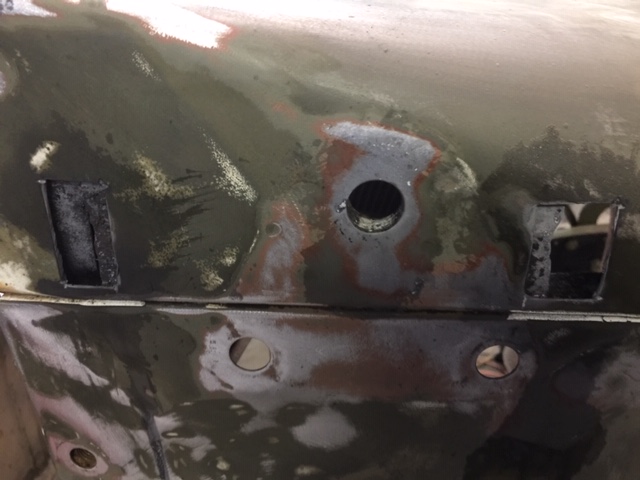
It’s now time to chase down rust holes on the sides of the cowl. The metal used to back up the windshield hinge must have been raw metal that rusts over time. That causes the cowl sheet metal to rust through. I think during the pressing process the metal on the curved parts of the cowl got thinner and that makes them also easier to rust through.
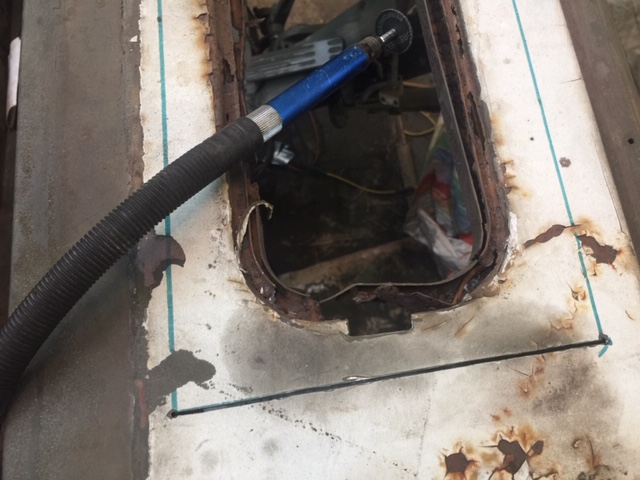
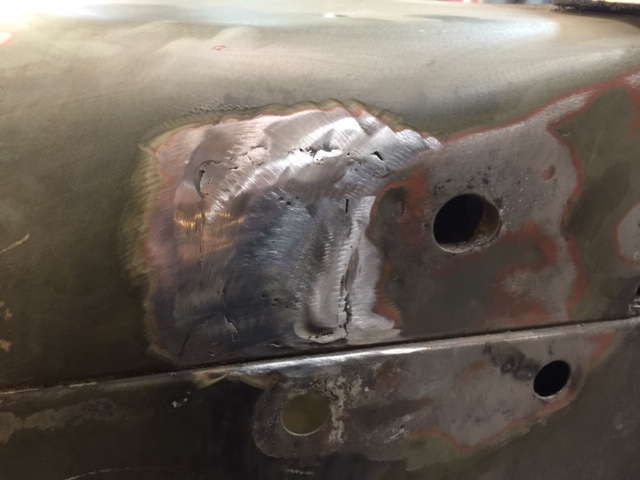
This is the driver’s side. I fixed the front hole before I took photos. I cut out areas away from the original rust holes. In the case of the front hole I had to keep cutting parts out until I got to good metal. That made that hole bigger than on the passenger side. Drivers side:
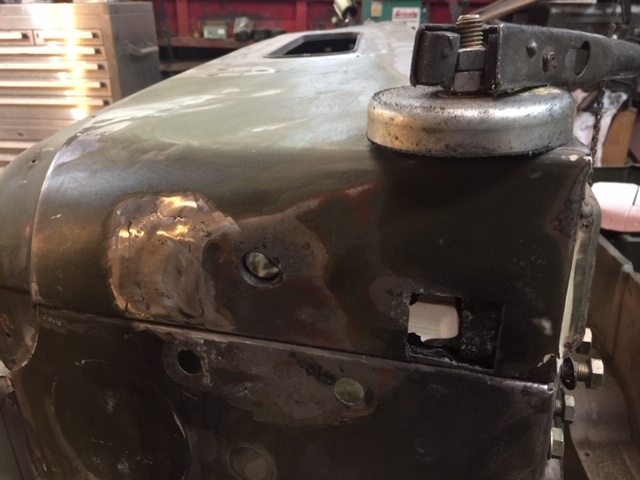
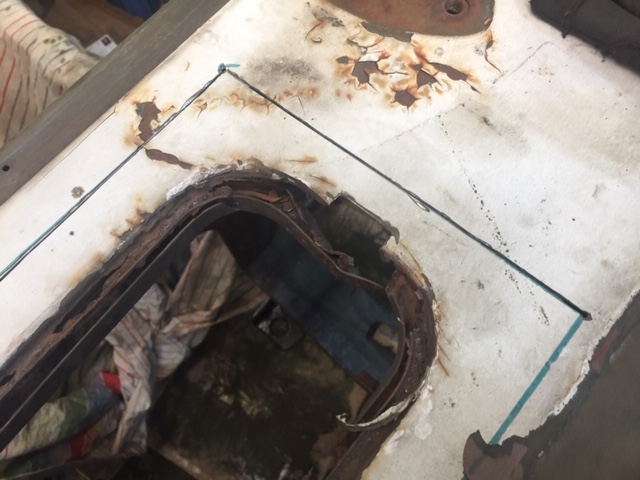
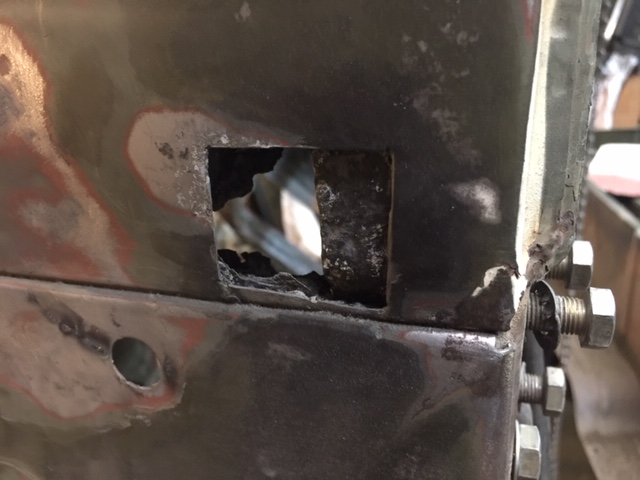
Rear hole on the driver’s side:
Close up of the front fixed. I know you can see some little spots that will have to be covered with filler. I have learned over time once you get to this point with thin sheet metal to not go chasing filling all the holes. You run the risk of blowing more holes in the metal.
Here is the rear hole fixed. On this hole I was blowing holes like crazy and had to put a small piece of copper inside to back up the seams. Then I was going back and forth grinding and welding. Well one time welding I kept smelling something on fire. I had forgot to switch back to my welding gloves and my light work gloves were on fire! Just another day welding.
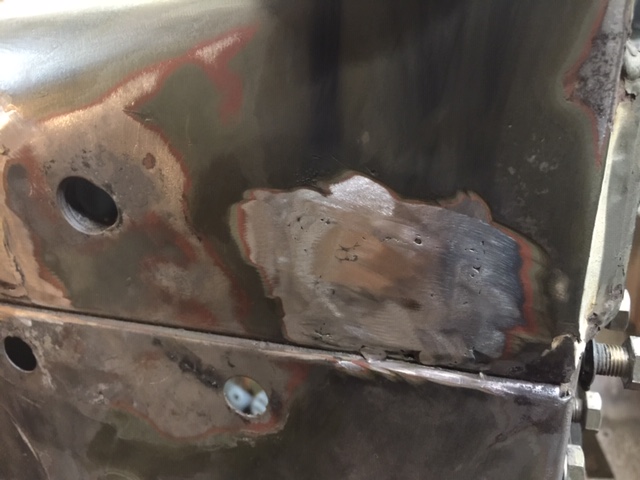
Here are the holes on the passenger side treated for rust like I did on the driver’s side.
Re: SC M37
Posted: Wed Mar 24, 2021 6:21 am
by sturmtyger380
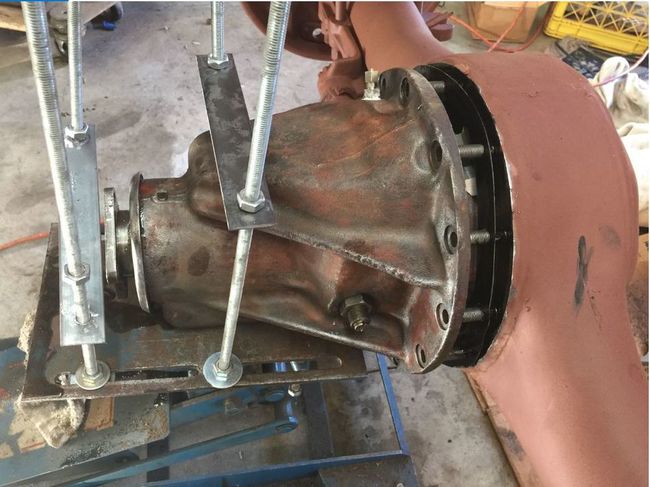
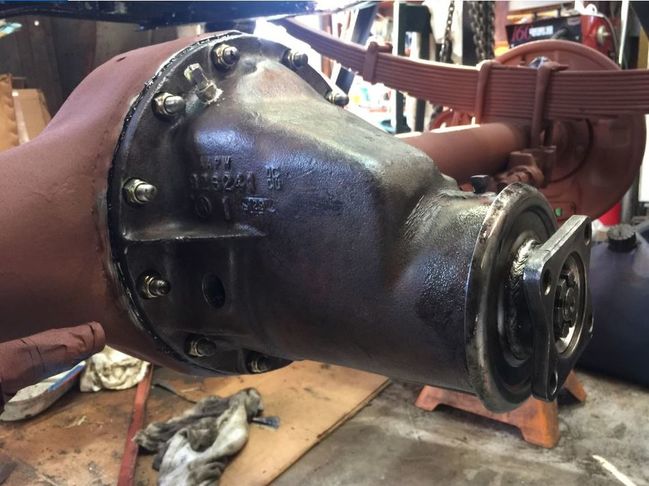
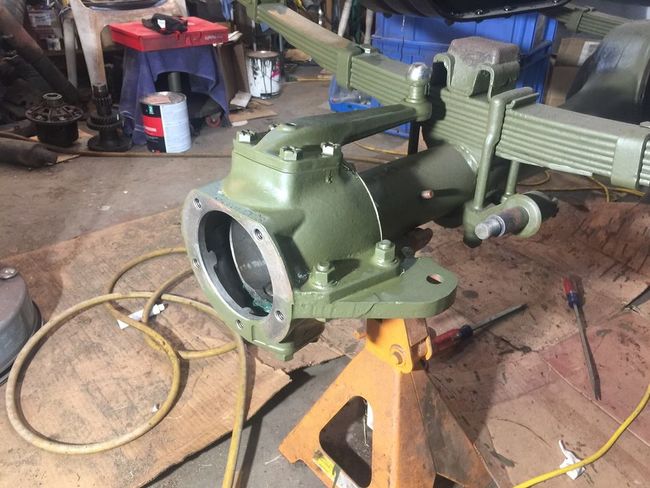
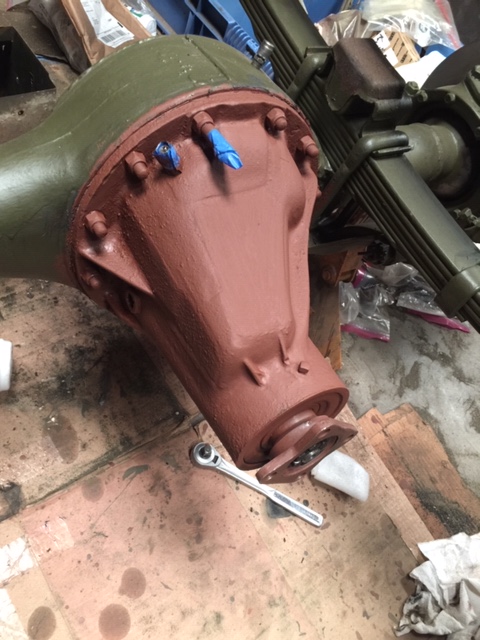
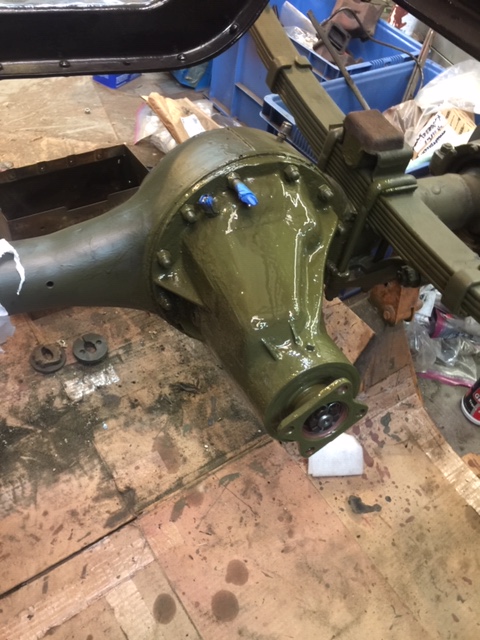
In the last post you saw me working on the cab to patch holes. I had been working on rebuilding the front differential but found I was missing a part for the ARB Airlocker. I contacted VPW and ARB and both were a great help and did a super job to source the missing part! Once I got the part the differential went together fast. Once it was set up right, I mounted it in the axle housing. Here it is with a fresh coat of primer.
While that was drying, I was working on cleaning and prepping the front axles and spindles. Once dry I gave the carrier a coat of OD paint.
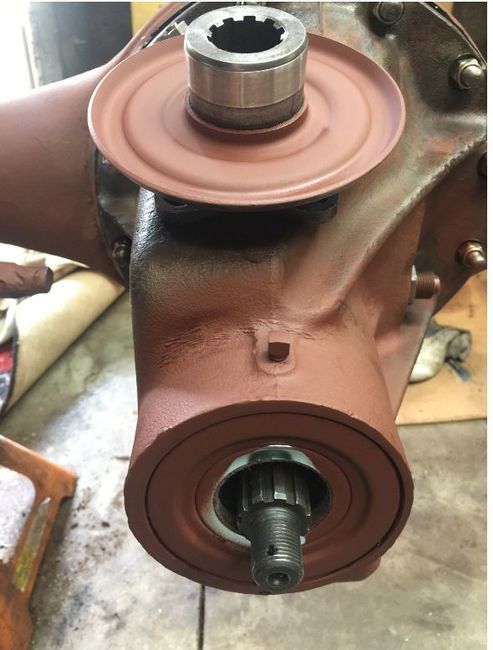
Slipping the passenger side axle in I could then mount the spindle and add the disk brake caliper holder bracket.
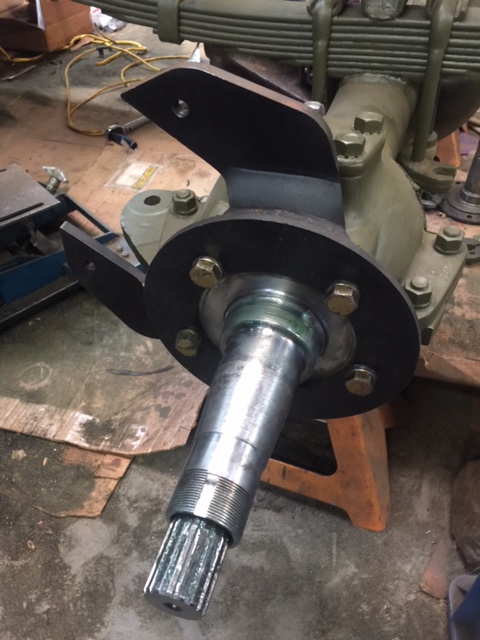
Then over to the Driver side to put the spindle, axle and bracket on. Getting the longer drivers side axle to slip into the splines of the differential took a while of fishing for the hole.
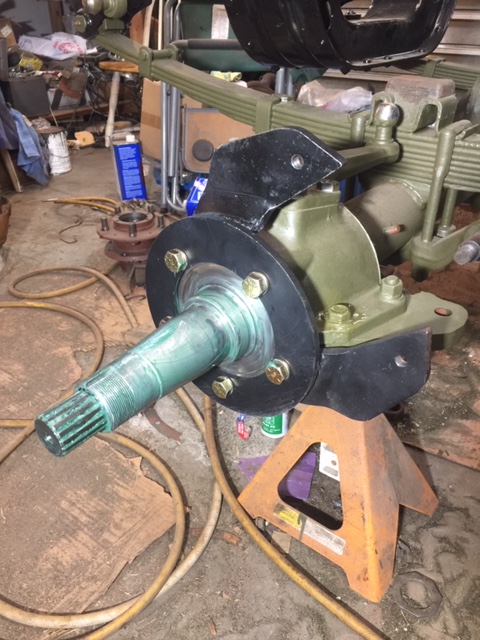
Now was the time to load the hubs with bearing grease add the bearings then slide the hub disk assembly onto the spindle. This is starting to look really good!
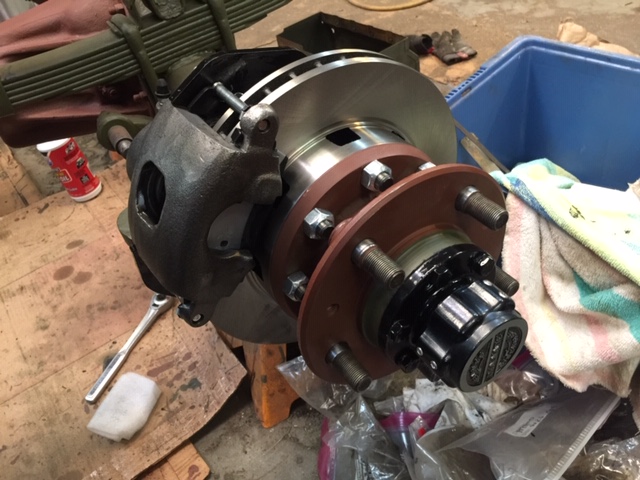
The next day I got the calipers out of their boxes and added them to the bracket. (Well I did decide to paint the brackets the day before a nice shiny gloss black.)
I am thinking this will be stopping great now! (Has to be better than zero brakes when I got the truck.)
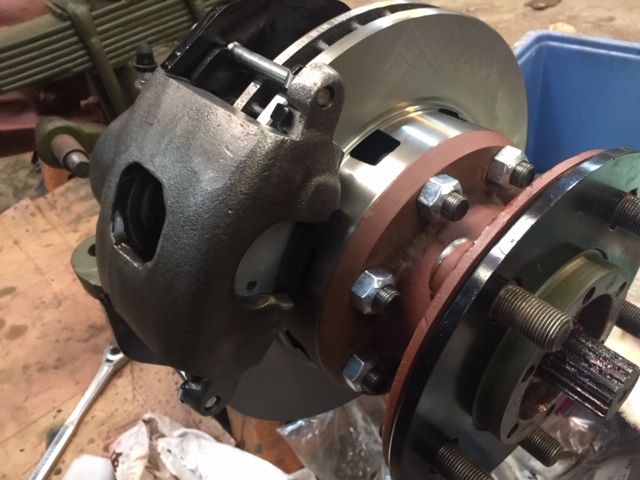
To help with driving I added my lockout hubs. So, other than adding the gear oil and the knuckle grease the front axle is done!
Re: SC M37
Posted: Wed Mar 24, 2021 9:06 am
by m-37Bruce
Moving right along, excellent work on the brake swap too, that's one of my "need to do" jobs as well.
Thanks for the update.
Re: SC M37
Posted: Wed Mar 24, 2021 9:08 am
by John Mc
Looking great!
Differentials are not on the menu for the current round of work on my truck, but I'm sure they are not too far behind.
IF I'm not causing too much drift from your build thread, I'm curious about what your experience has been with locking differentials. Rear only vs front & rear, brand, etc. I will be considering adding that when it comes time to do differential work on my truck. I don't do rock crawling or anything like that, but I do use it in my hilly woods.
John